


This webpage is a story (with lots of pictures) about how a car enthusiast with a tight budget rescued a failed kit car project and gradually turned it into his mid-engine dream car. This garage-project has evolved over the many years I have owned it. In the photo galleries that follow, I have tried to present the images chronologically that highlight the many changes which make this example different from most other Fiberfab Valkyries and Avengers.
Can someone else’s nightmare become my “dream car”?
The acquisition
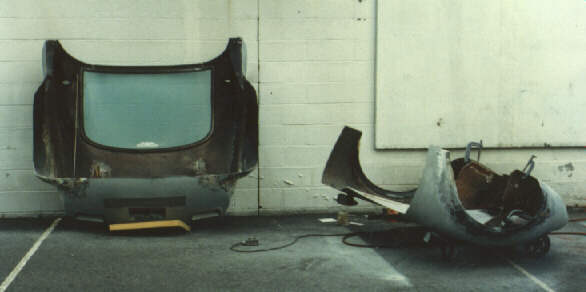
In or around July 1976, a close friend alerted me to an ad in a local newspaper for a Fiberfab Valkyrie kit for sale about 30 miles from where I lived. As long as this find was not already “butchered” beyond recognition, he knew this was something I would find hard to resist. We made arrangements to check it out. Although the fiberglass body was sitting on the steel tube frame, if I purchased it, I would basically be starting from “step-1” in the build process. On the plus side, it came with a number of parts that I would have had to source from donor cars in a salvage yard.
A Chevy V8 engine in (unknown condition) which was already in the chassis, bolted to a Corvair 4-speed trans-axle using the adapter and the required modifications that were part of the original Valkyrie kit.
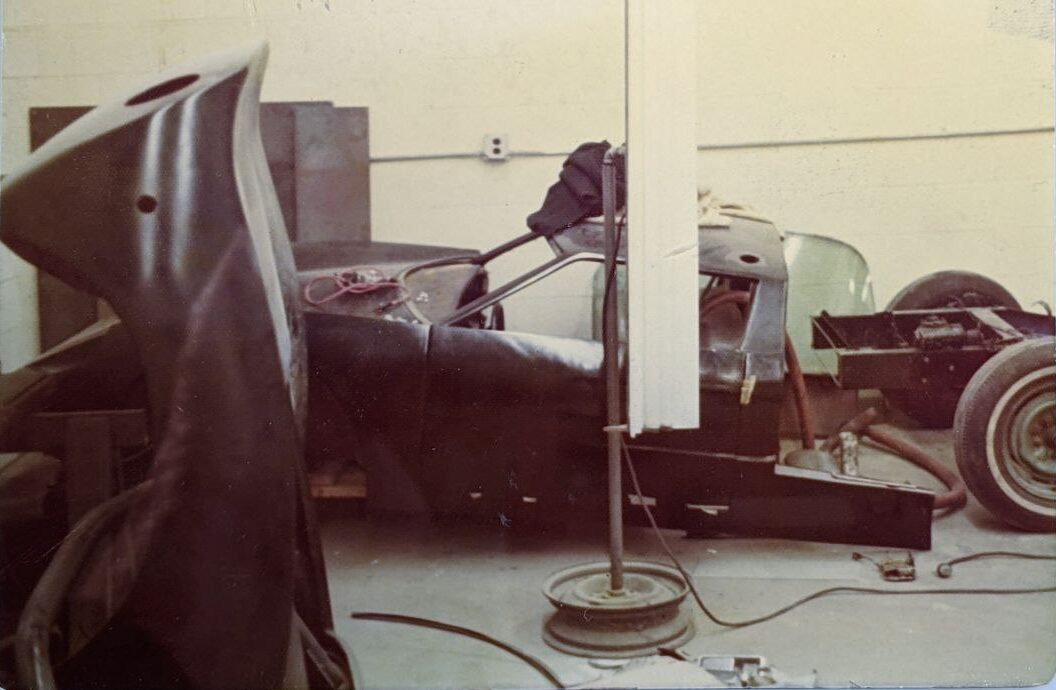
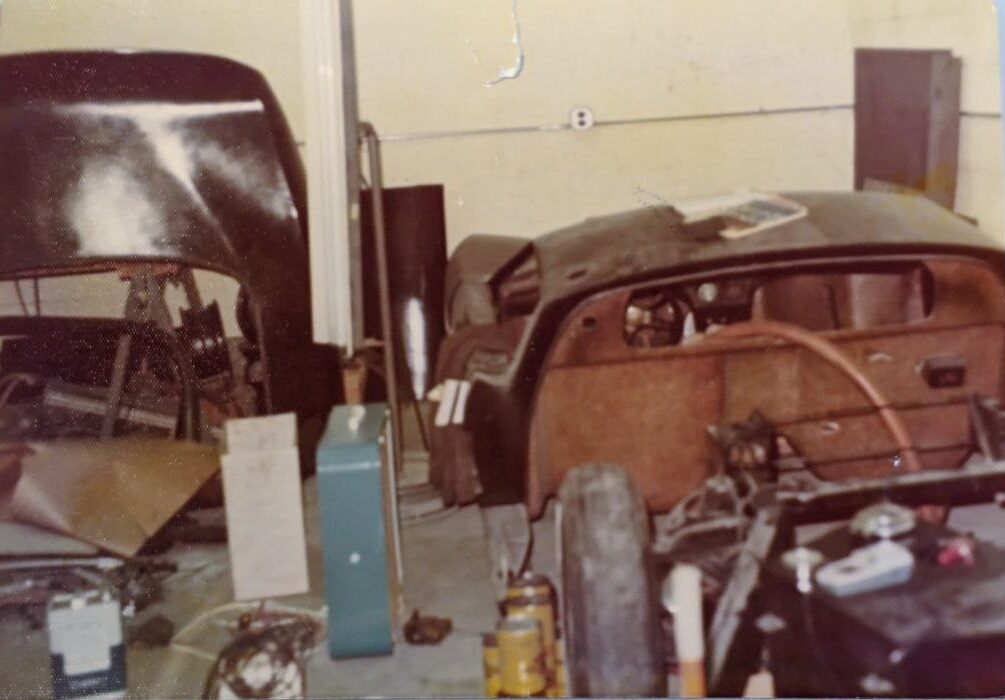

I purchased this Fiberfab Valkyrie for $900. At the time, it was clear I was mostly getting a loose collection of parts. Yes, Corvair front and rear suspension was bolted onto the frame giving it the appearance, at first glance, that a substantial amount of work was already done. But after agreeing on the price and getting it home, reality gradually set in; there was a ton of work needed. The body had to come back off the frame, to say the least. There was no wiring and no plumbing, no brake lines, no windshield, no wipers, no instruments, and no tail lights. At least 1 other person (probably more) had attempted to build it before me, and for unknown reasons gave up. Most “kit cars” of that period- late 60’s, early 70’s- were not easy to complete for the casual car enthusiast, contrary to what the advertisements would lead you to believe, and this Fiberfab Valkyrie was a perfect example.
Over the years, these are the most significant changes I made to the standard Fiberfab Valkyrie:
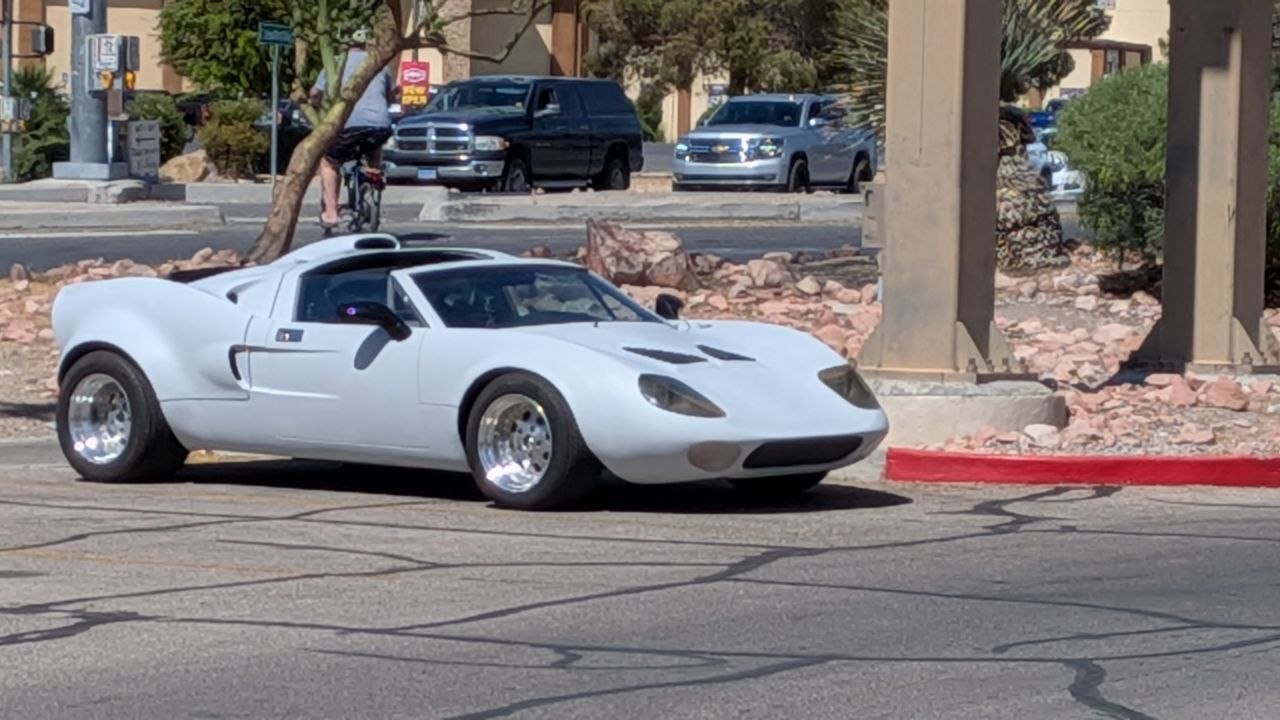
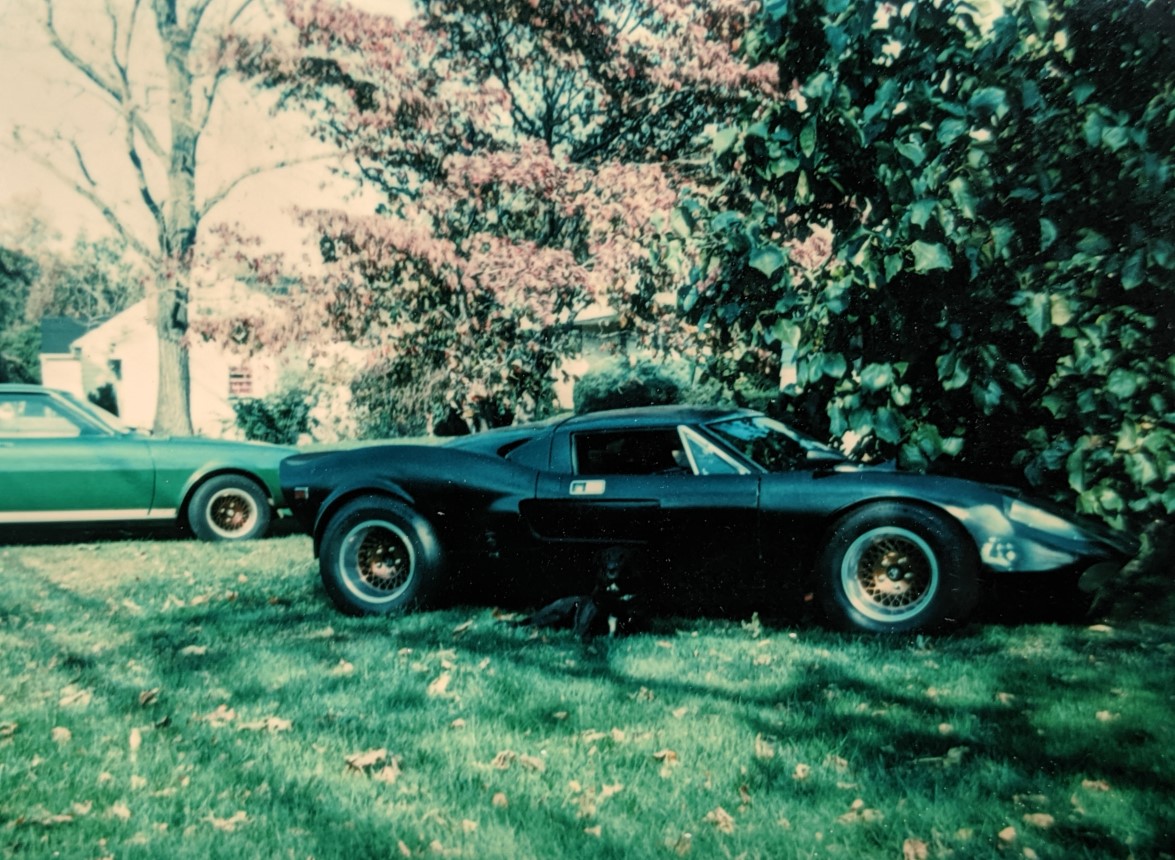
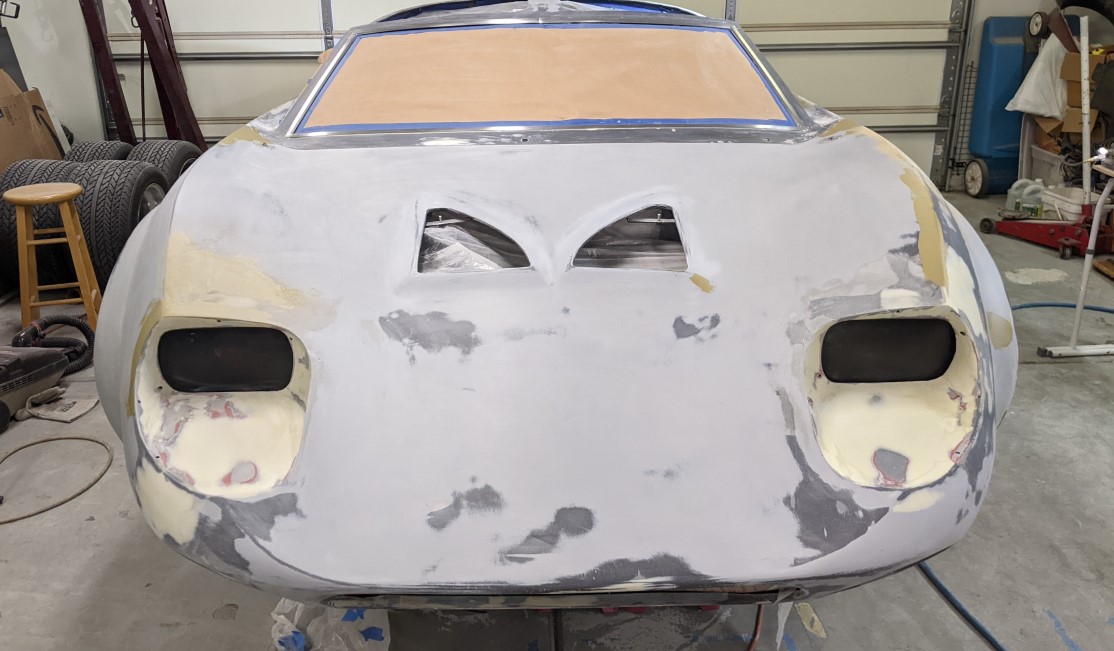
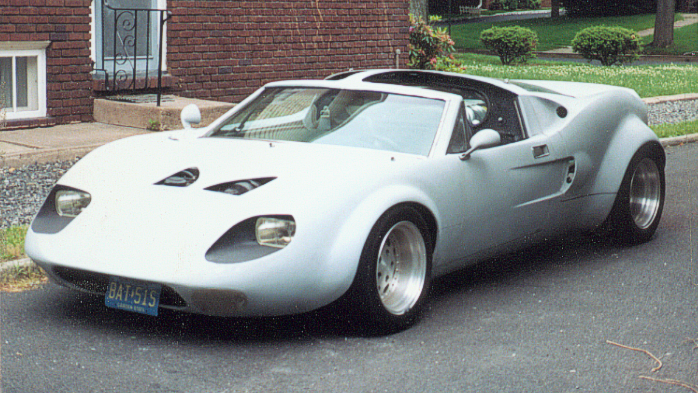
- Converting the quad sealed beam headlights to rectangular H4 bulb type units of the same size as those used on the racing Ford GT40 Mk-I and MK-II. This dramatically changes the appearance of the front end.
- Modifying the roof to have T-top style removable roof panels. Weather permitting, it’s much more enjoyable with the open top, and so much easier getting in and out.
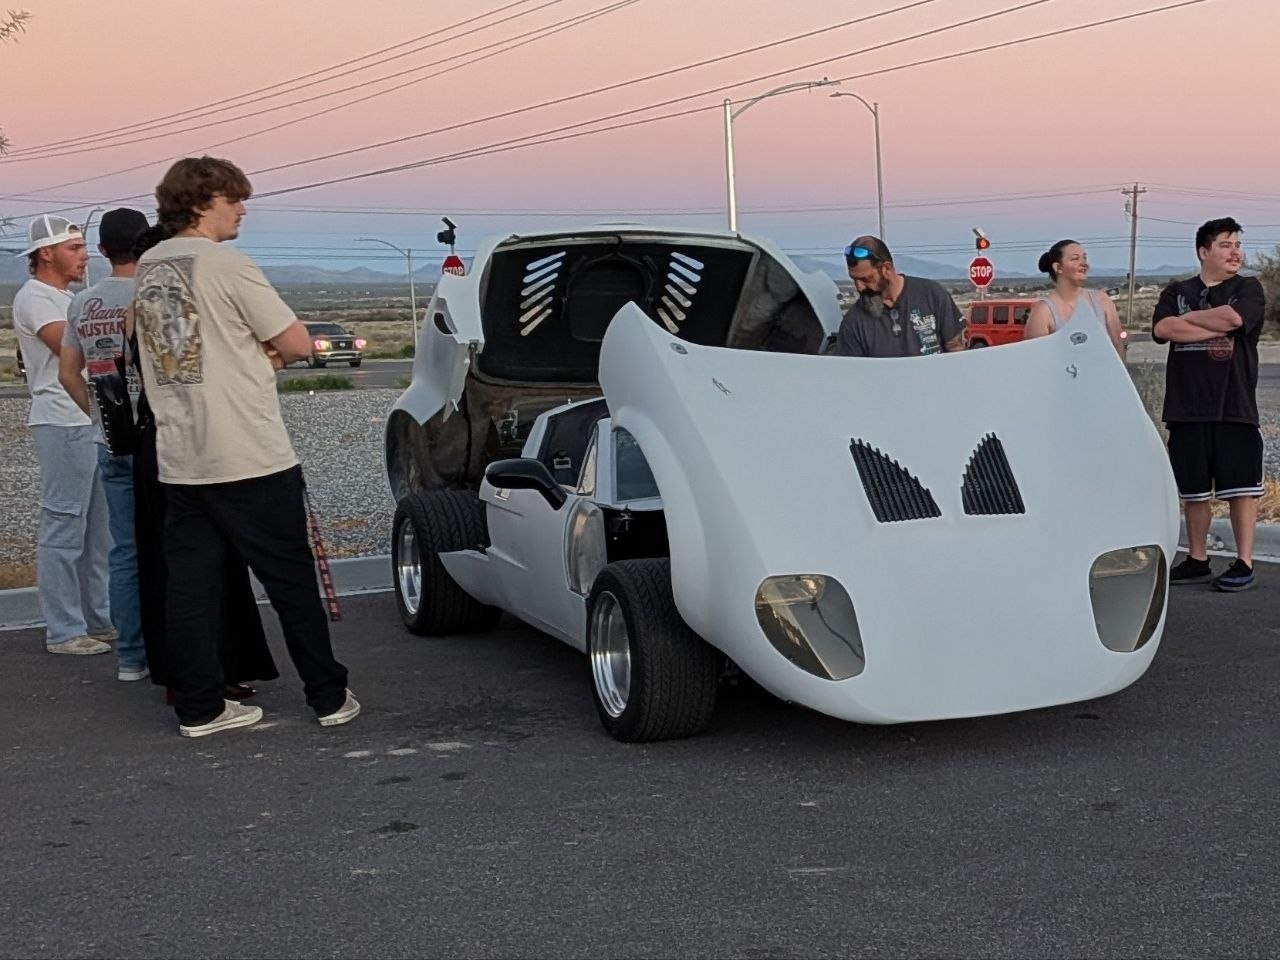
- Separating the front section from the main body and make it capable of tilting open. Everything on this car is now easy to access and do maintenance on.
- Replacing the Corvair transaxle with a ZF 5-speed unit, the same type used in the Pantera and early Ford GT40. This was one of the most impactful changes, as it moved the engine back almost 12 inches, which for starters, made normal seats possible.
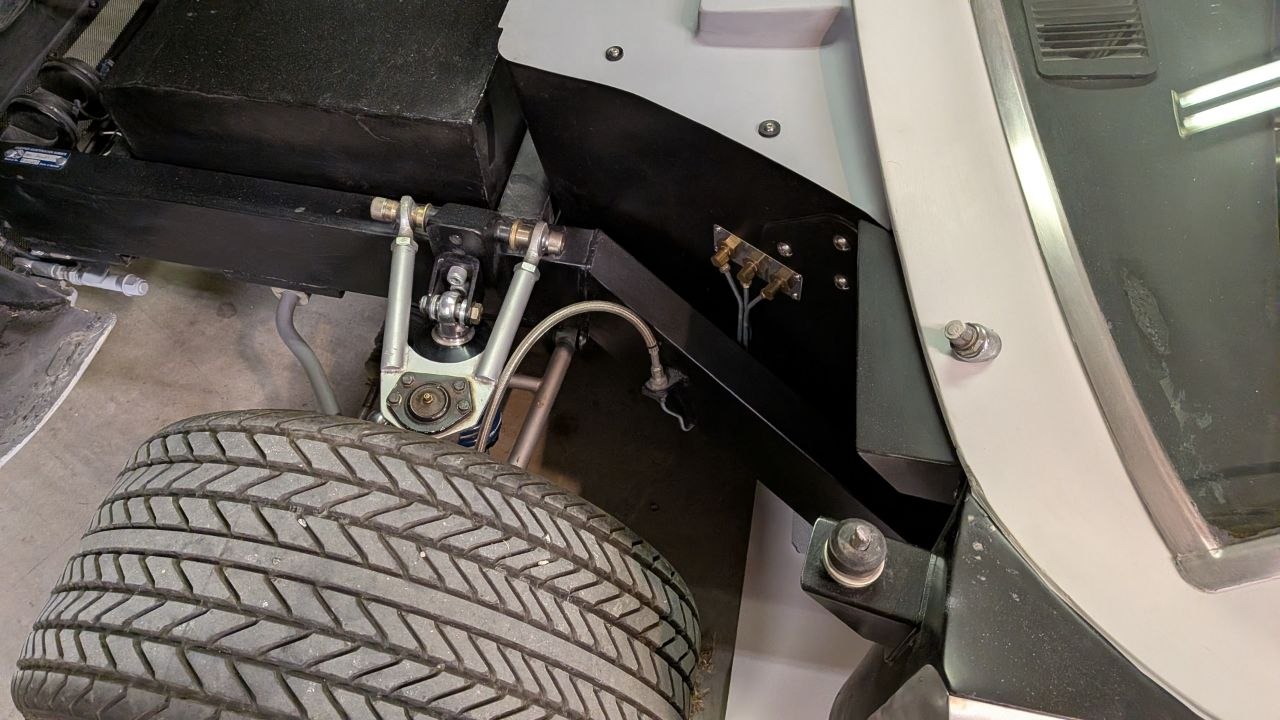
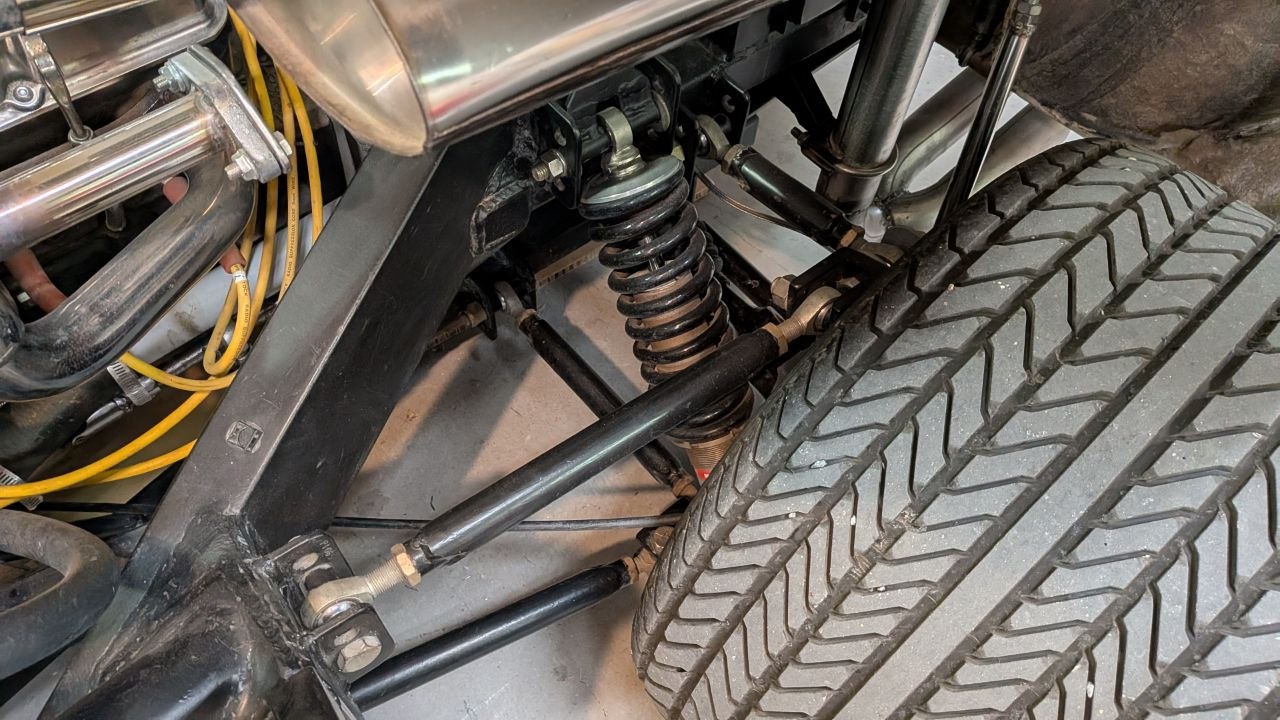
- Replacing the Corvair rear suspension with a custom design inspired by that used on the Lamborghini Countach. This gave more adjustability and included a rear sway bar.
- Installing wide tires and fender flares: 285/40 front; 345/35 rear. Mounted on 10″ and 12″ wide 3-piece Centerline wheels.
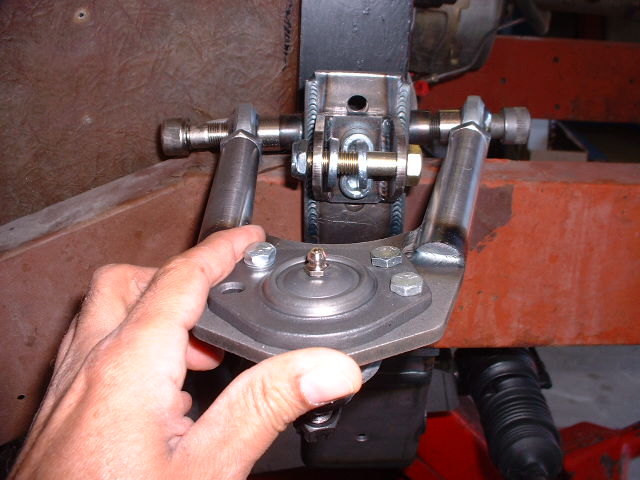
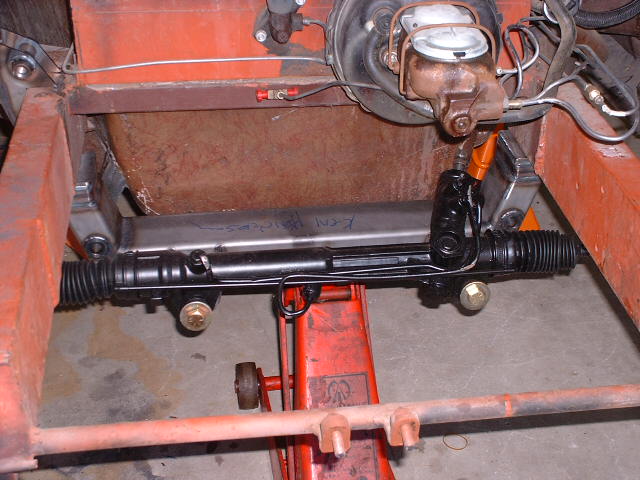
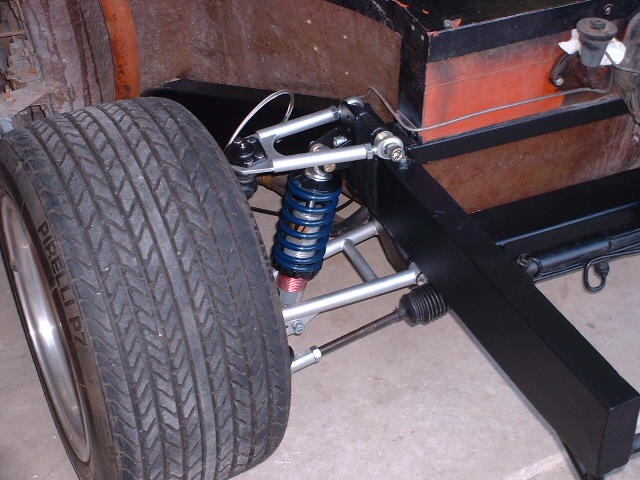
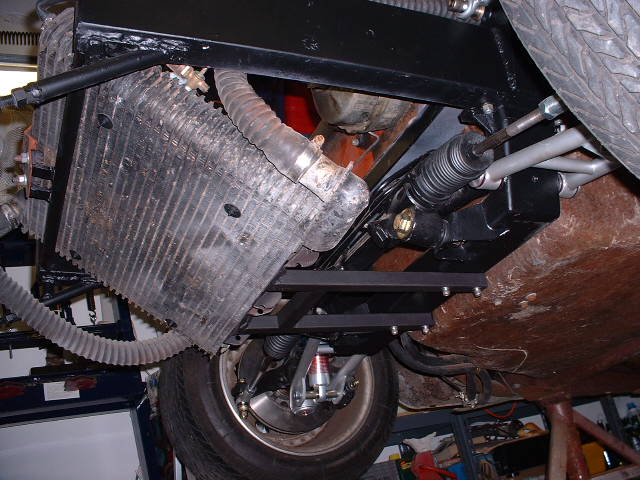
- replacing the Corvair front suspension with a weld-in Jim Meyers Racing tubular A-frame design. The mod included a fast power rack and pinion.
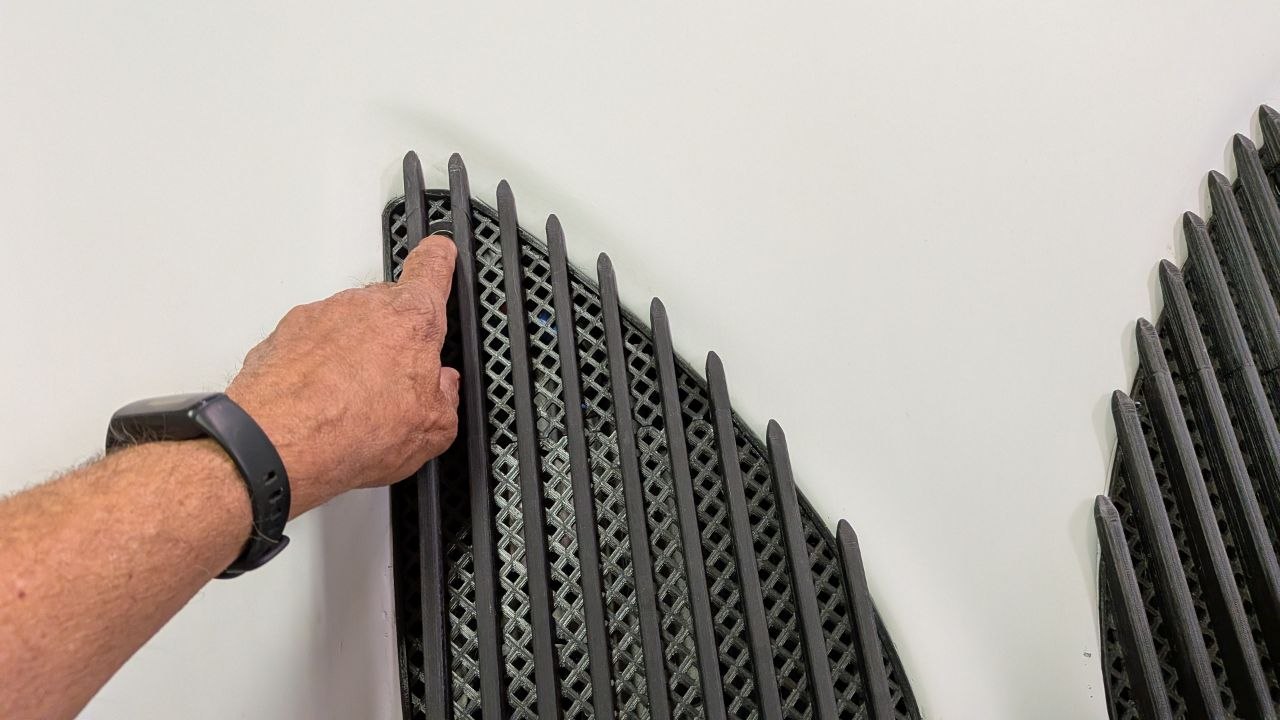
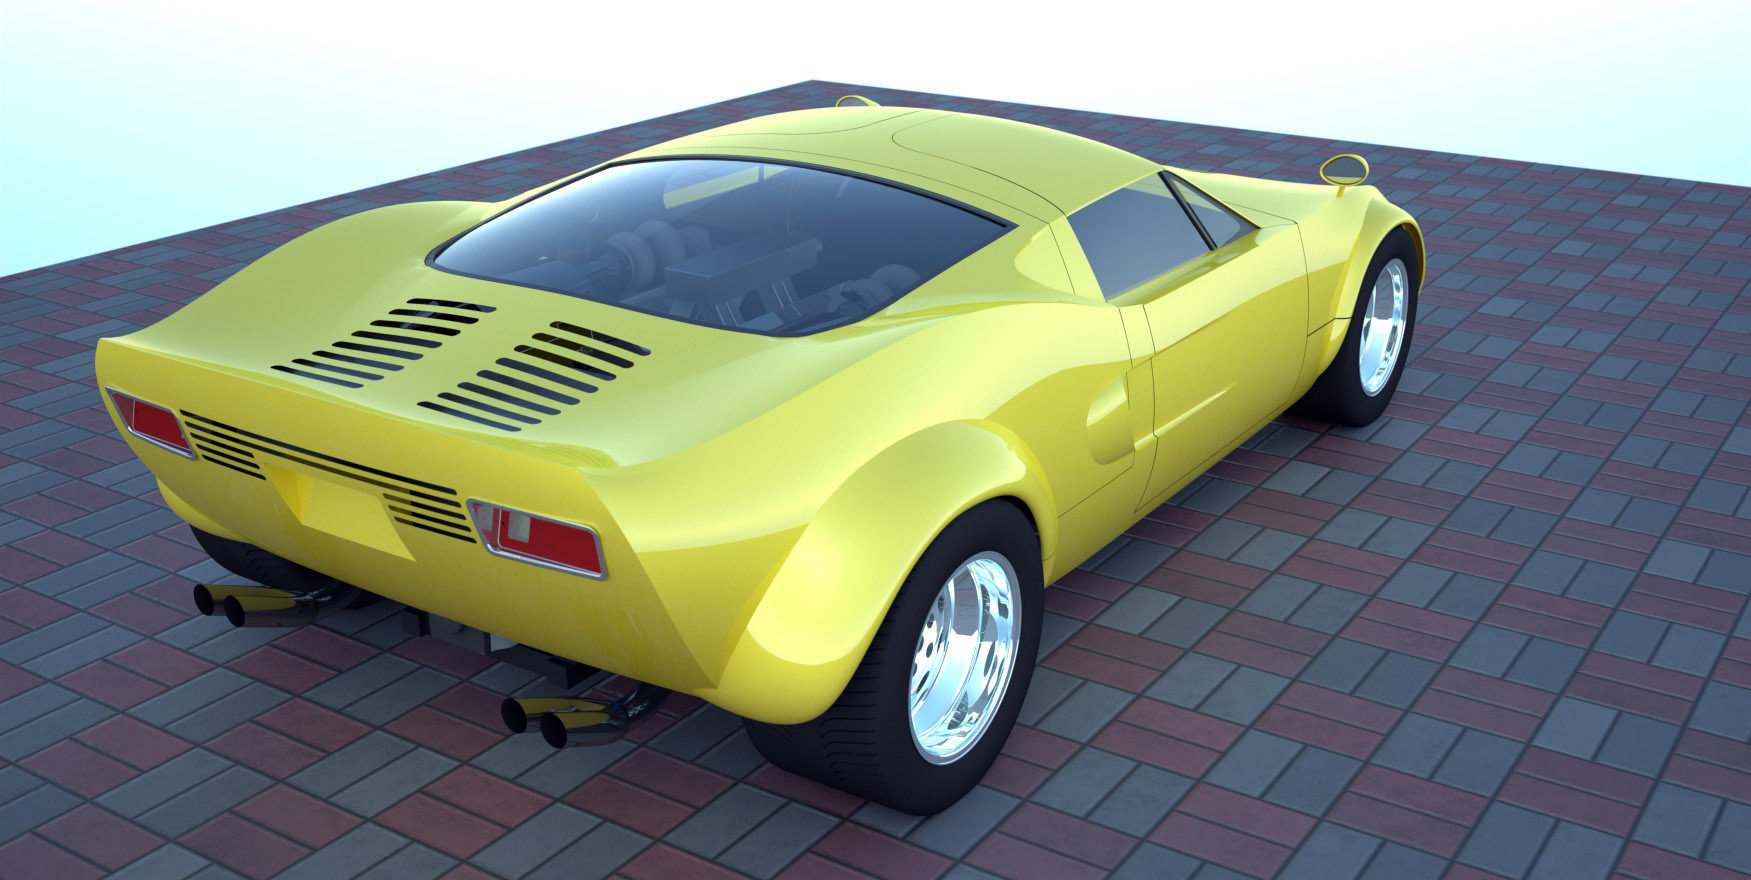
- Replacing the glass Mustang rear window with a custom fiberglass panel with a air scoop to help display the hot air around the engine.
Getting the engine running
After the initial purchase, one of the first tasks was to get the engine that came with the car running and see what kind of condition it was in. Once I got the engine fired up, I discovered it had extremely low oil pressure. As mentioned, I had prior experience successfully building 3 high performance engines, but this low oil pressure problem had me stumped. I felt like I was wasting time with the first thing I tried to do on this project, and I had a long list of action items still ahead. Feeling frustrated and a bit like I was taken advantage of by the seller, I needed to get past this issue and make some progress. I located a low mileage 350 cubic inch small block truck motor (with four-bolt mains and a forged crank) for a reasonable price. Finally I could check off the engine, and move on to the next task.


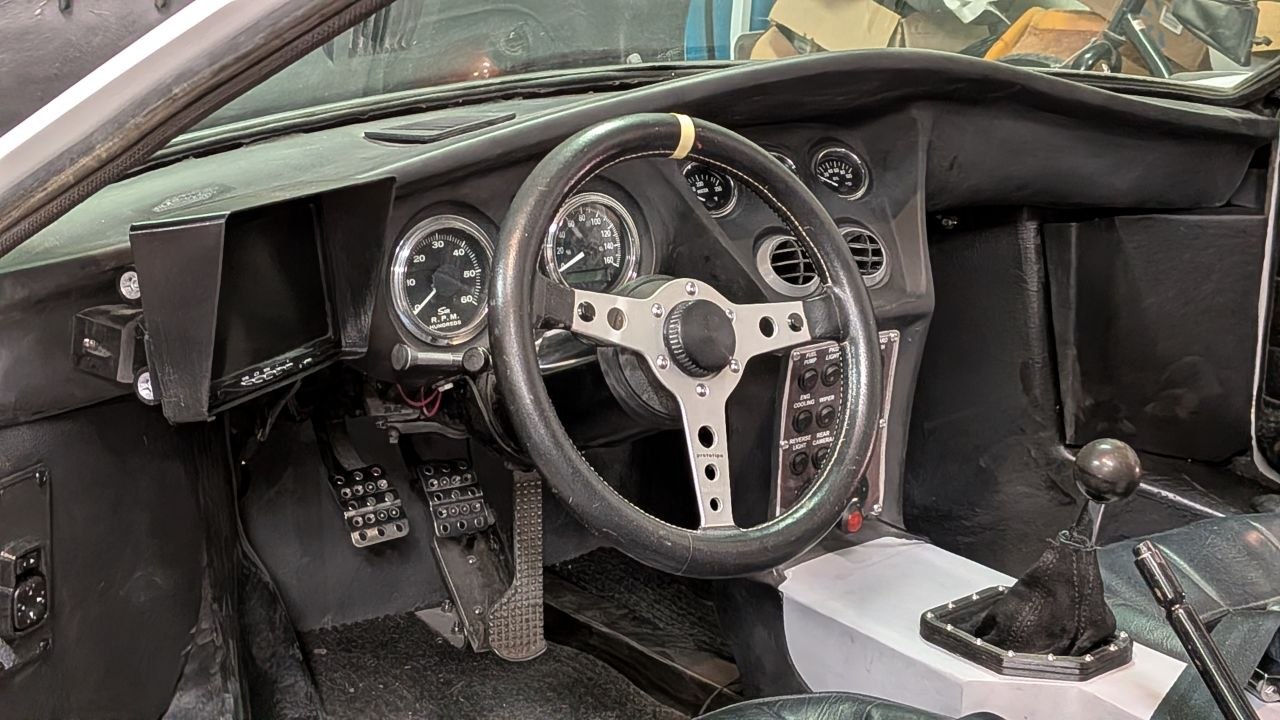
For the next several months, more parts were sourced; some new, mostly used, and work steadily progressed. A switch panel from a Chrysler, a tilt and telescopic steering column from a Cadillac, tail lights and door handles from a Gremlin, a new Corvair windshield, and a new Momo steering wheel, just to name a few.
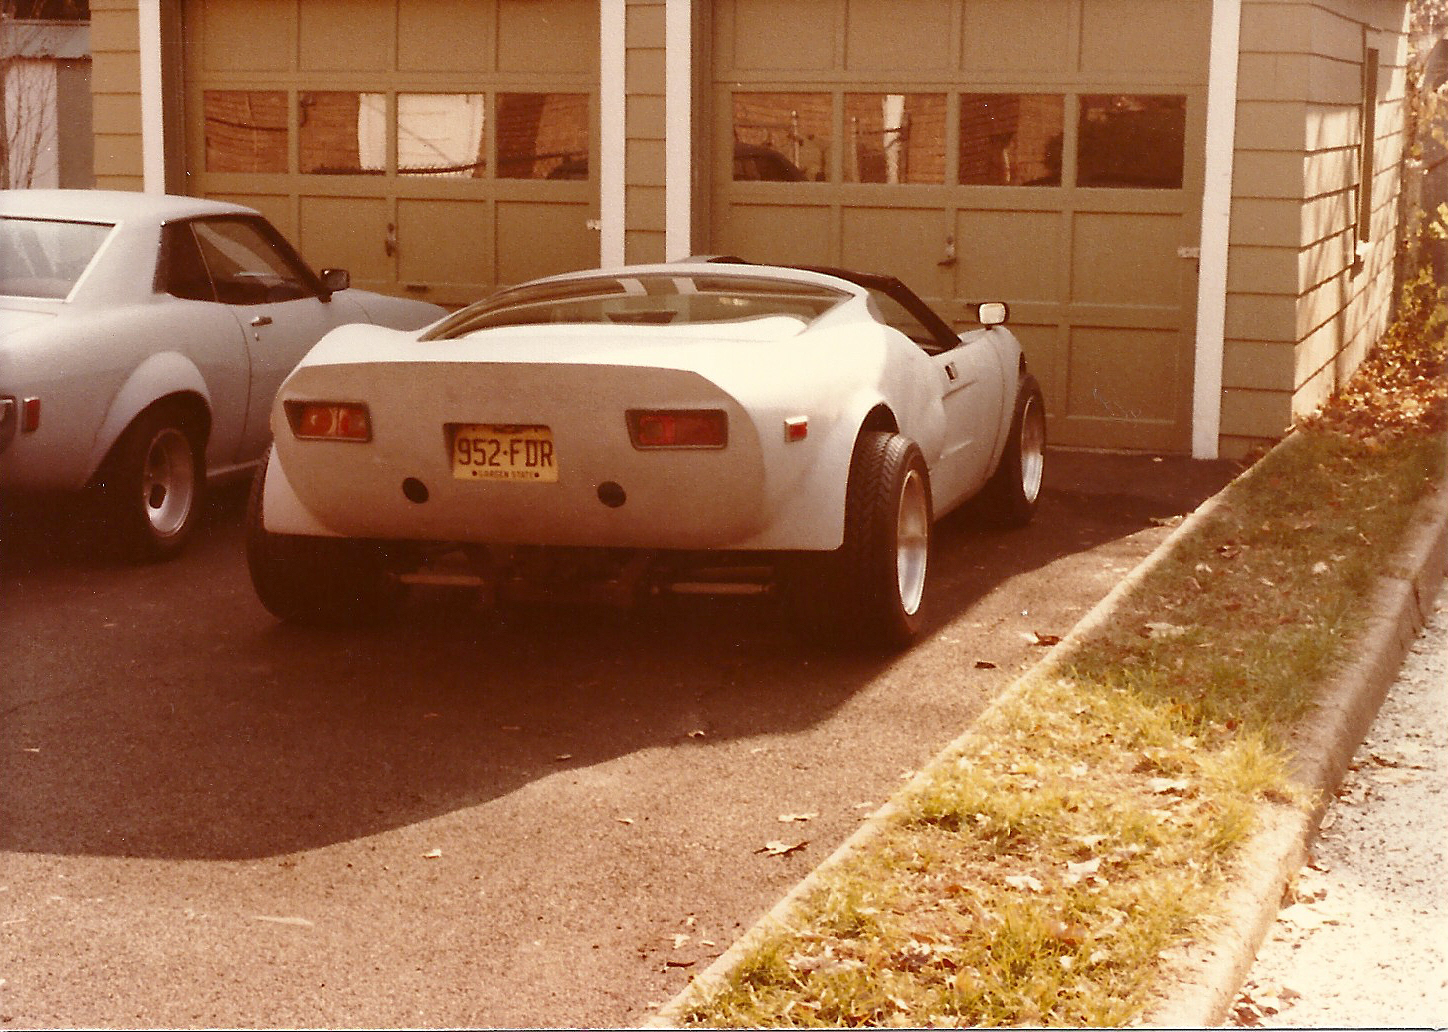
Keep in mind, funds were tight at the time. One of the first big purchases was a set of Appliance Plating aluminum wheels that were styled after the legendary BBS wheels frequently seen on Porsches and BMWs. Of course the AP wheels were a fraction of the price, but what a transformation they made! 7 x 15 for the front, 8 x 15 for the rear.
For tires, I went with used Dunlop 205/70-15 tires from my Dad’s Jaguar XJ6 for the front, and I purchased H70-15’s (similar to 235/70-15) for the back. Remember, this was before the introduction of the extremely wide and low profile Pirelli P7 tires that would soon appear on the Lamborghini Countach.
It Drives!
It took me about 6 months to get things to a point where I could get the car to move under its own power. Next, I needed to make it legal. Getting a New Jersey registration and plates was likely going to be a nightmare. I had heard stories from friends with home-built hot rods describing the red tape and hoops the NJDMV make you jump through if you didn’t have a vehicle title with a matching VIN plate on the chassis. Since it had (at that time) a number of significant parts sourced from a Corvair, it made sense to me (and hopefully also to the state of New Jersey) to register the car as a Corvair. As mentioned previously, the Corvair parts included both the front and rear suspensions, the transaxle, the windshield, and the steering box. To make this step go as smooth as possible, I purchased a non-running 1966 Corvair to get the VIN/serial number plates and the title, which I used to insure my car and and get its first registration and plates! I later found out that what I did was highly frowned upon. In most states, you are not allowed to remove a VIN plate from one car and put it on another. Apparently, this is how chop shops and car thieves get stolen cars back into circulation. Once I knew this, I never felt at-ease driving the car, always on the lookout for the boys in blue, and thinking about what I would say if pulled over. But amazingly, in the 28 years it was in New Jersey, I was never pulled over. This was partly because the car was never “on the road” for very long before I took it back apart to make improvements.


Those first drives were quite exciting! A lot of work had been done in a relatively short period of time, and it felt sort of redeeming to be able to get in the car and actually use it to go somewhere! But these first rides really turned out to be the start of a test, debug and redesign process that would be repeated for many years.
After the first drive, I began listing the things I wanted to improve.
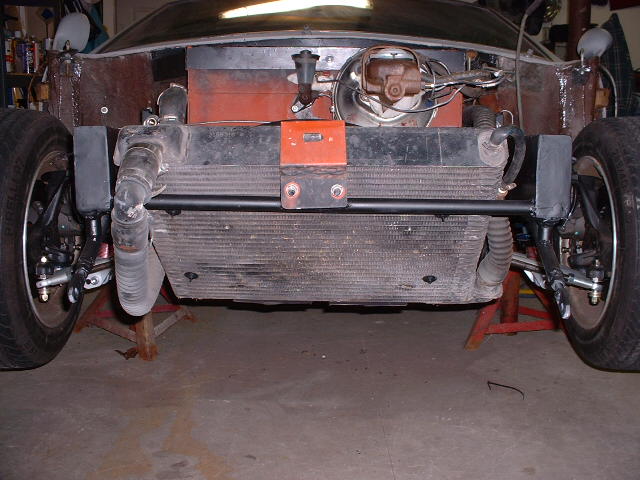
- After mounting the body on the frame, there was no easy access to the front half of the chassis. To do nearly any kind of maintenance required jacking up the car and removing the front tires to gain access through the wheel wells. For some things you might be able to reach in through the triangular vent openings on the top side of the front clip. Fortunately, there wasn’t much mounted up front when I first assembled my Valkyrie. Just a radiator and master cylinders for the brakes and clutch. Things which typically don’t require frequent attention.
- The front of the V8 engine was fractions of an inch from touching the interior bulkhead (firewall). The hot exhaust manifolds were just inches from the back side of the fiberglass seat surfaces. Adjustment of belts and checking the ignition timing required opening an access hatch located between the seat areas.
- The way in which the Corvair transaxle was being used (with the V8 engine’s bell housing bolted to the forward facing end of the transmission using a 1″ thick adapter) just seemed like a bad configuration, resulting in the front of the engine being tucked under the bulkhead window (see #2, above). Once I got a look at how most mid-engine drive-lines were laid out, and in particular, the De Tomaso Pantera, I wanted to change my Valkyrie, and a long planning process began.
- The roof was very low which, combined with wide door sills, made the car a bit tricky to get in and out of. It also got quite warm in the summer months, partly due to the engine being so close to the bulkhead and not having air conditioning.
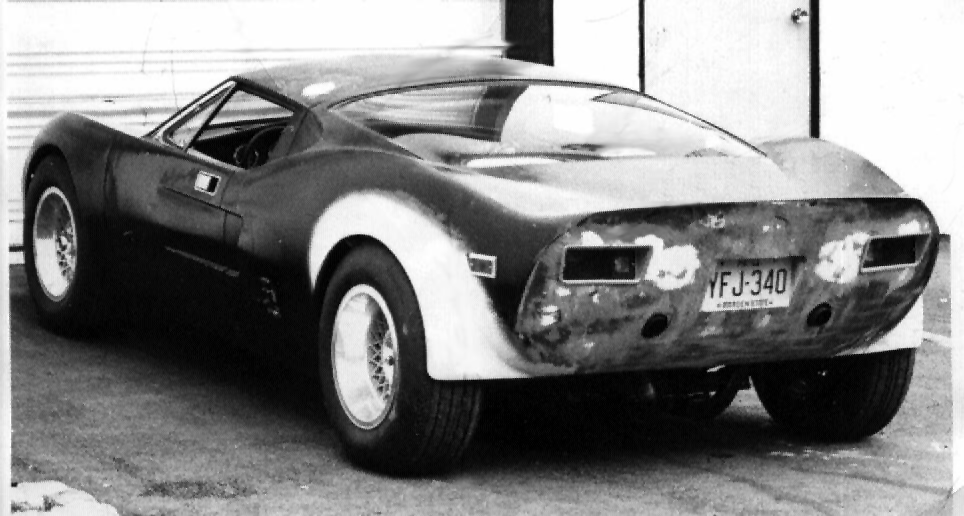
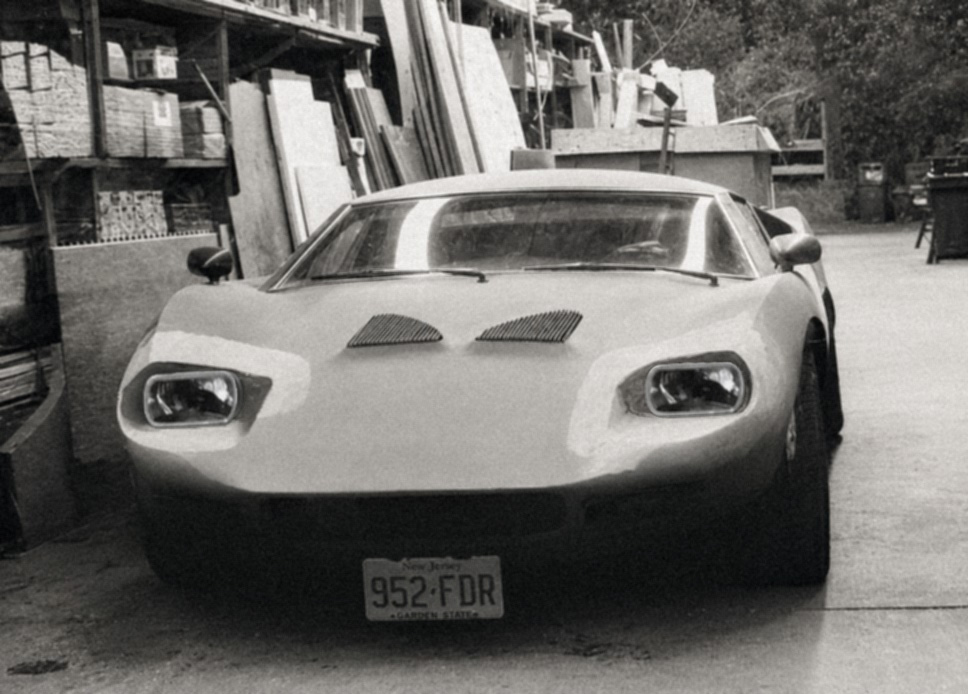
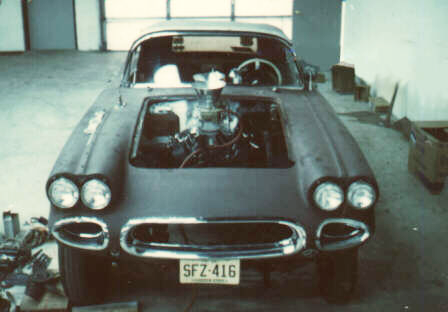
- Although the Valkyrie styling was heavily influenced by the Ford GT40, the Valkyrie had little choice but to use DOT approved round sealed beam headlights. With the clear plastic headlight covers in place, it wasn’t bad looking. And even though the handful of GT40 road-legal cars did use round DOT headlights, I thought the Valkyrie would look much better if I could modify the body to use the same rectangular headlights that the GT40 Mk-I and Mk-II race cars used.
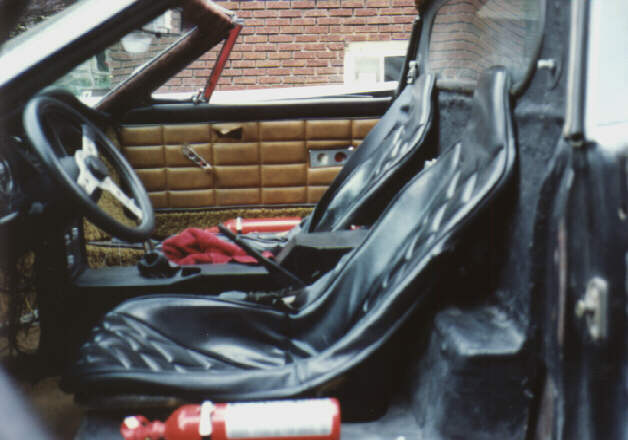
- Unlike the Fiberfab Avenger, which used a VW beetle platform, the Valkyrie wasn’t designed to use anything resembling a real bucket seat. Race cars and dune buggies of that time typically had bucket seats based on fiberglass or aluminum seat shells with removable upholstery covers. Instead, the Valkyrie’s molded-in fiberglass floor had the intended seat surfaces also included in the floor mold, but they were literally shaped like a park bench. Fiberfab intended to have the seat upholstery anchored at the top (shoulder area) and bottom (thigh area) in a manner such that it formed a sling, something like a hammock. Apparently, they weren’t kidding about this, and I shouldn’t criticize it too much, as I never really considered trying it. I did have a professional shop install a nice tan vinyl upholstery with padding on the seat surfaces, but it was still very uncomfortable, to say the least.
One by one, I implemented solutions, always figuring out how I could accomplish things using the least amount of the limited funds I had on hand.
Headlight Conversion – creating a more familiar face (1979)


The First Major Re-build (1985)
This rebuild all started with getting lucky at a Lincoln-Mercury dealer parts counter- A new Pantera ZF transaxle!
From the moment I saw a magazine article about how a shop in California had installed a Pantera ZF 5 speed transaxle in a Manta kit car, I was obsessed with doing the same swap on my Valkyrie.
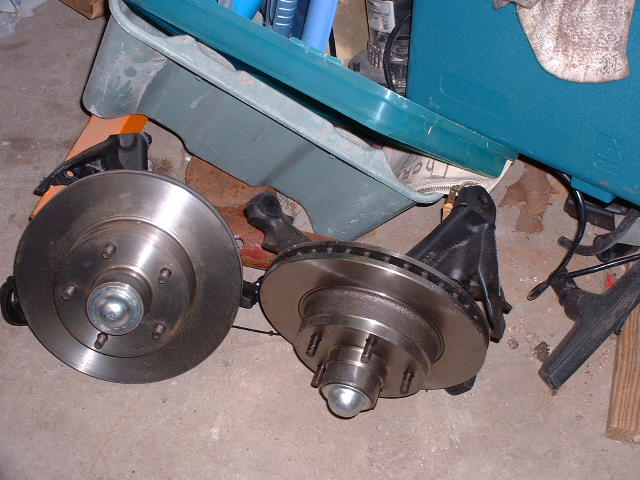
I don’t remember exactly how it was that I found out Ford was selling off its supply of Pantera spare parts, but I do remember going to a Lincoln -Mercury dealer that had previously sold Panteras, and asking about the availability of the ZF 5 spd transaxle. They quoted me a price of $750, which in 1985 was a lot of money to me. Replacing the Corvair transaxle with the ZF unit was not going to be a simple weekend swap. At least not how I was planning to do it. This was going to require designing extensive modifications to the chassis, and the whole rear suspension also needed to be replaced. And because the engine was being relocated towards the back, the seating could now be improved, and a new fuel tank would be required. As if that wasn’t enough, new wider wheels and tires required modifying the fenders. With all of these upgrades taking place at the rear of the car, I decided the front of the chassis should also get some attention in the form of disc brakes and replacing the Corvair steering box with a rack-and-pinion system. And since the body was now off the frame, it seemed like the perfect time to cut the nose off of the main body unit so I could have a tilt-nose for easier access to the front mounted chassis components.
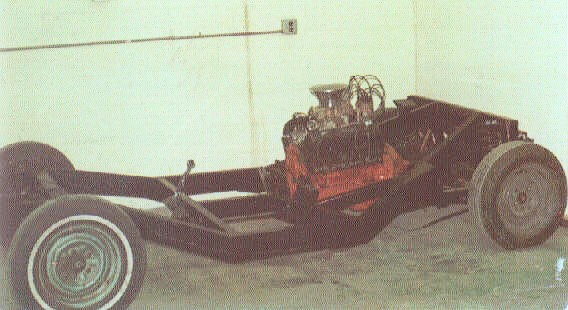
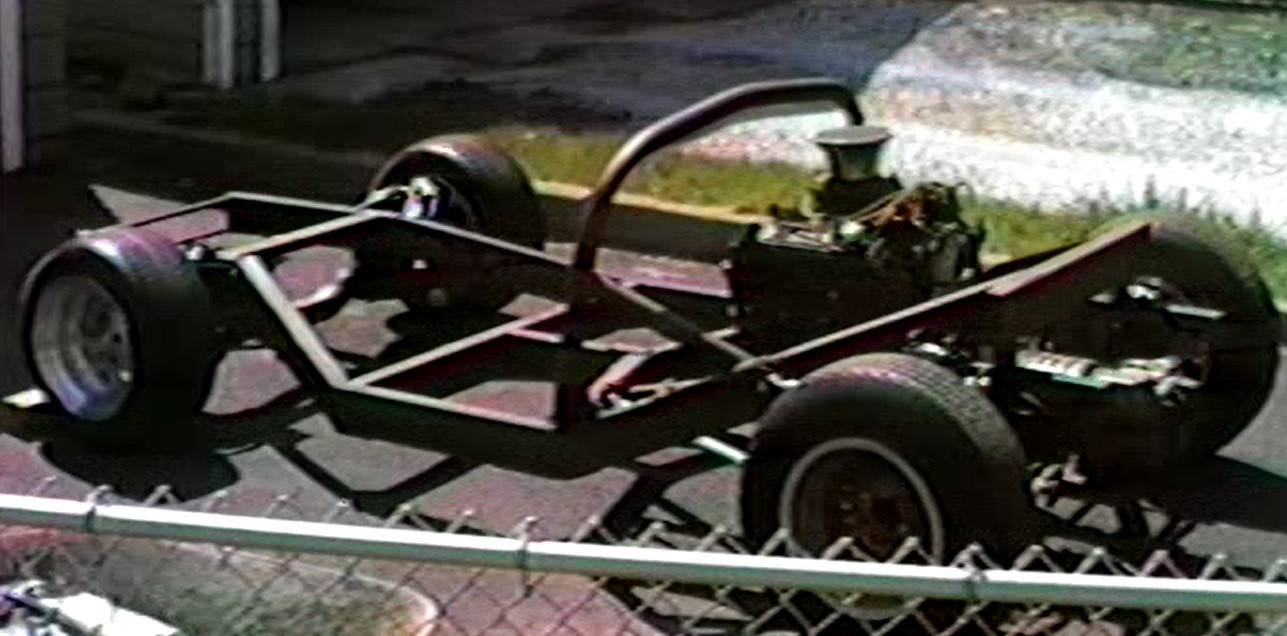
The first step was get the body back off, the engine out, and strip the chassis down to the frame rails.


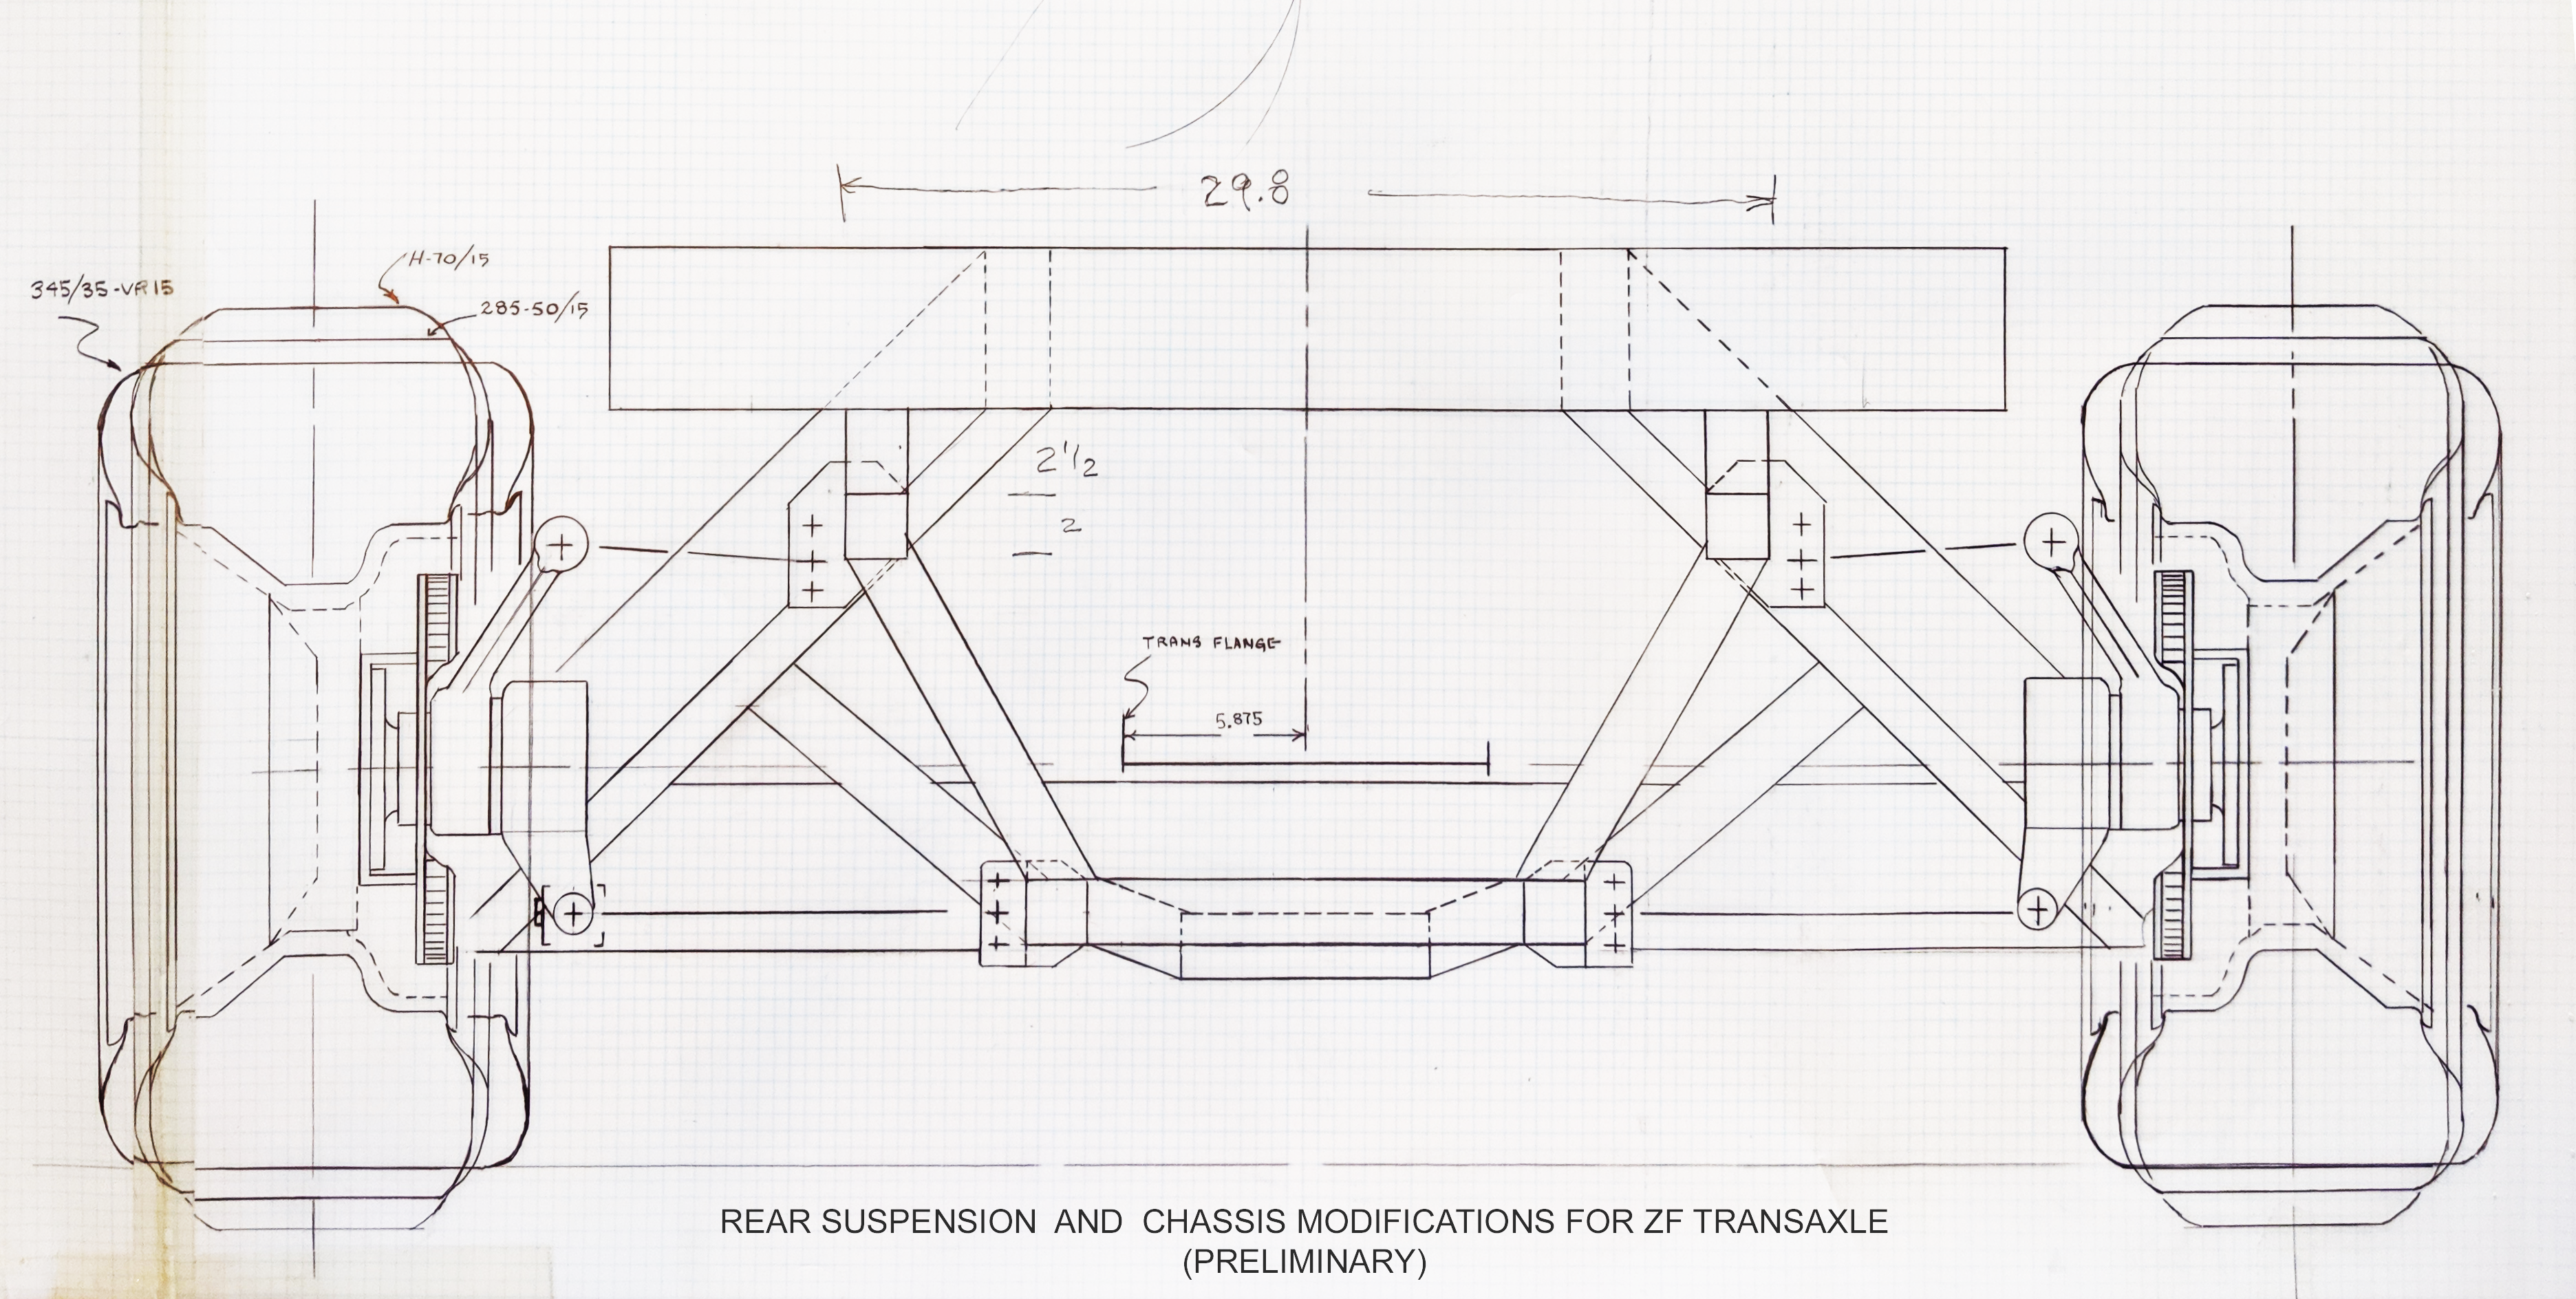
Designing the required frame and suspension modifications (with paper and pencil)
Once the ZF transaxle in my possession, and the bare frame on my garage floor, it was time to get serious about planning in detail all of the modifications necessary to make it work in my Valkyrie. As stated, there was a lot more involved than just swapping out the Corvair transaxle. I put a drafting table in a 3rd floor guest bedroom in my house, and this is where I spent many hours planning the necessary work that would follow.
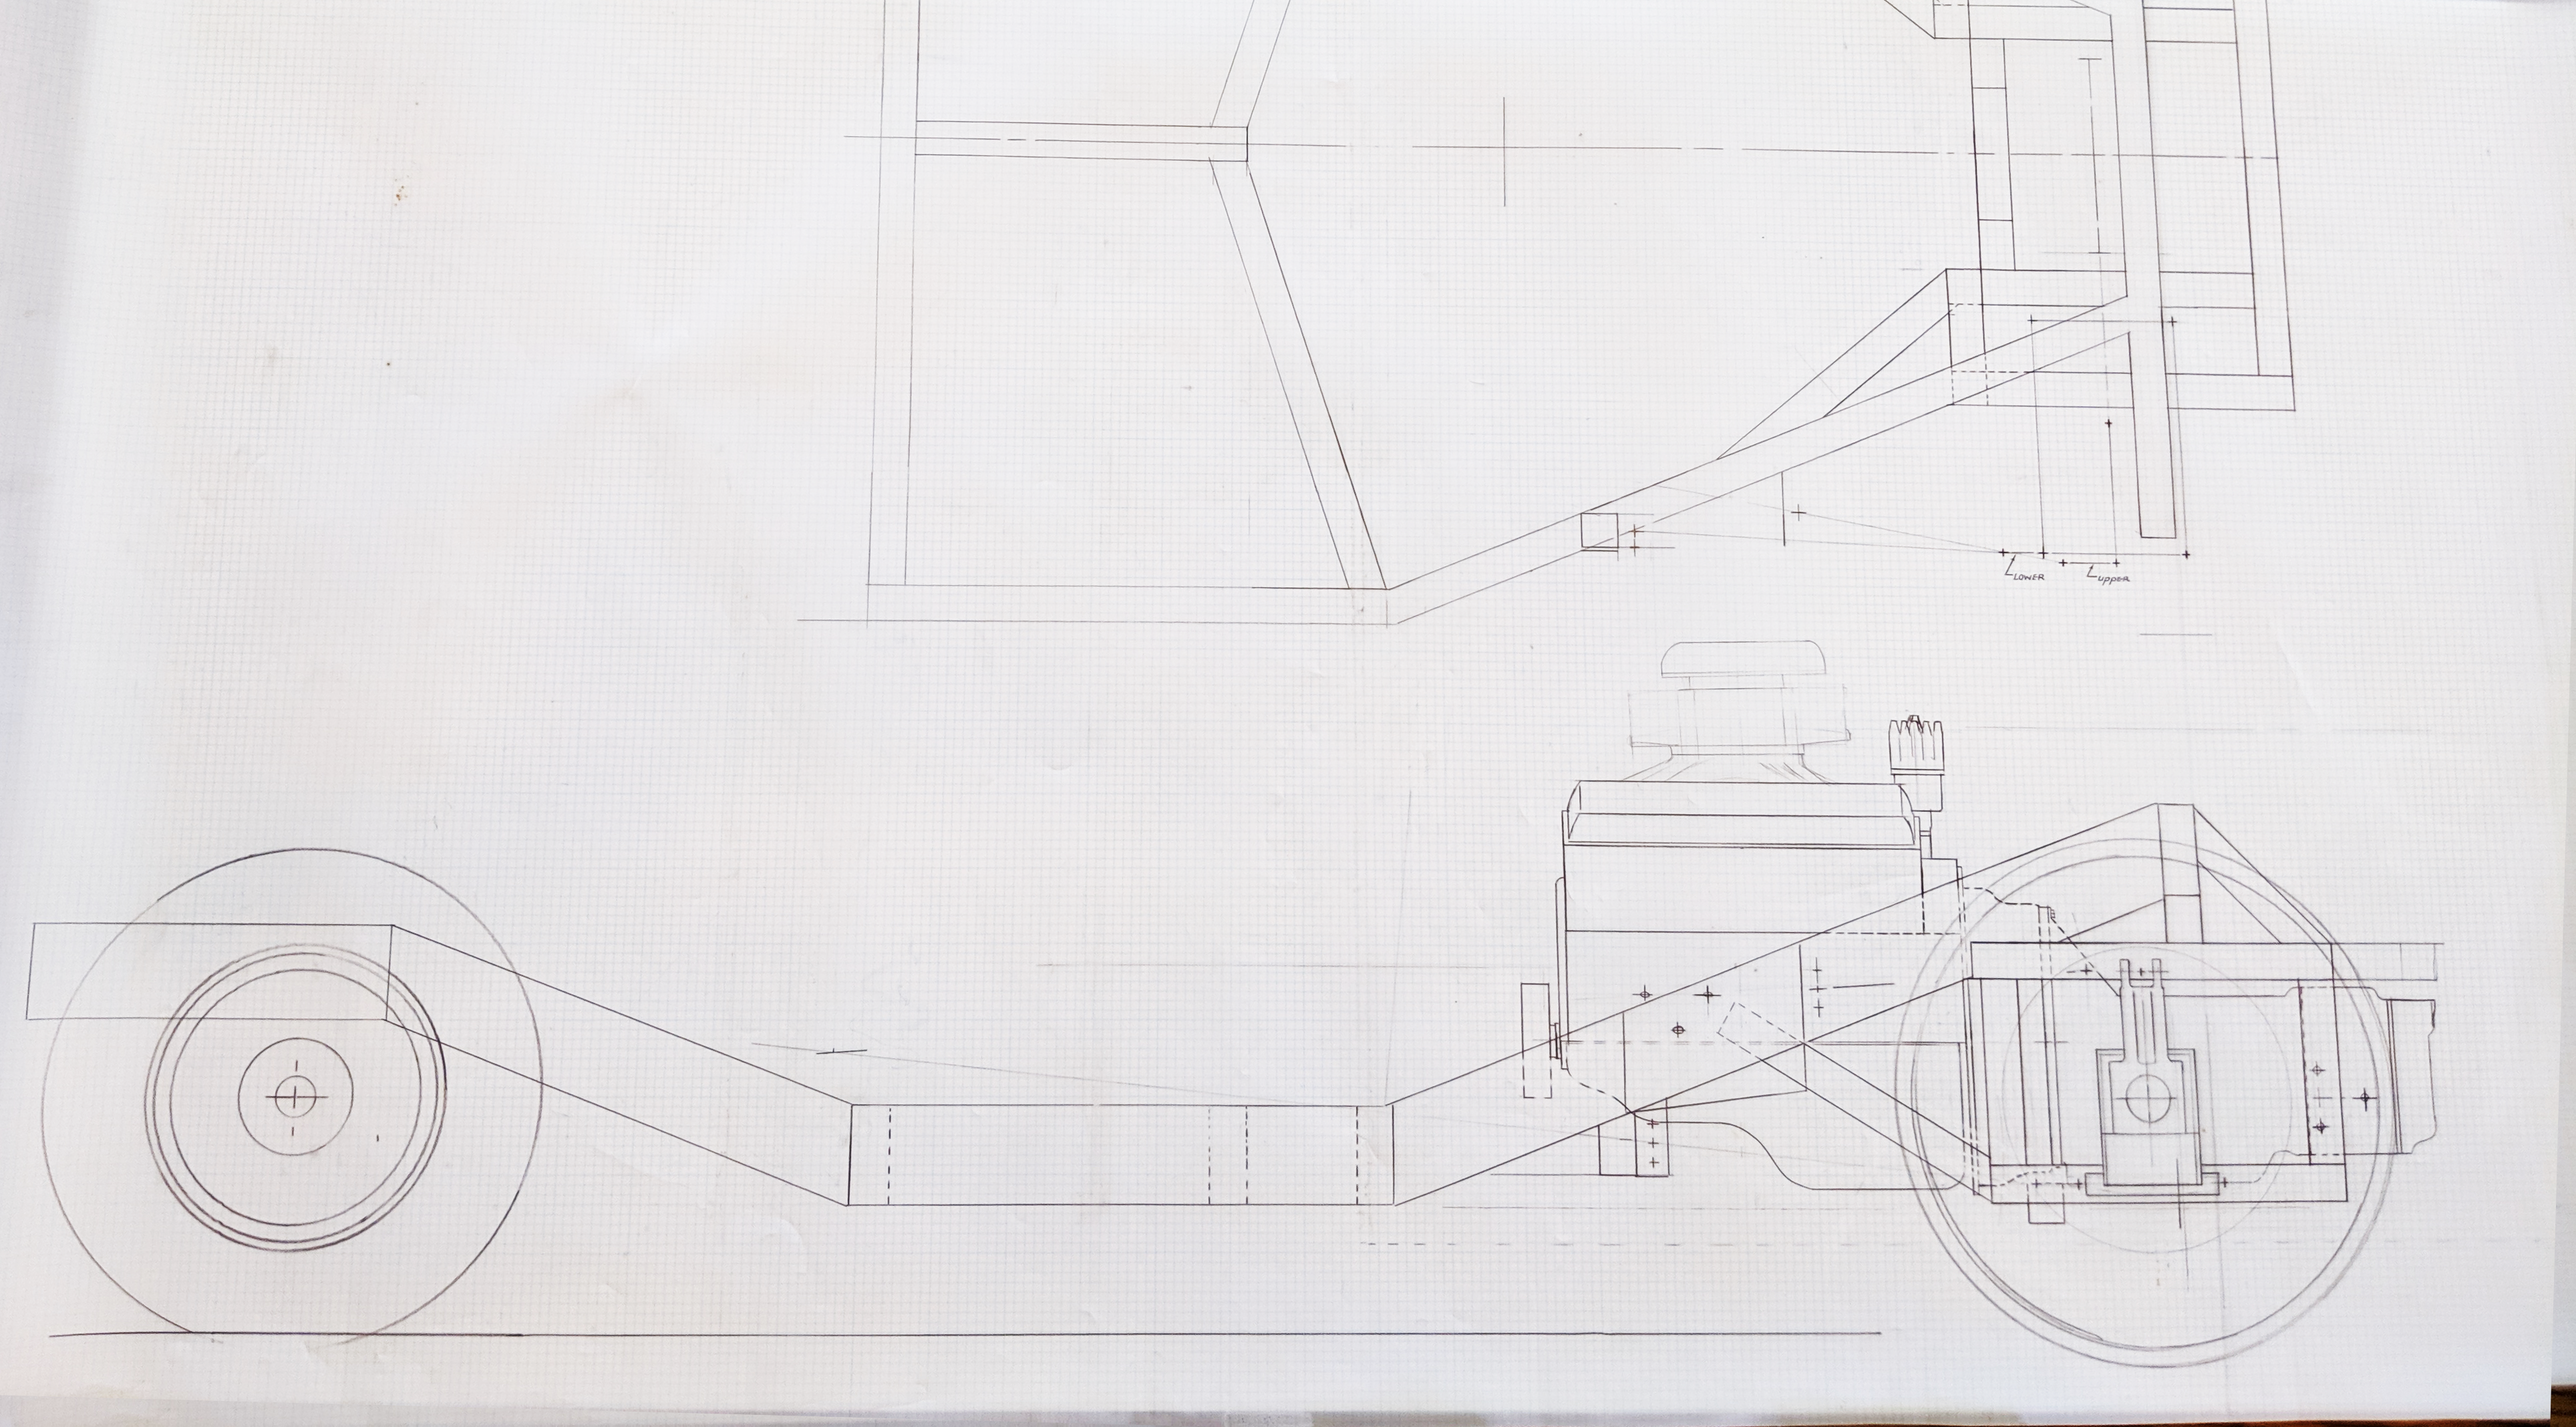

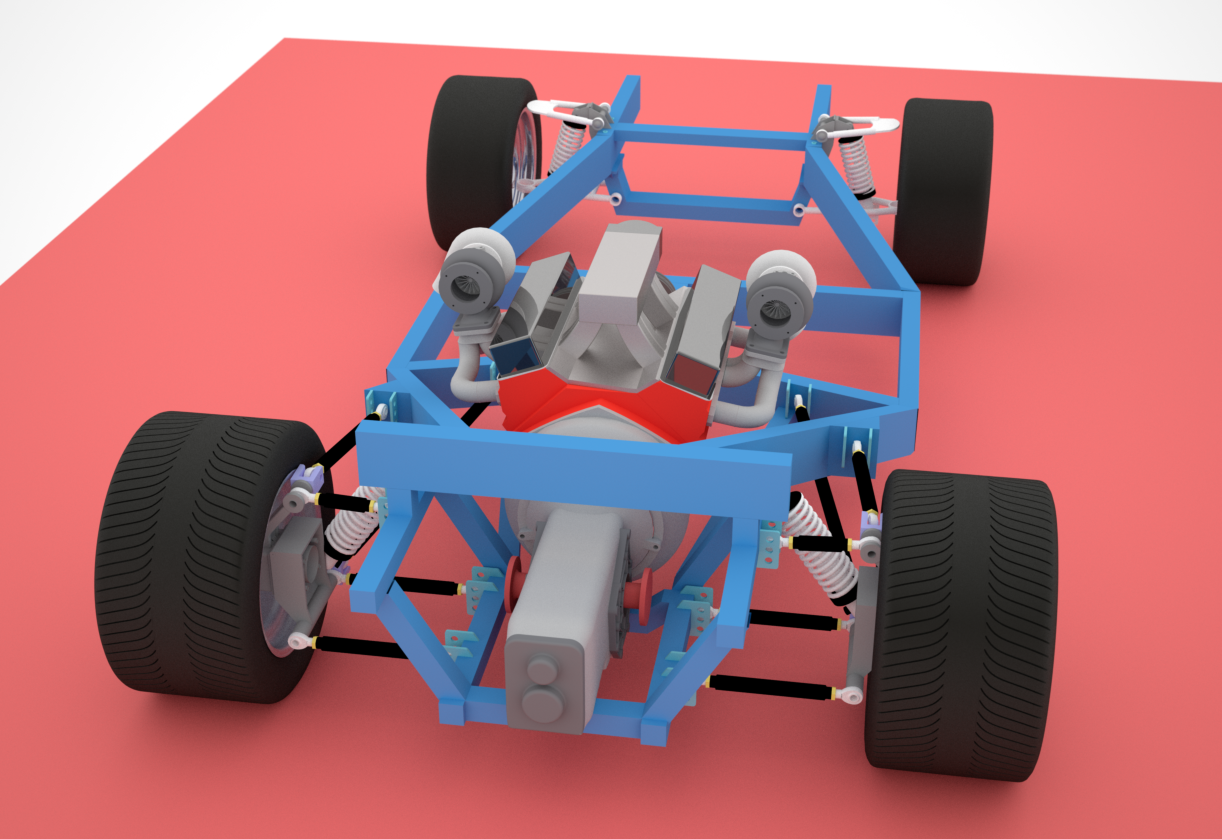
Engine moves further back 12 inches (to where it should be)
The ZF transaxle has many advantages when compared to the Corvair unit. The Corvair was a rear-engine vehicle. It had an air-cooled, flat-six cylinder engine located at the very rear of the car. In this configuration, the gearbox section of the transaxle was located in front of the rear axle centerline. To keep the overall cost of building a Valkyrie kit as low as possible, Fiberfab used an adaption method that allowed the V8 engine to be bolted to the end of the transmission section which, remember was forward of the axle centerline. An unfortunate side effect was that the engine was about 12 inches farther forward than it ideally should have been. At that time (late 60’s, early 70’s) there were very few other transaxles available at a reasonable cost that could have been used. The ZF 5-speed unit which was available, and one of the few that could handle the torque of a V8 engine, would have cost more than the Valkyrie kit itself. In fact, Fiberfab did advertise a turn-key version of the Valkyrie that included a 427 big block V8 and a ZF 5-speed transaxle for $12,000!
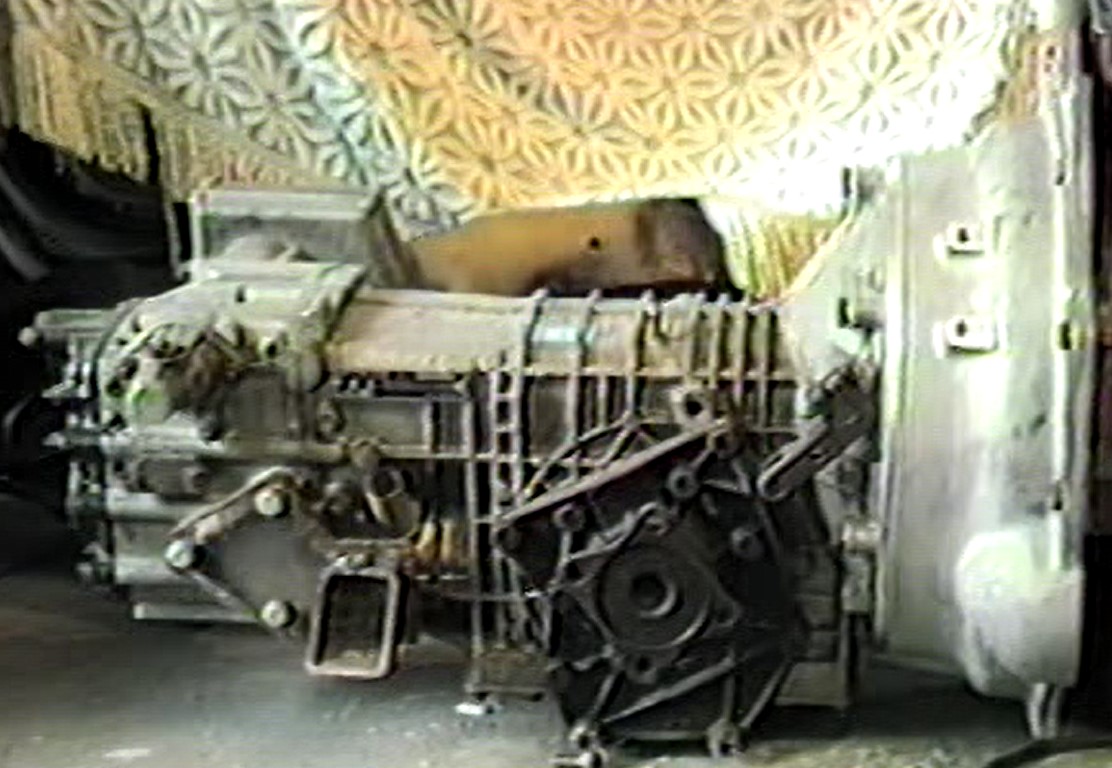

In the ZF 5-spd, both 4th and 5th gears are overdriven and the limited slip differential has a 4.22:1 ratio in most of the Pantera configurations.
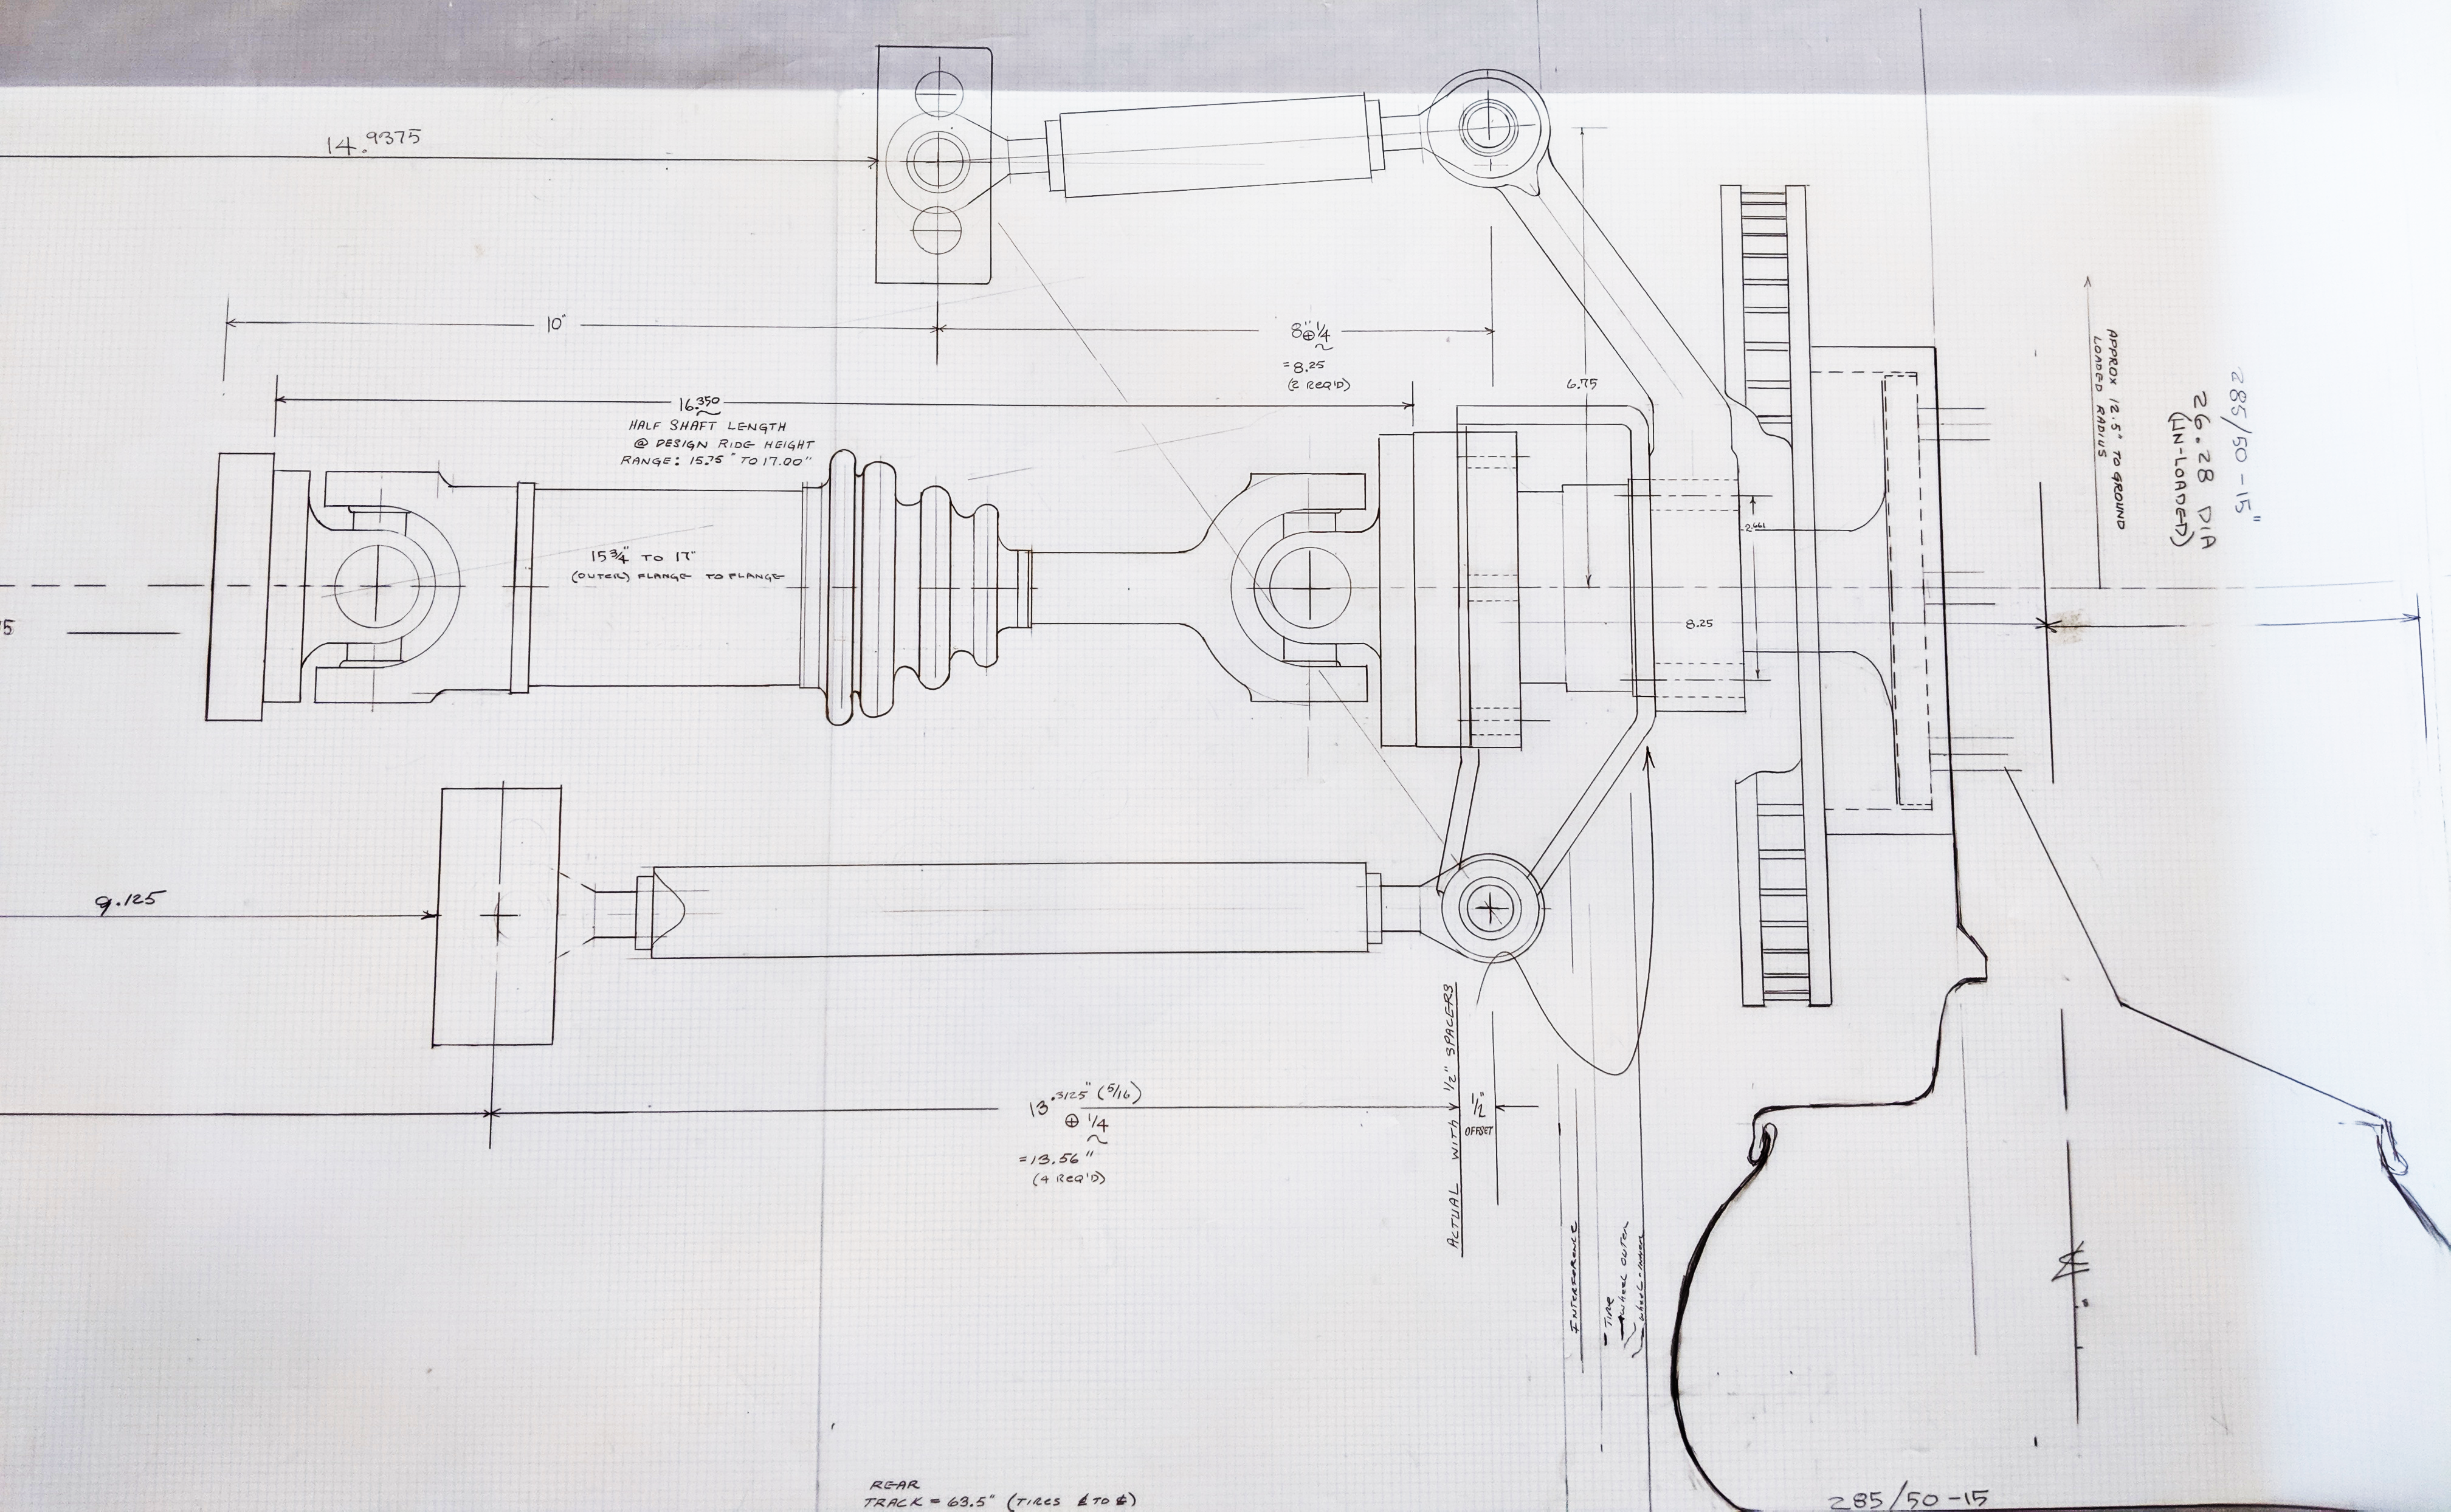
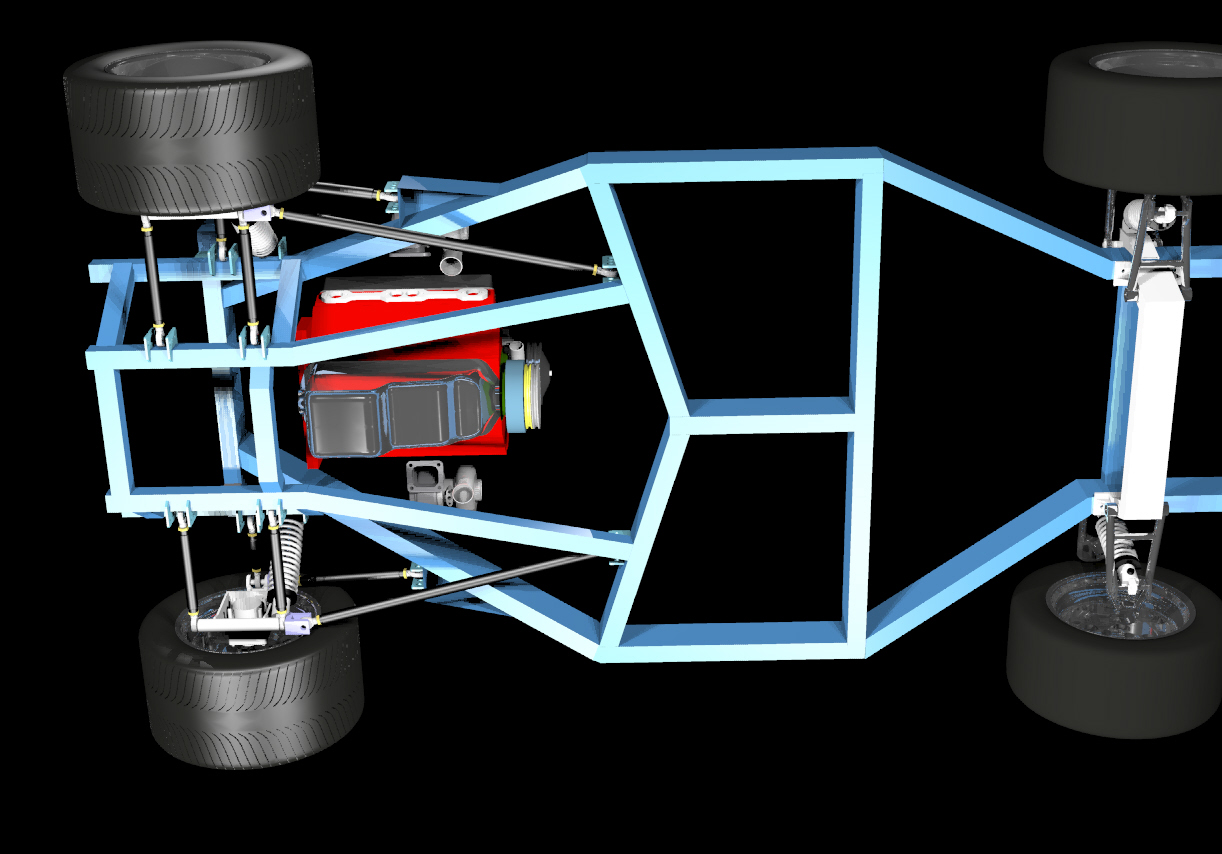
After studying a Pantera parts and service manual, I designed a similar rod-style shift mechanism that uses four U-joints (of the same type typically used in steering shafts).
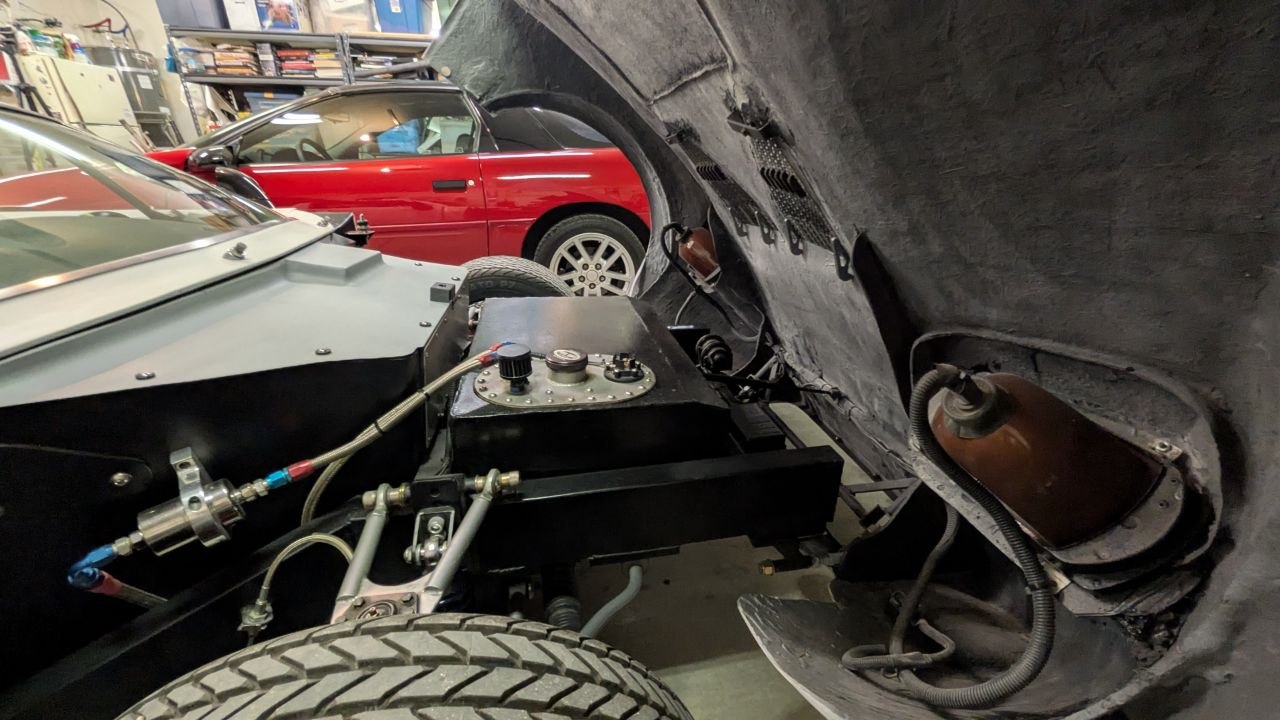
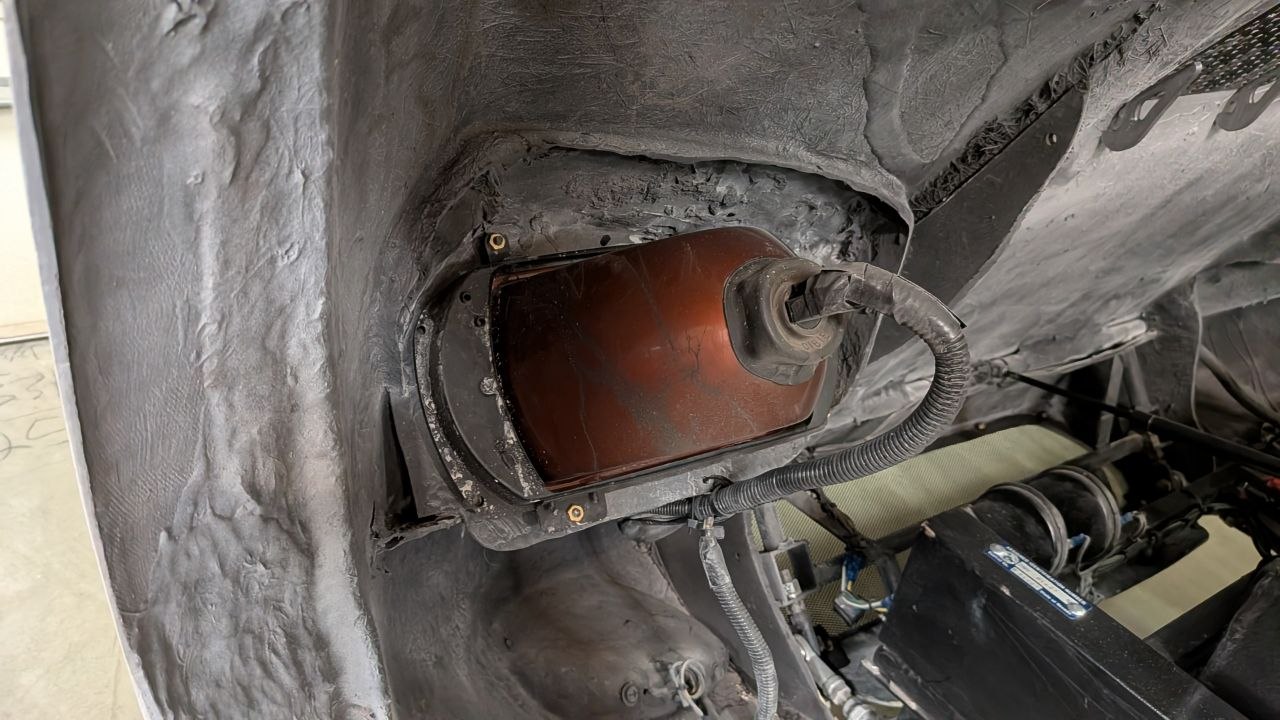
In addition to extensive modifications to the frame and new shift linkage, numerous other changes were also required, including a new fuel tank, which had been located just behind the engine (see image). Additionally, the exhaust system, the seating position, and the rear suspension were all redesigned as a result of switching to the ZF transaxle..


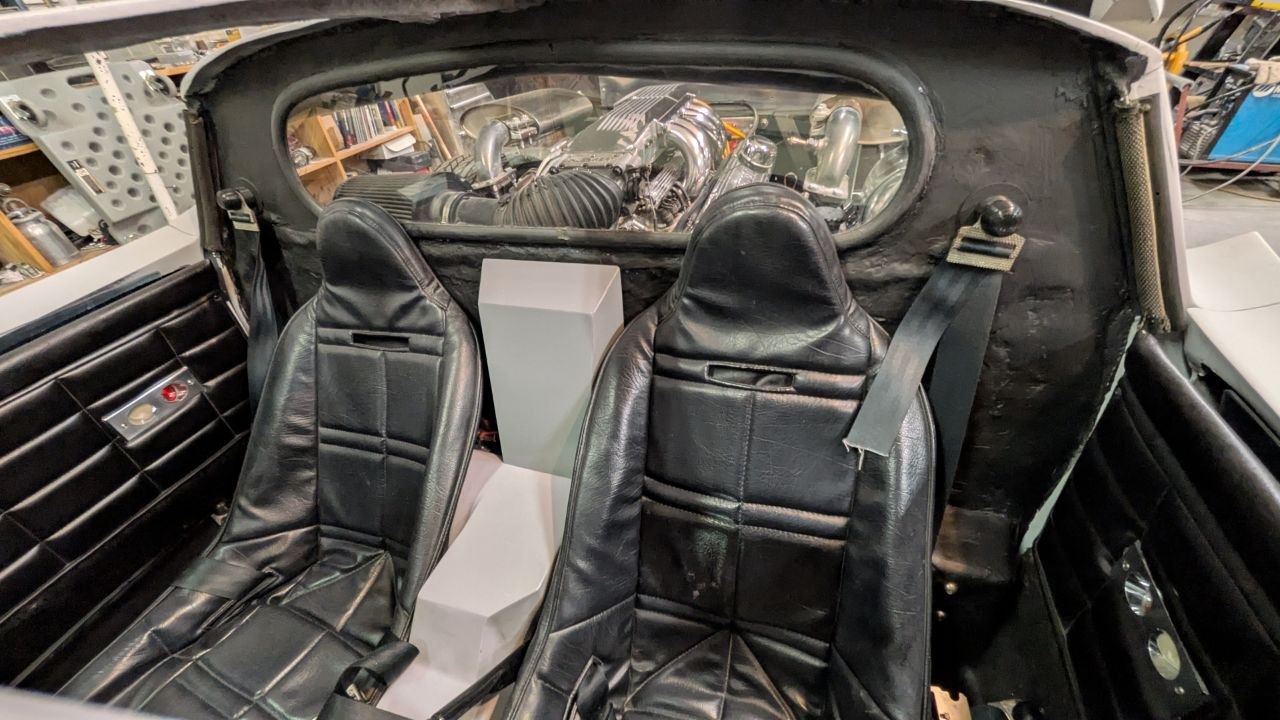
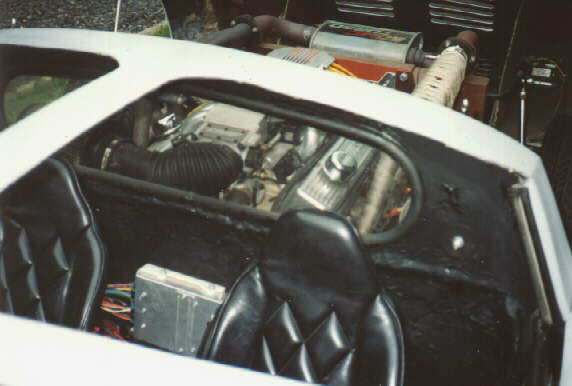
Improving the seats
With the engine now “out of the way”, I was able to remove the molded-in seat surfaces and install upholstered bucket seat shells that provided a much more comfortable position. Also, it was no longer necessary to have a removable panel between the seats for accessing the front of the engine. Any necessary engine maintenance could now be done from the open engine compartment.
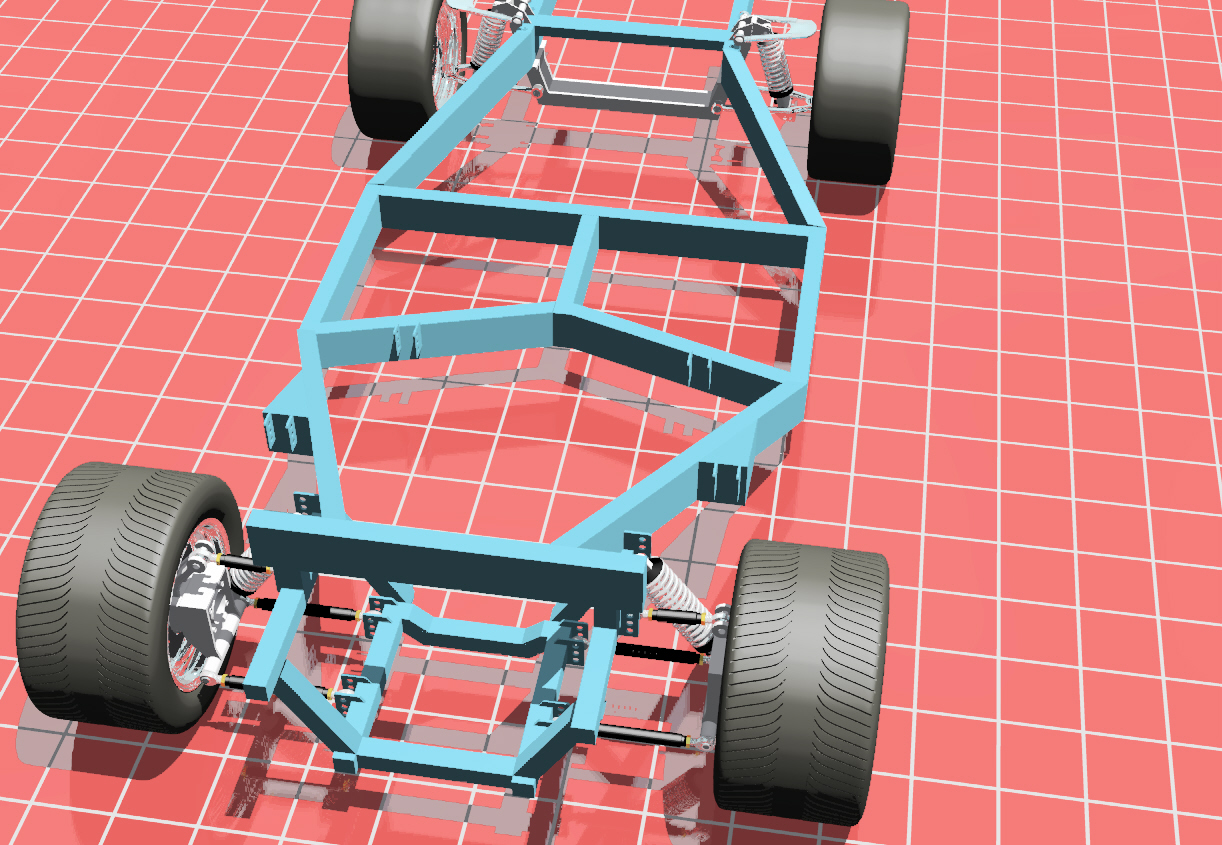
Replacing the Corvair rear suspension
Included in this major upgrade to the ZF transaxle was the complete replacement of the Corvair rear suspension, which was very similar to the Gen-2 Corvette. I had been studying competition and sports car suspensions for several years, getting ideas from Formula style race cars, and books. In particular, a book about the Lamborghini Countach by Jeremy Coulter proved to be very helpful.
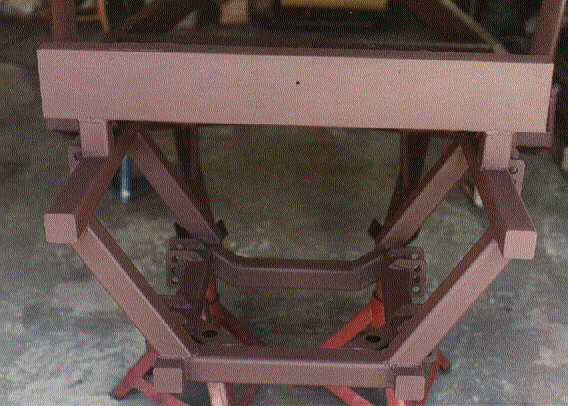
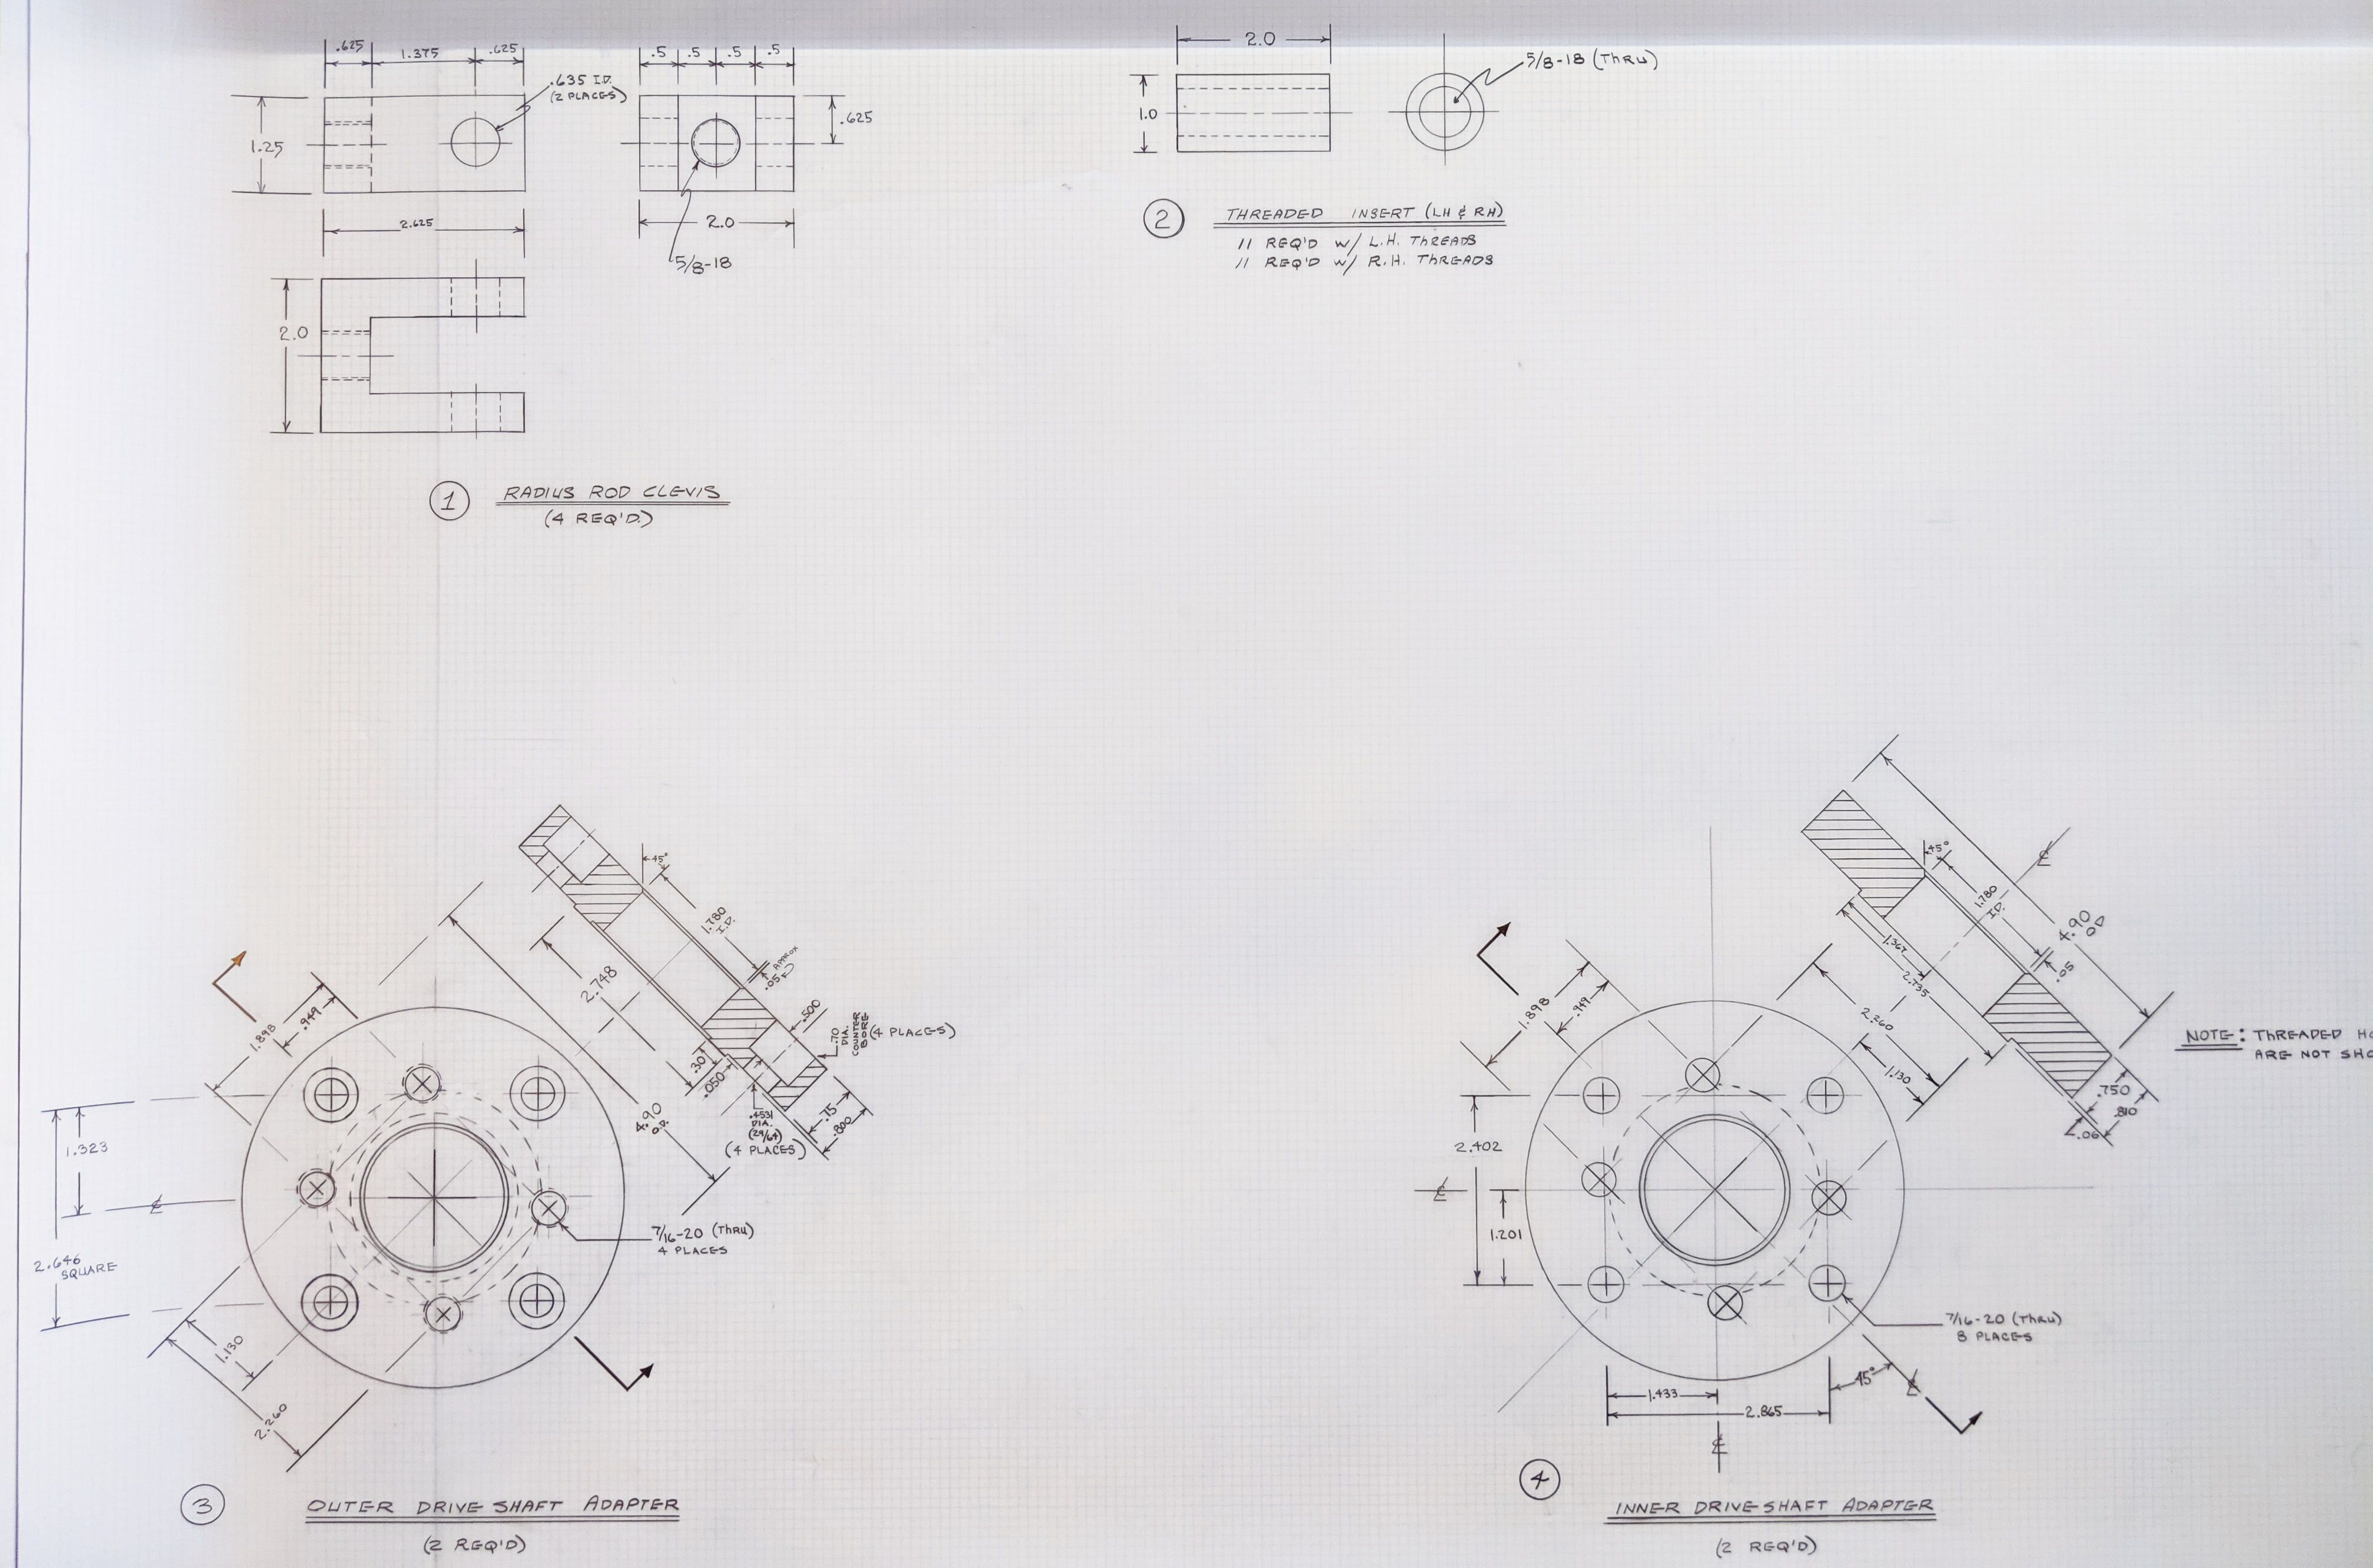
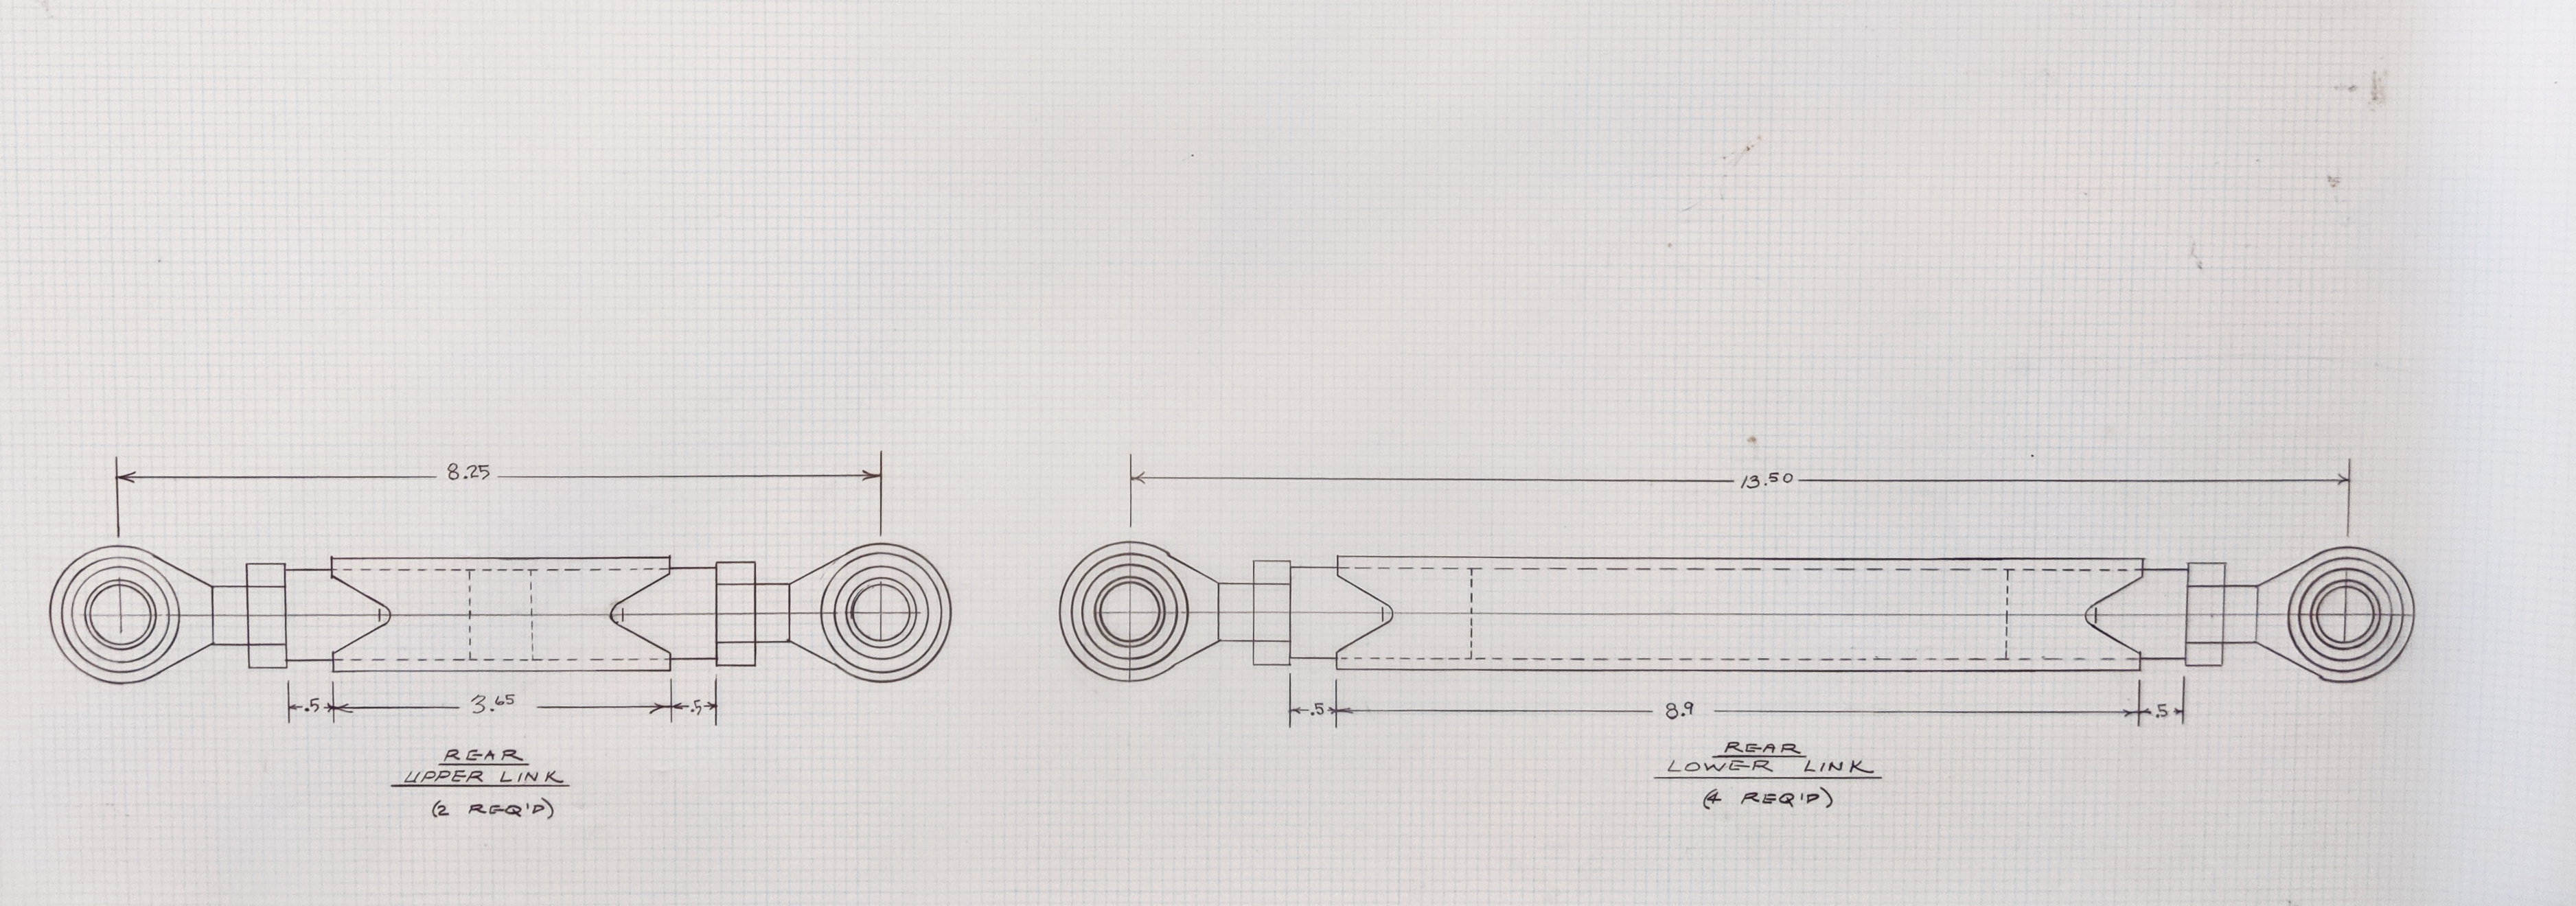
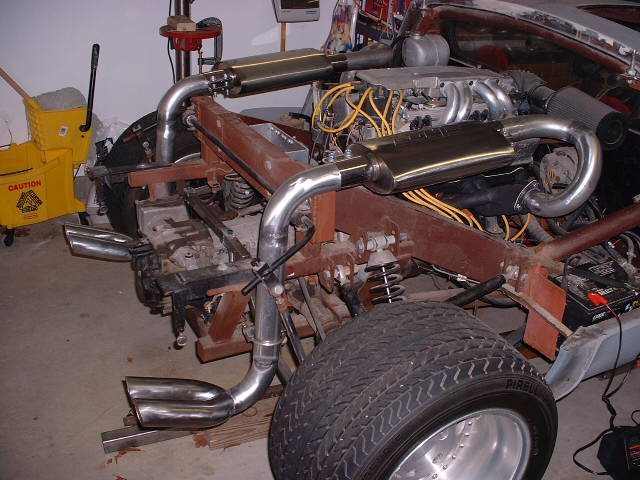
To provide new mounting points for the motor, transaxle , and suspension arms, 2″ x 2″ steel tubing was used. I used relative thick steel (.120″) for the added tubing which allowed me to achieve good string welds using a common stick welder. All of the suspension mounting points were also thick steel (.25″). I knew using metal that was thicker than necessary would add unwanted weight, but the tradeoff was I could more easily achieve strong welds and have a chassis that I would not have to worry about if I hit a curb or a typical New Jersey pothole.
One of the only things I employed the services of a professional welder for was welding the threaded ends onto the suspension arms. I cut and prepared each tube end with a “fish-mouth” notch, and tack welded on a threaded slug. I then had a certified welder TIG weld each rear suspension arm end There was a total of 20 tube ends to be TIG welded.
Separating the front body section for easier access
Before the transaxle change was completely finished, I took a sawzall to the body and cut off the front section. There was am easy way and a hard way to do this. Naturally, I chose the hard way. The easy way would just require making a straight cut across the front just ahead of the footbox. This is how the Fiberfab company separated the front from the main body in later versions of the Valkyrie and Avenger. The harder way was to make a cut about 4 inches in front of the lower edge of the windshield, and continuing each end of that cut down the outer edge of the door jam. Doing it this way gave me excellent access to everything in the footbox are (under the dashboard), the front suspension, and looks how you would think the factory would have done it if they designed it that way from the start. The big drawback was the hard method weakens the remaining main body section much more, resulting in significant cowl area flex and shake requiring reinforcing the remaining structure in a couple key areas.


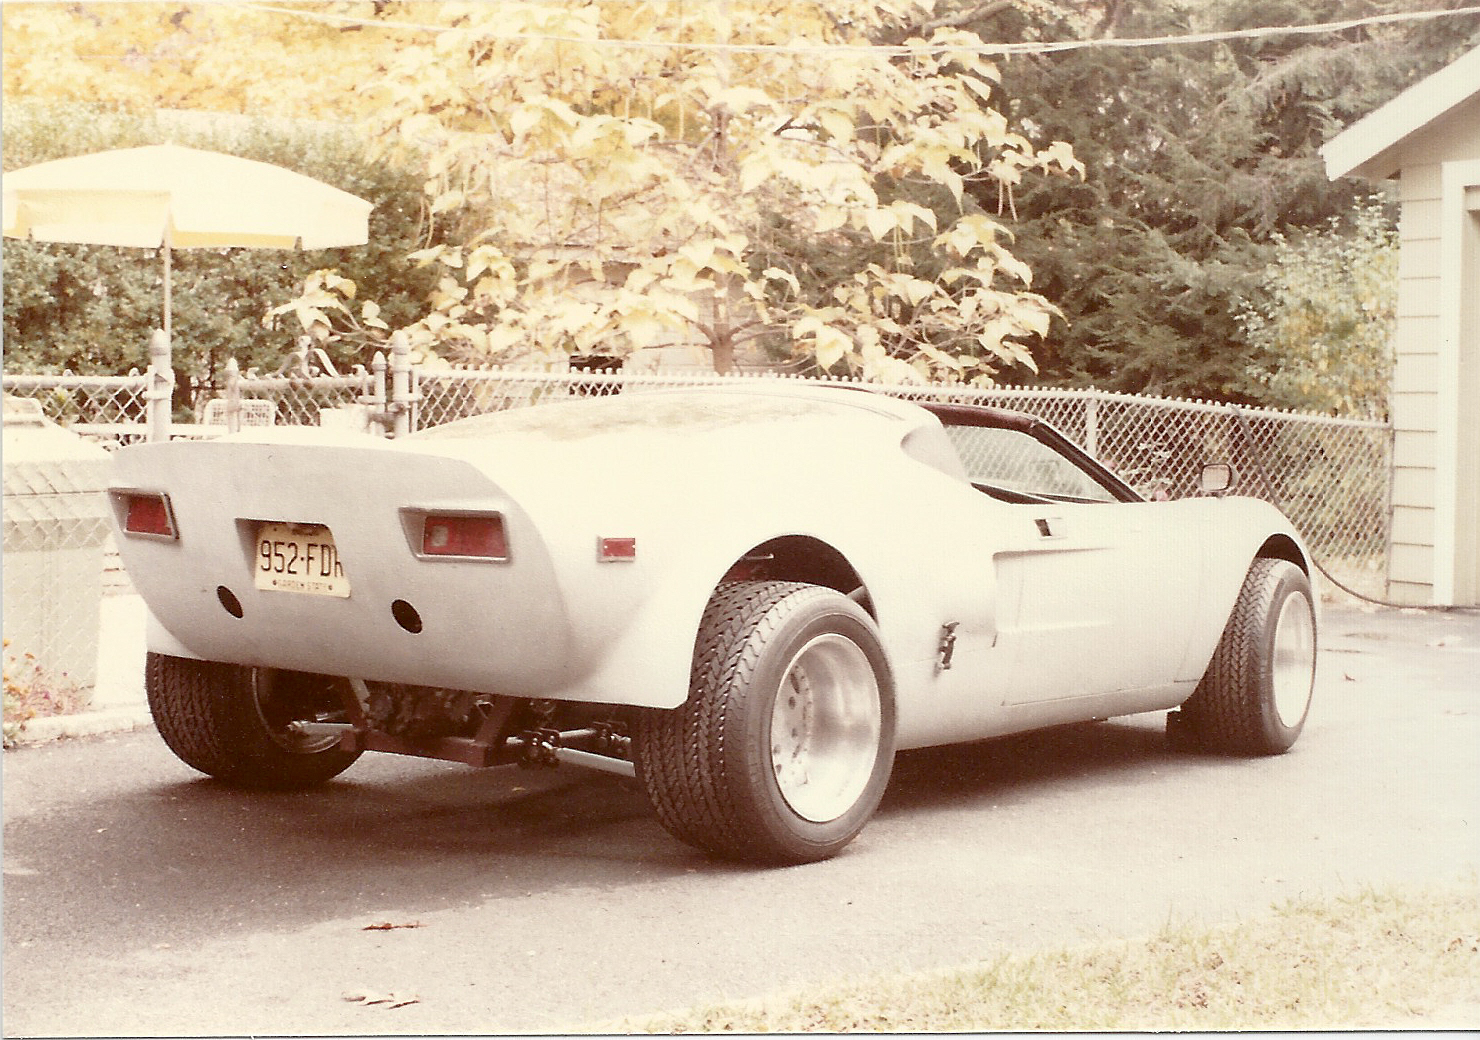
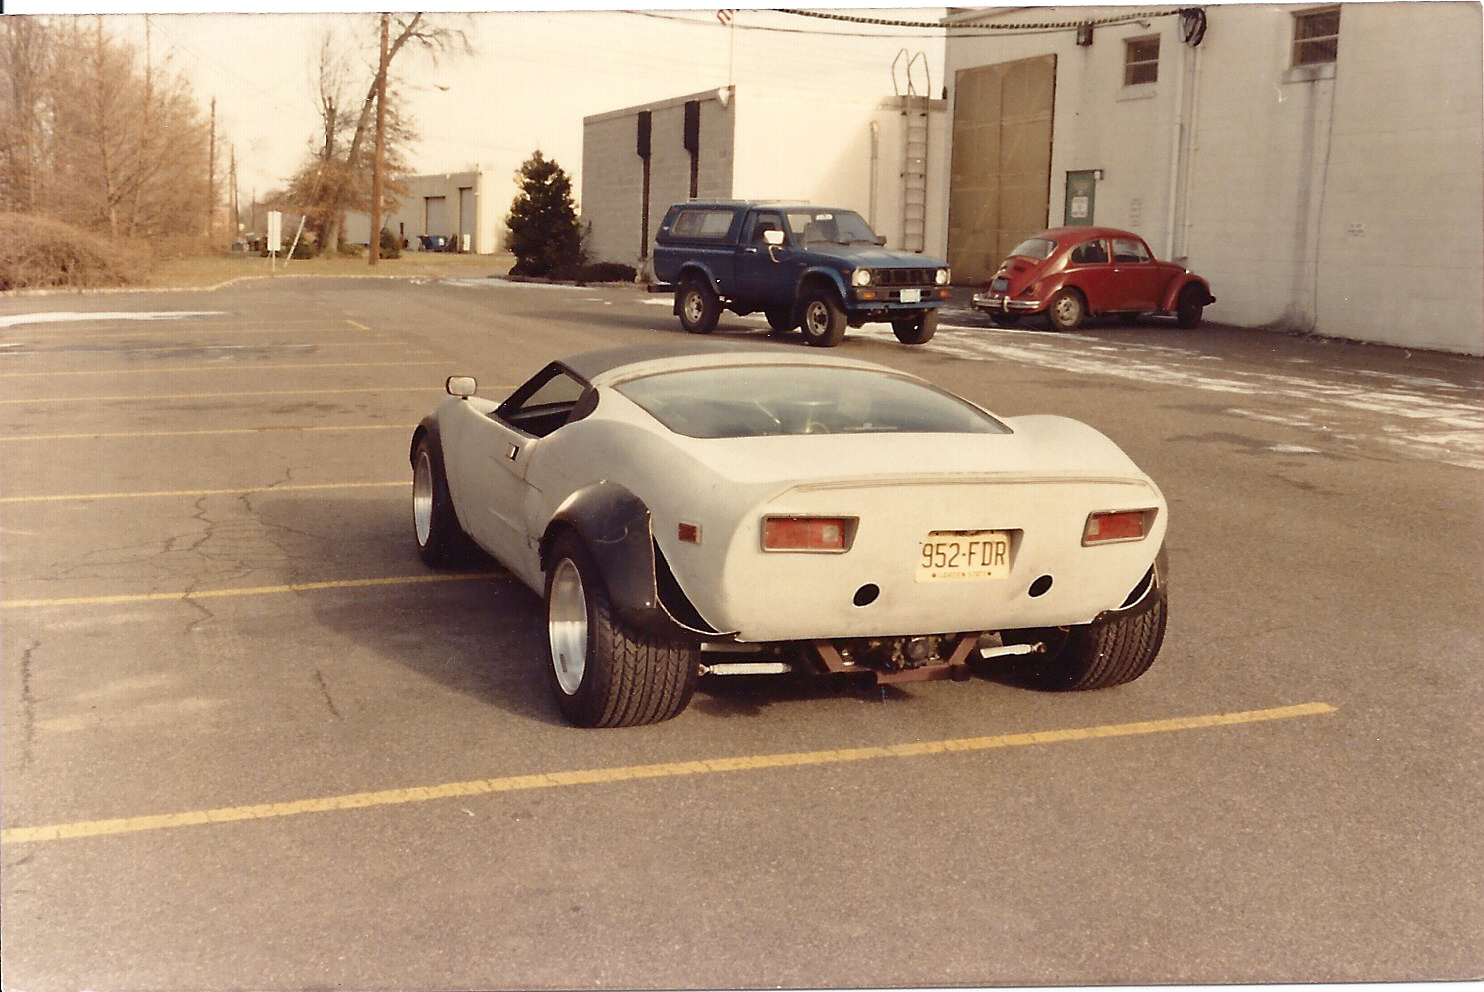
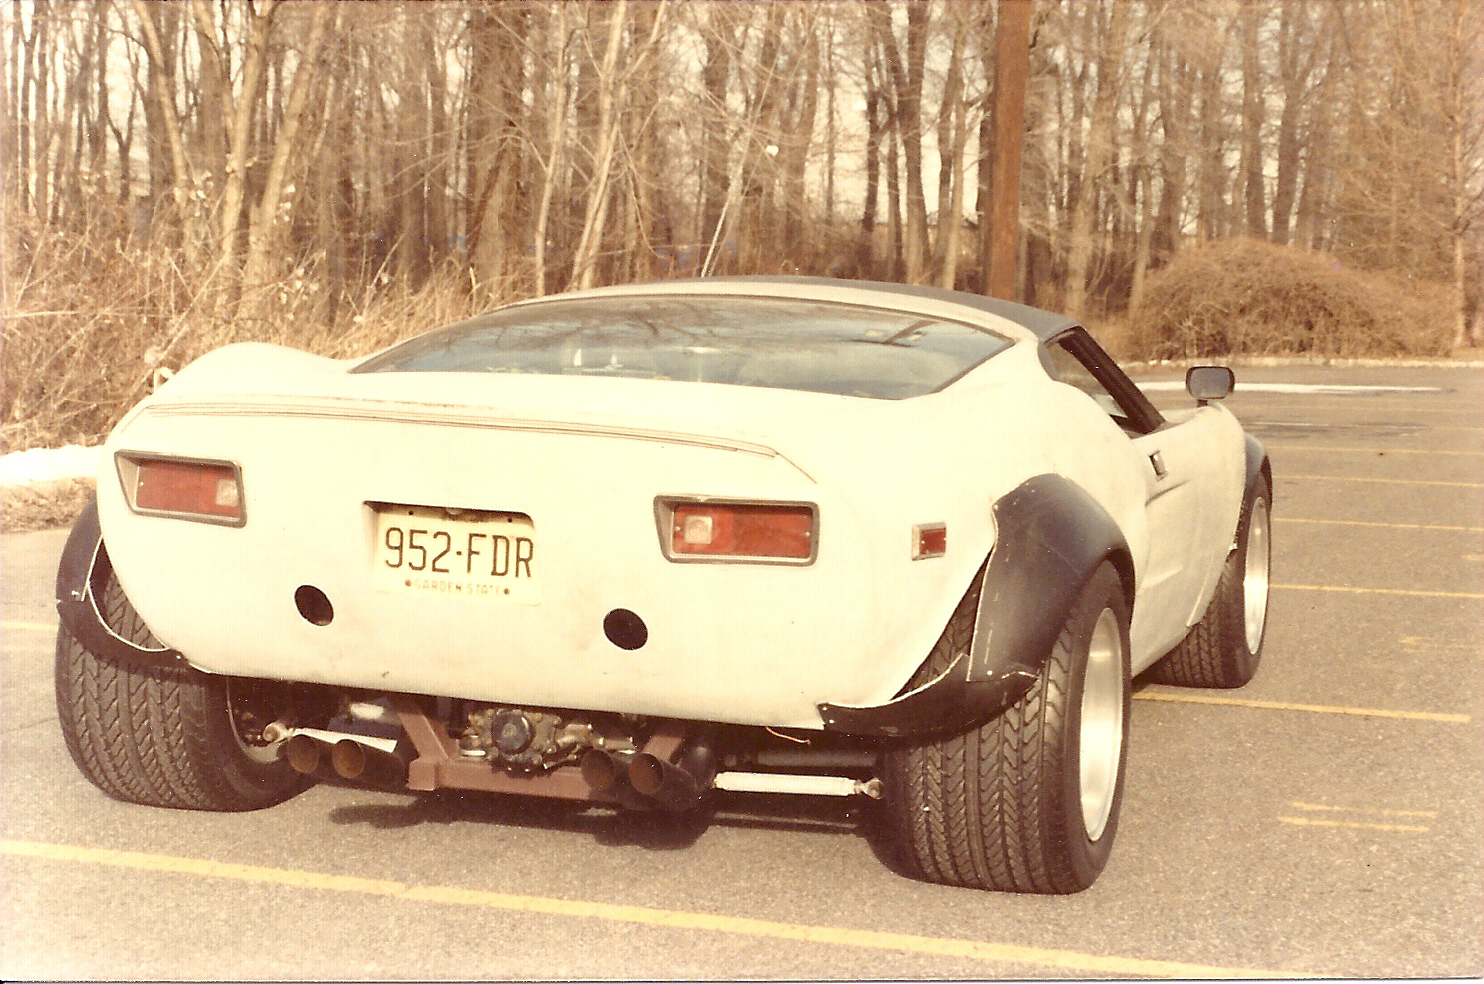
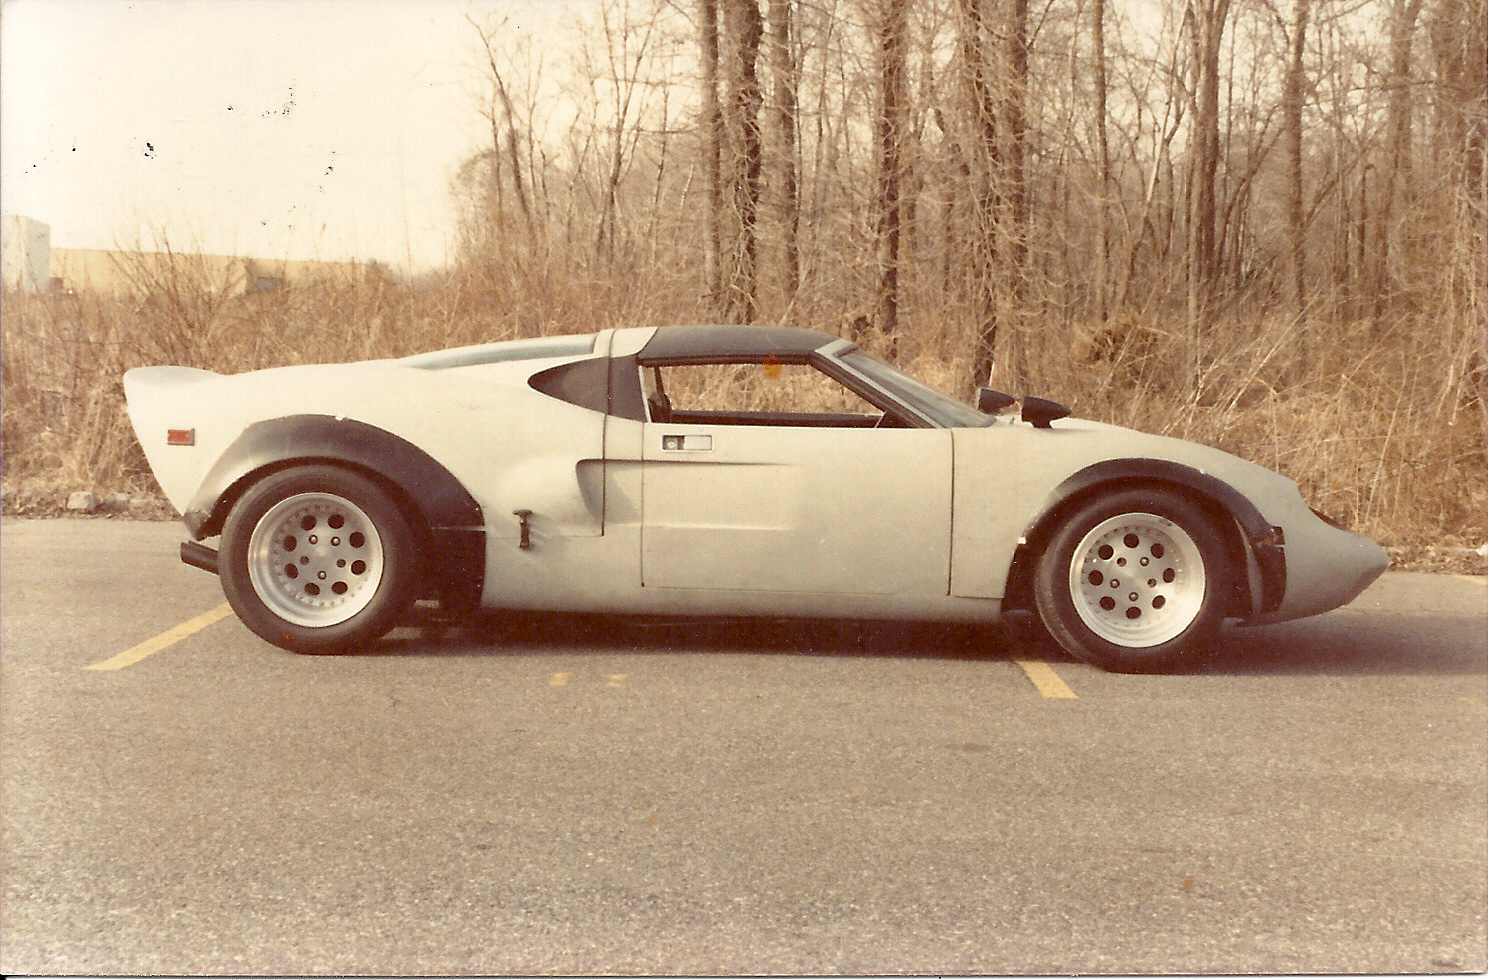
Wider wheels and tires require new fender flares
All happening at the same time as the transaxle change and the tilt front nose modification, all four wheels and tires were upgraded to the widest high performance tires Pirelli offered in the mid 80’s: 345/35-15 in the rear and 285/45-15 in the front on 12 inch and 10 inch three piece Centerline Racing wheels. Some kind of fender extensions or fender flares were clearly needed. After researching what was available I ordered a set of fiberglass flares styled after the Pantera Group-4 race car. They would end up being sliced and diced and eventually fiberglassed on to the Valkyrie body. After many hours of sanding and filling and sanding some more, they look pretty wild.


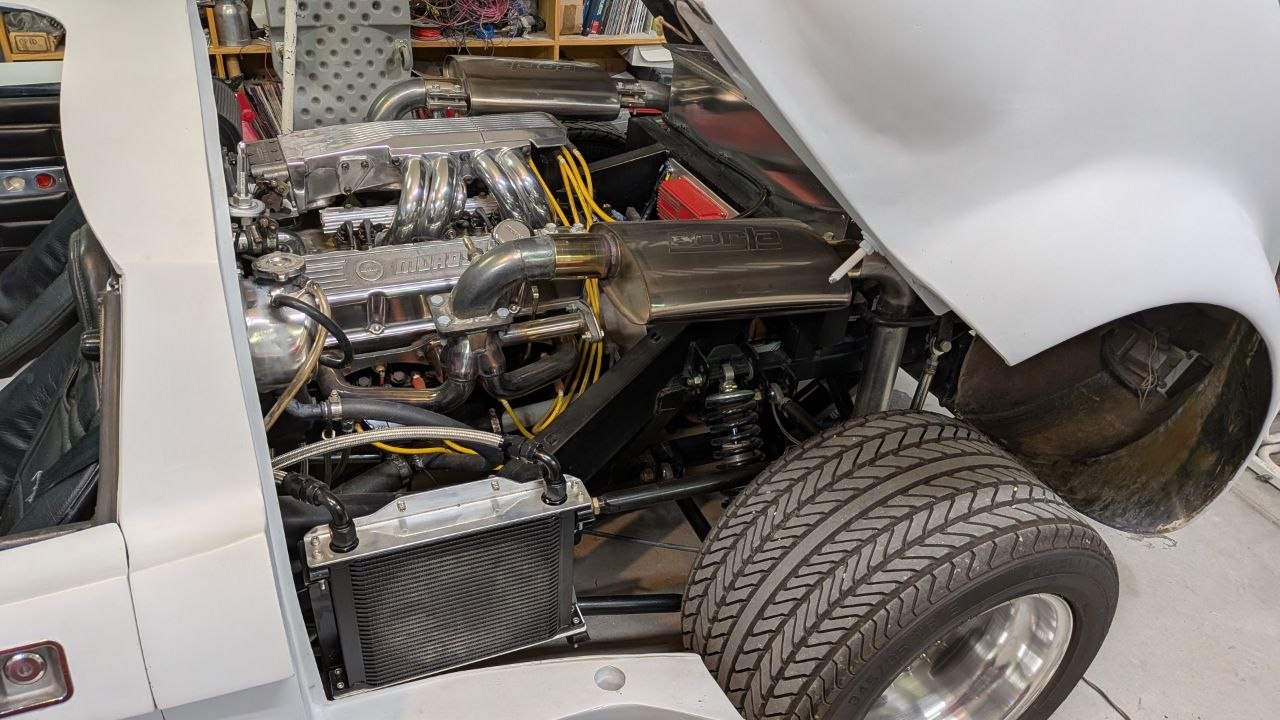
EFI time (1987)
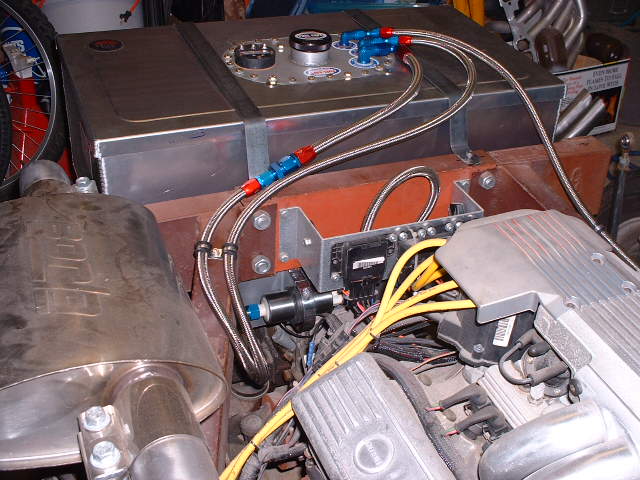
Not long after successfully installing a ZF 5-spd transaxle and making numerous other related modifications, I came across a complete Tuned Port fuel injection system at a swap meet at Raceway Park in Englishtown, New Jersey. Adding this 1986 Camaro TPI EFI system to my late 70’s 350 small block Chevy truck motor was made easier with a custom harness built by Howell Engine Developments. Since the mid 80’s, Howell has specialized in GM Fuel injection conversions and the electronics needed for late model LS engine swaps.


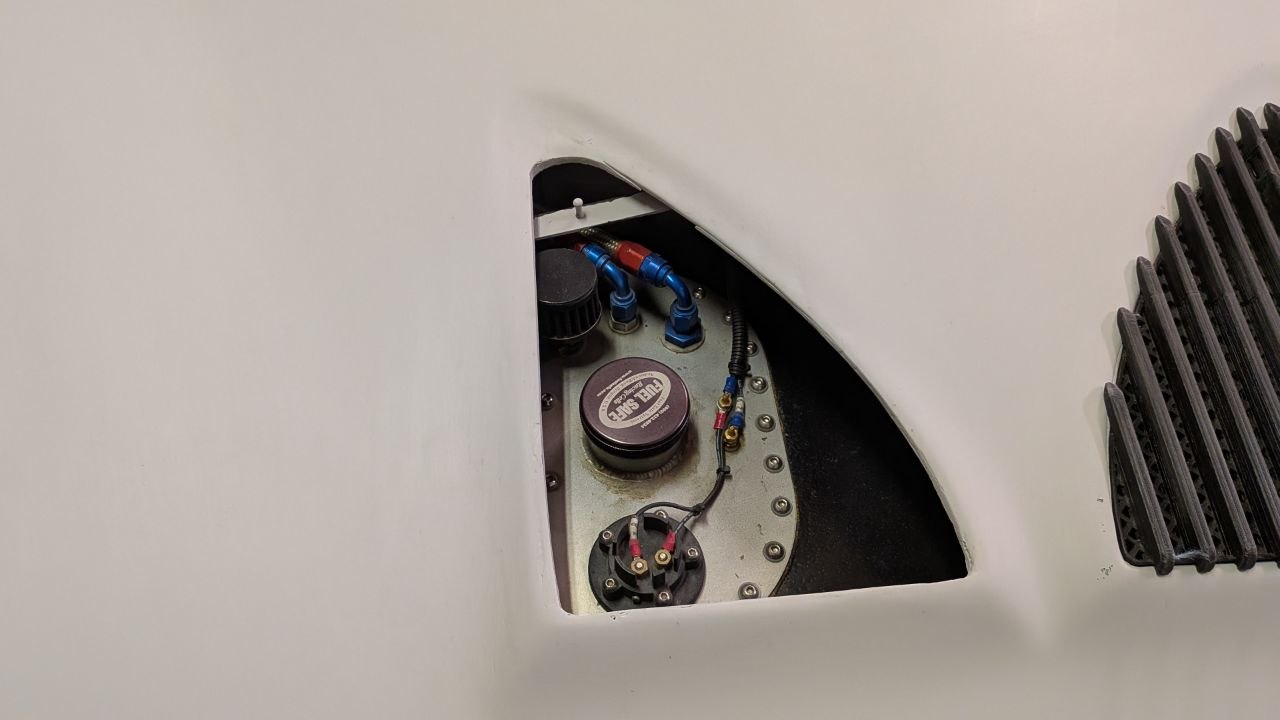
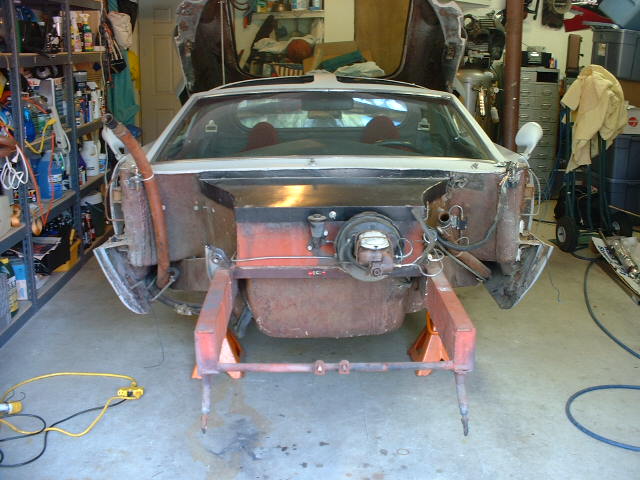
Moving the Fuel Tank to the rear
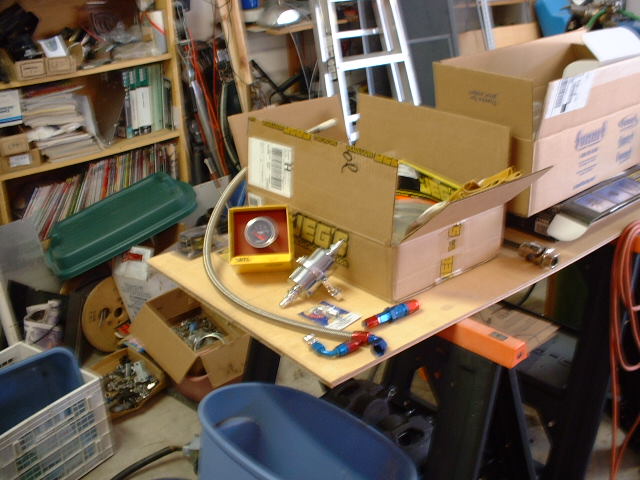
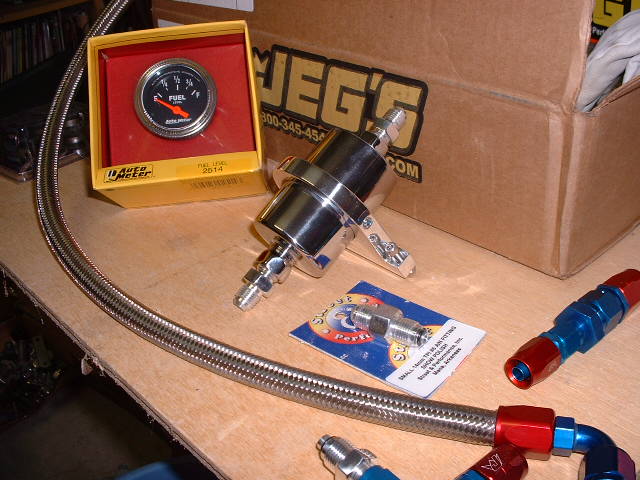
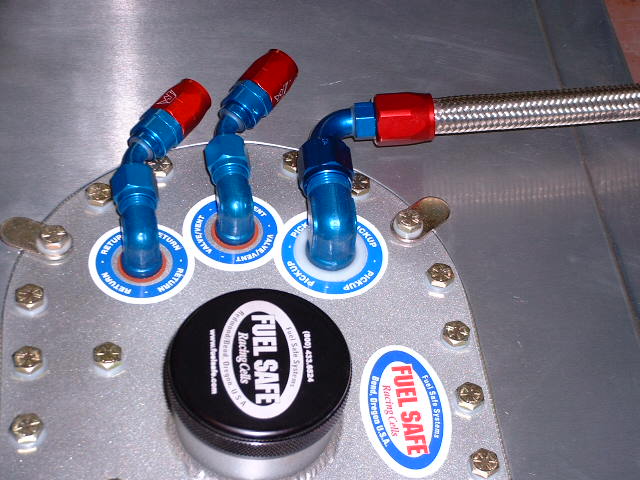
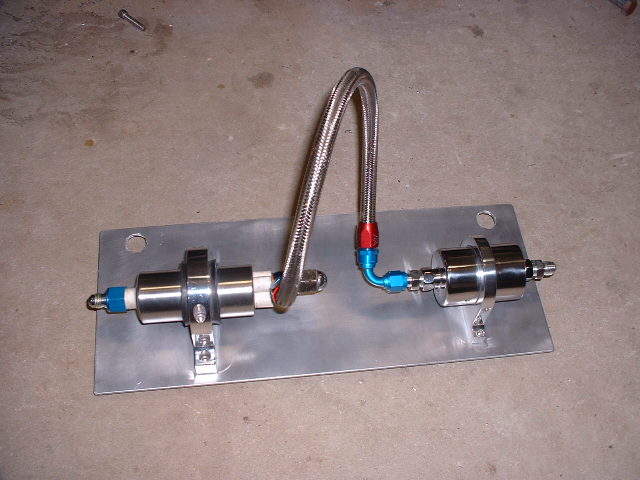
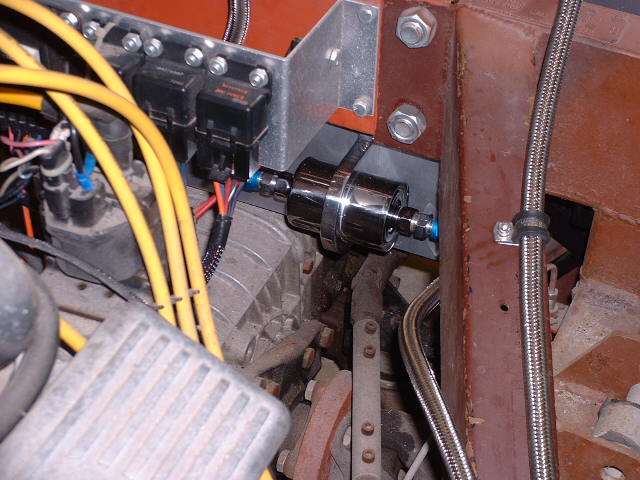
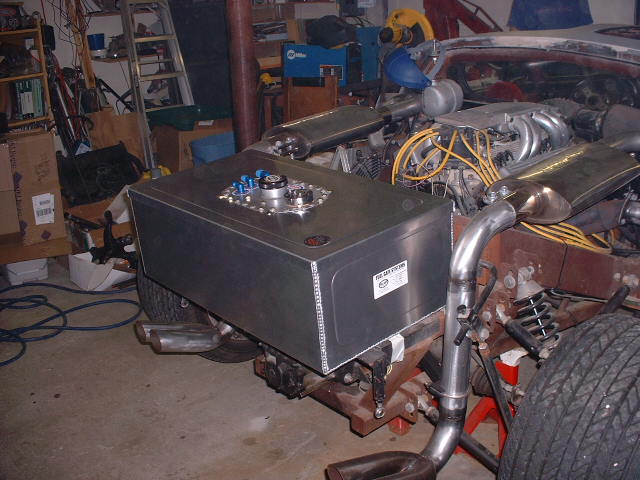
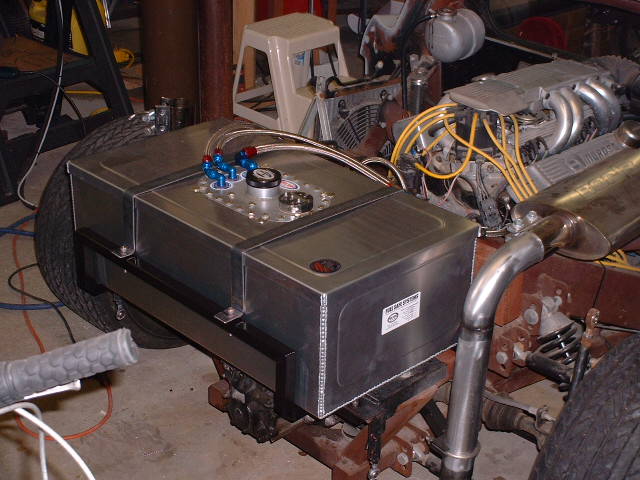
The problem with the original front mounted fuel tank had to do with it being right behind the radiator. On a warm day, the hot air coming from the radiator hit the bottom of the fuel tank and on several occasions, cause the fuel in the tank to boil. So just before taking on the project of replacing the front suspension, I ordered a new custom size fuel cell from Fuel Safe. For the most part, this task was pretty straight forward. I ordered the tank and the required hose and fittings, and used an external fuel pump positioned below the level of the tank bottom. Moving the tank to the ear also made it necessary to re-route the exhaust system which up until then had the two mufflers stacked right where the fuel cell was going to be located. So I added a couple of Borla stainless steel mufflers to the list of parts coming in.


Learning CAD helps with next phase
A major factor that had an impact on most of the work performed after the year 2000 was acquiring and learning how to use CAD software. Before long, I was able to get a fairly accurate representation of the chassis and engine into the CAD system. I remember being totally amazed at how the chassis could be viewed from any angle. Viewing photo-realistic renderings of planned modifications gave me more confidence that a proposed change would be successful. My CAD skills were constantly improving as I learned how to model as much of the existing Valkyrie as I could, eventually creating a close approximation of the Valkyrie body surfaces in 2004. I didn’t realize it at that time, but those improving CAD skills would become even more valuable 15 years later when my son gave me a 3D printer for Christmas. More on that to follow.


The CAD model used in the renderings of the body shown in the above images was created through manual reverse engineering, starting with a tape measure and a sketch pad. Clearly some proportions of the body are not truly accurate, but it’s close enough to give me a good idea how things will look and if there may be significant interference between objects. When and if I ever add a portable 3D scanner to my toolbox, I will revise the body surface layers in the CAD files and create a more accurate model of the body. The chassis was relatively easy to model as it is comprised mostly of straight lines, rectangles and square tubes- these are the things I learned how to model first when learning the CAD software.
A New IFS by Jim Meyer Racing
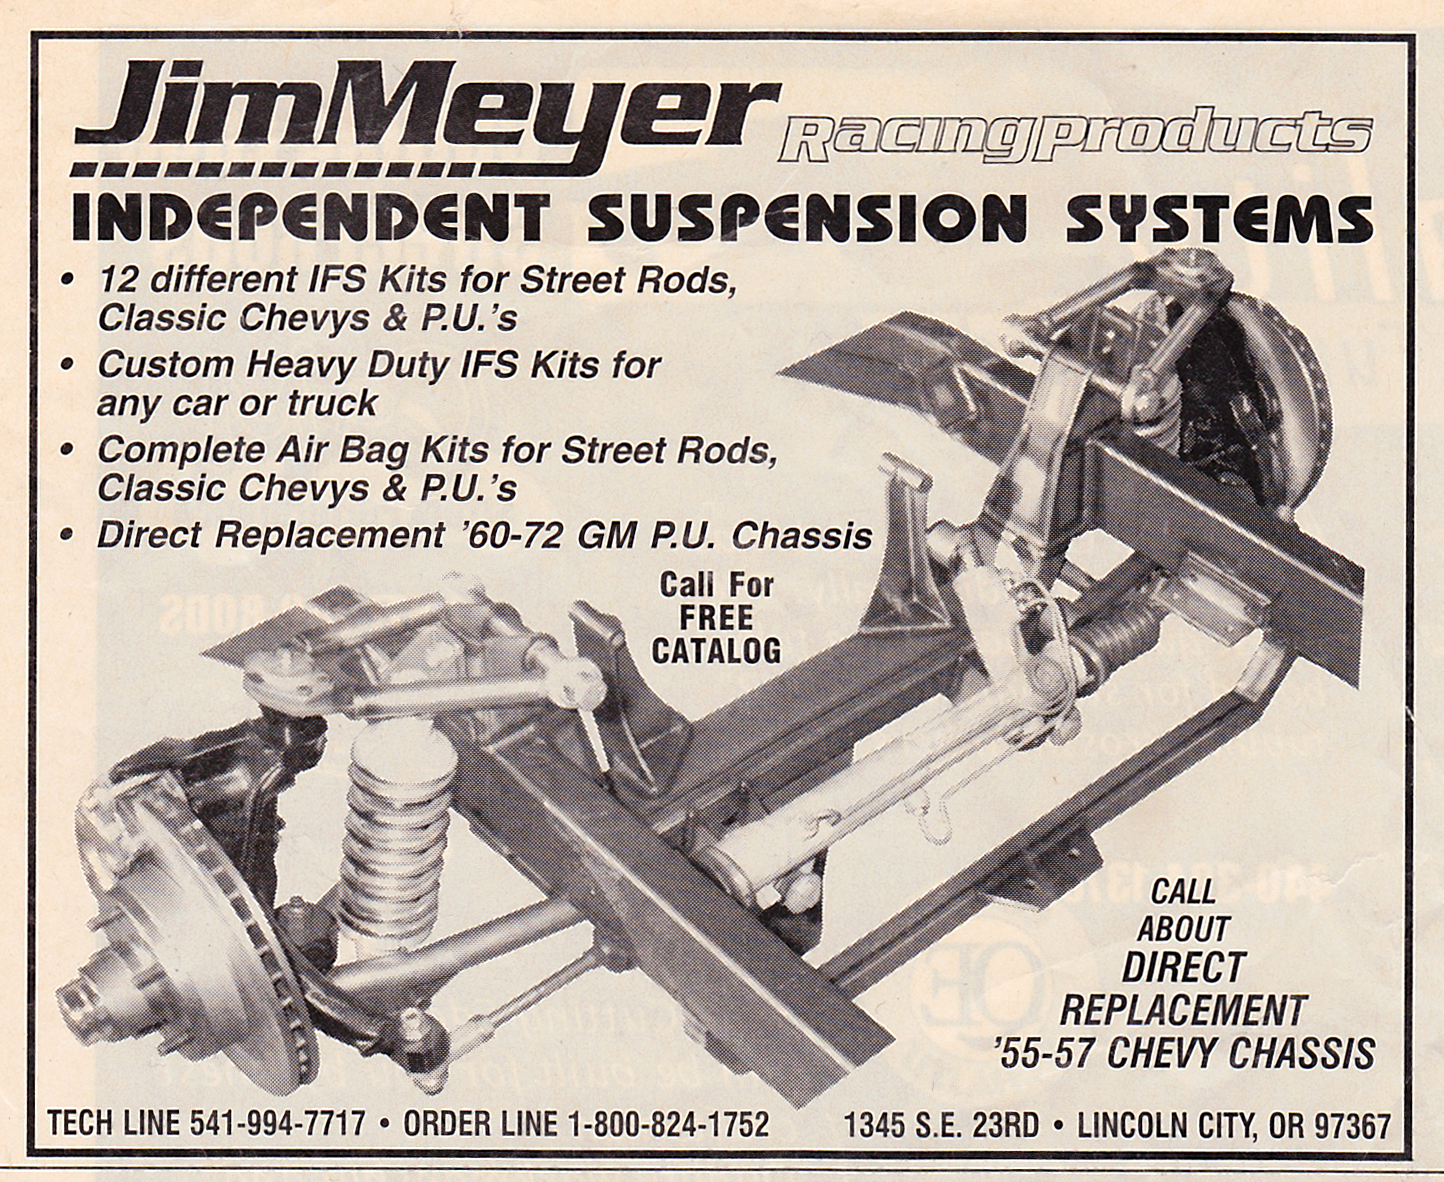

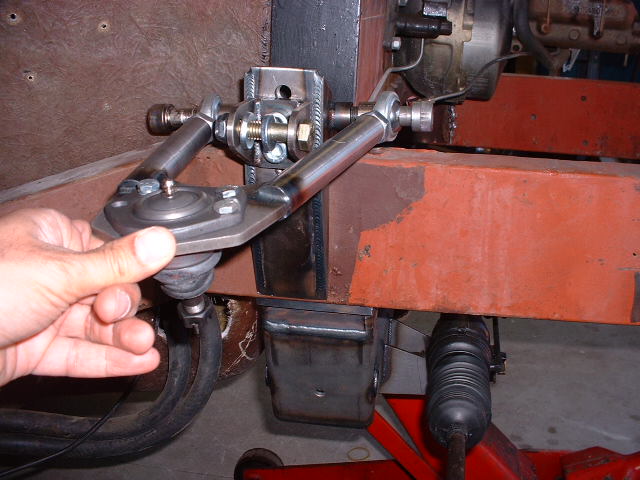


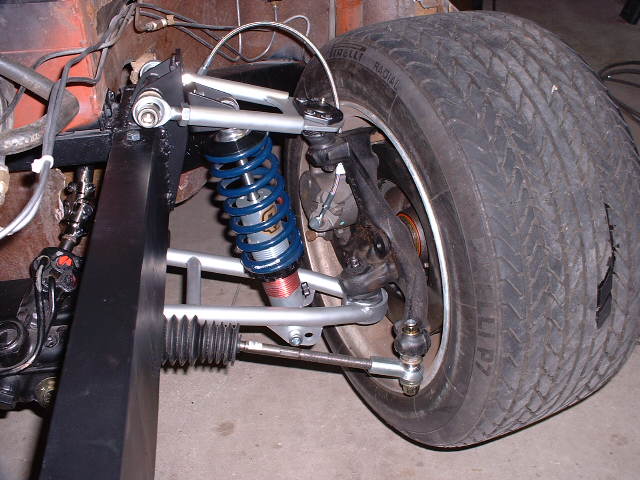


Note that the windshield is now the only remaining item on my Valkyrie that came from a Corvair.
A “Life Happens” moment: Moving to the high-desert in southern Nevada
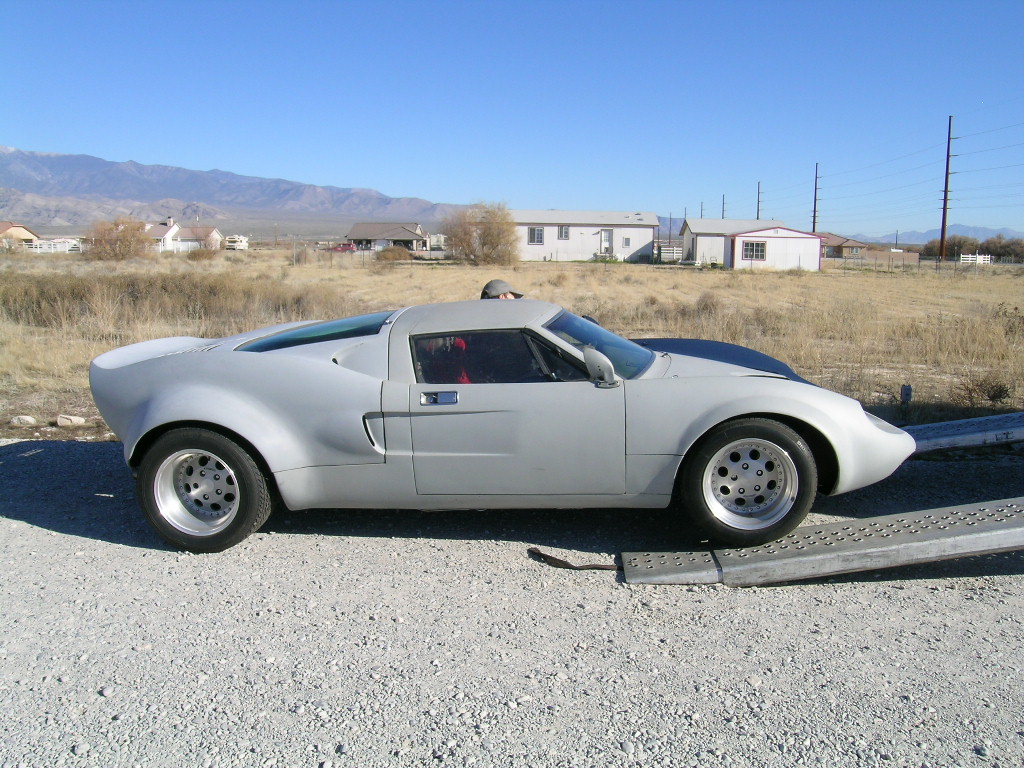
Living in New Jersey can be frustrating at times for a car enthusiast. It rains seemingly every other day and the humidity can be brutal in the summer. The winters are cold enough to be very uncomfortable, with just enough snow to keep things looking messy through the winter months. We had a very nice house in central New Jersey when we took our first RV trip to the west coast. It was in the Fall of 2002. Southern Nevada can be very attractive in the fall. When the monsoon season is over, the humidity falls back to the single digits and the nights can be quite chilly. When driving through the rural areas, a guy from the crowded Northeast can feel like he found heaven on earth. Long story short, we got hooked and bought an acre on our second trip in 2003. By 2004 we contracted with a builder and in the fall of 2005 we loaded up the truck and travel trailer once more for the big move. In late 2005 the house was still not finished but we were living in the RV parked right in our new back yard. I couldn’t wait to get my tools and Valkyrie into the over-sized four-car garage.
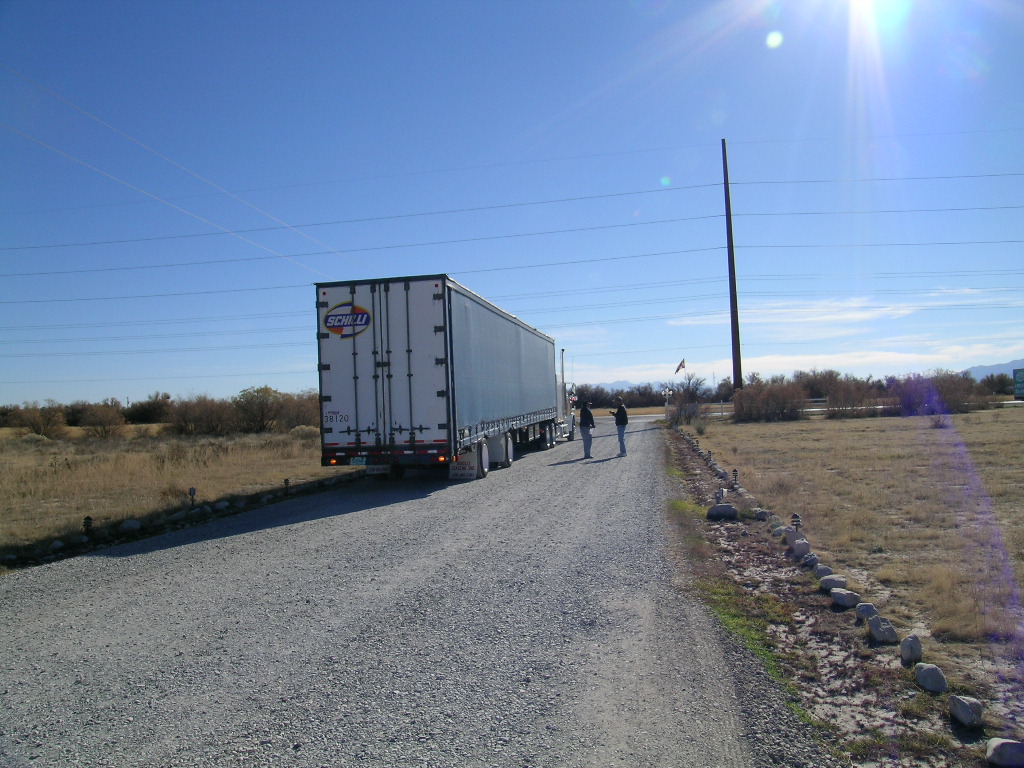
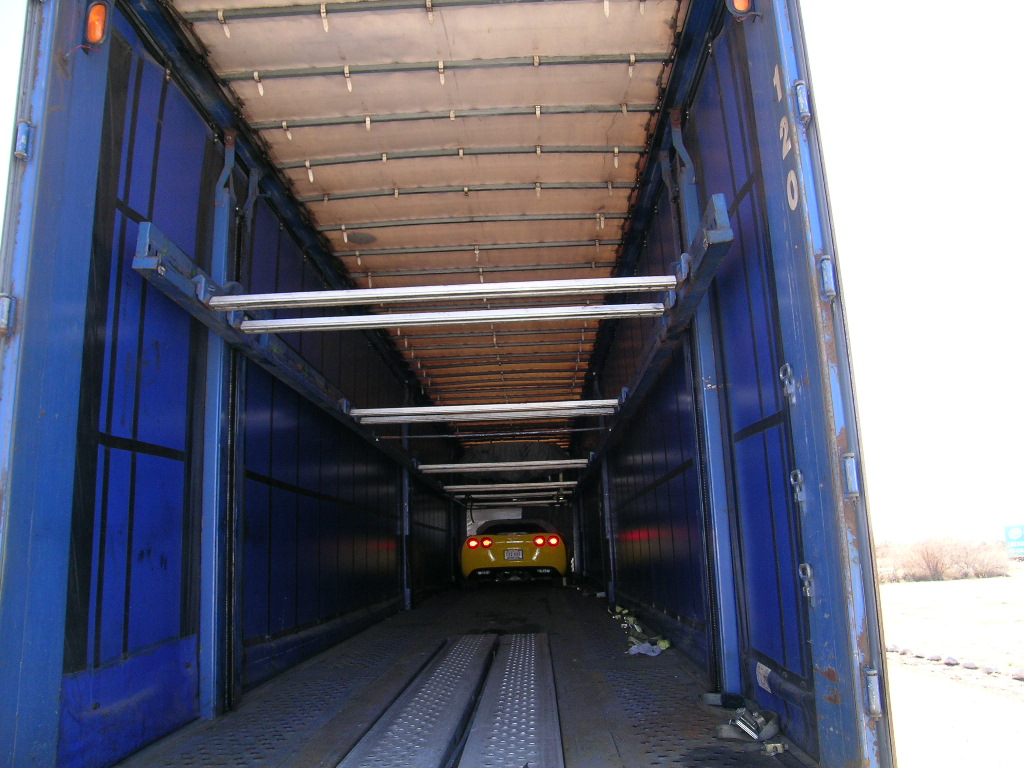
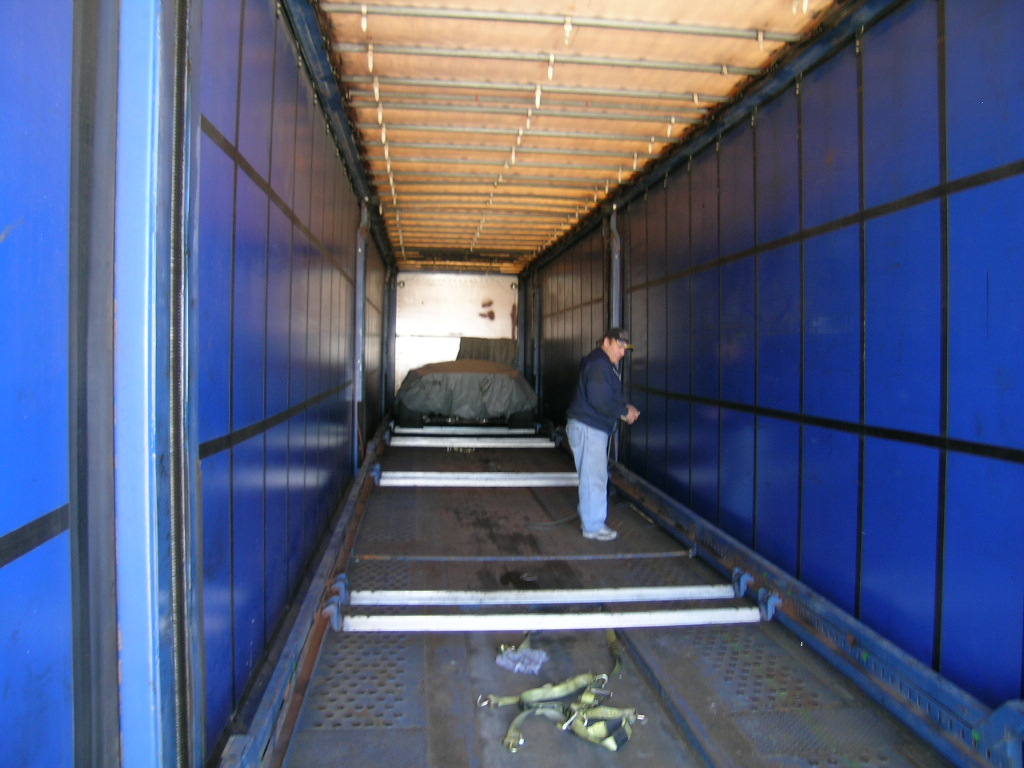
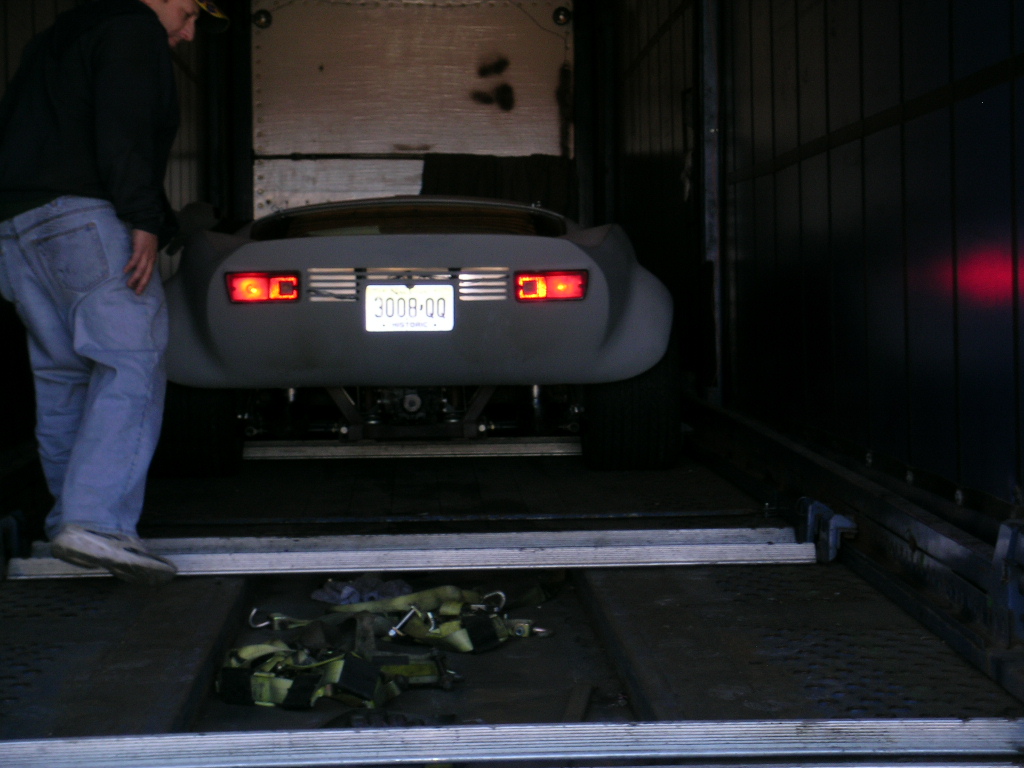
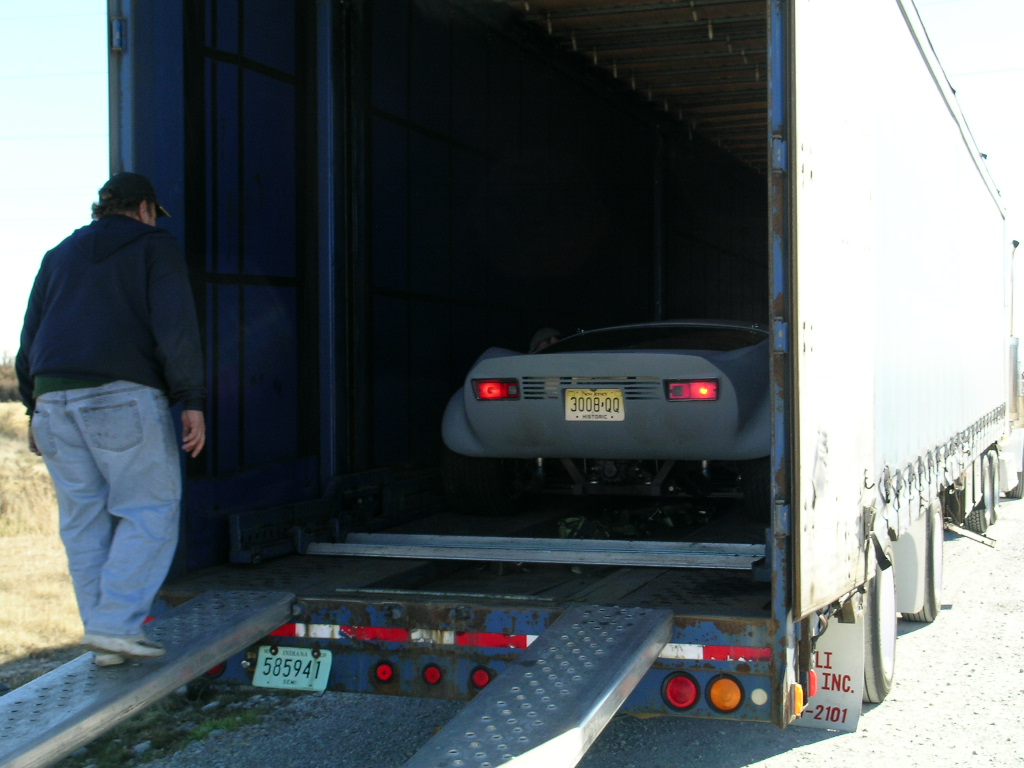
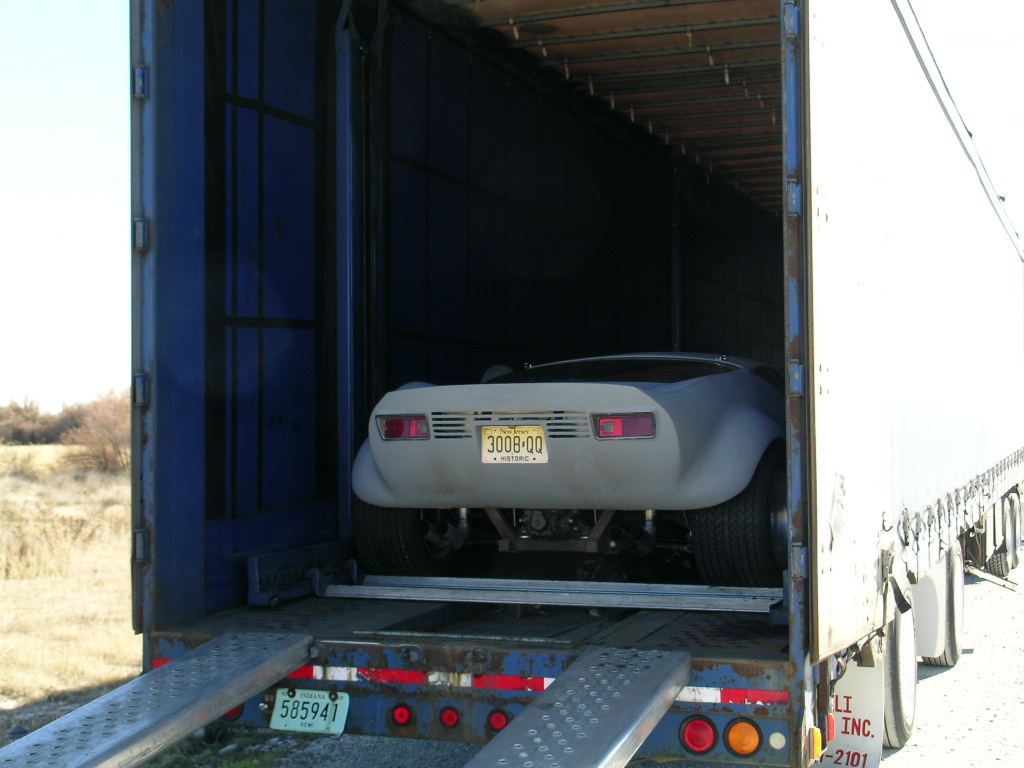
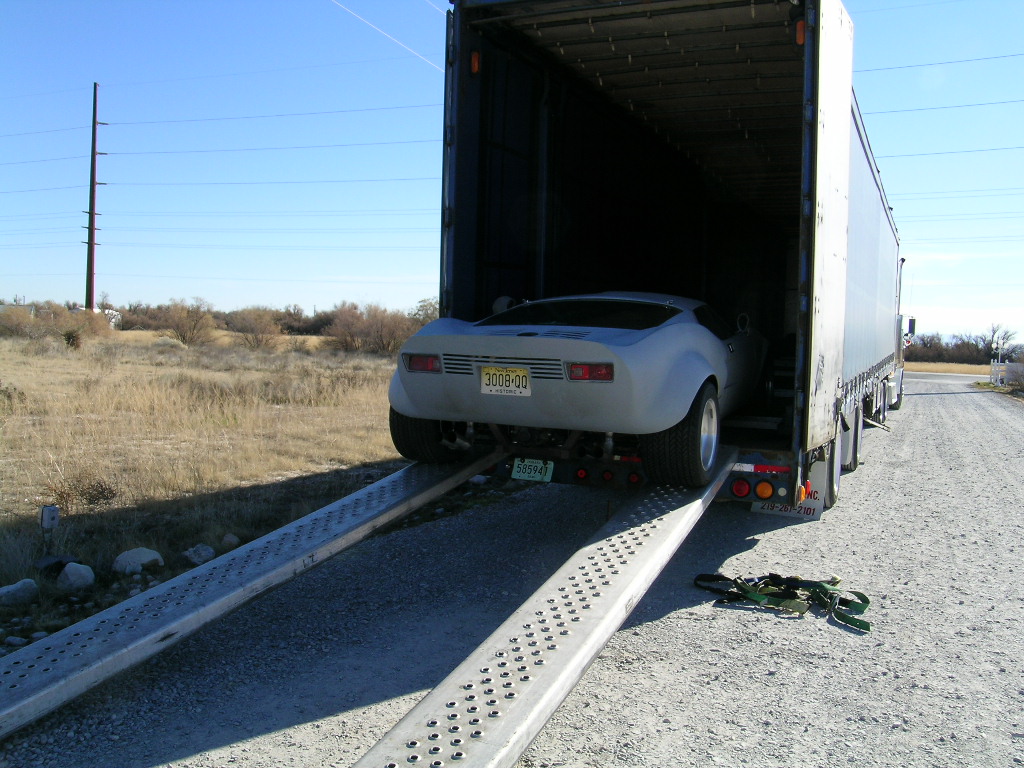
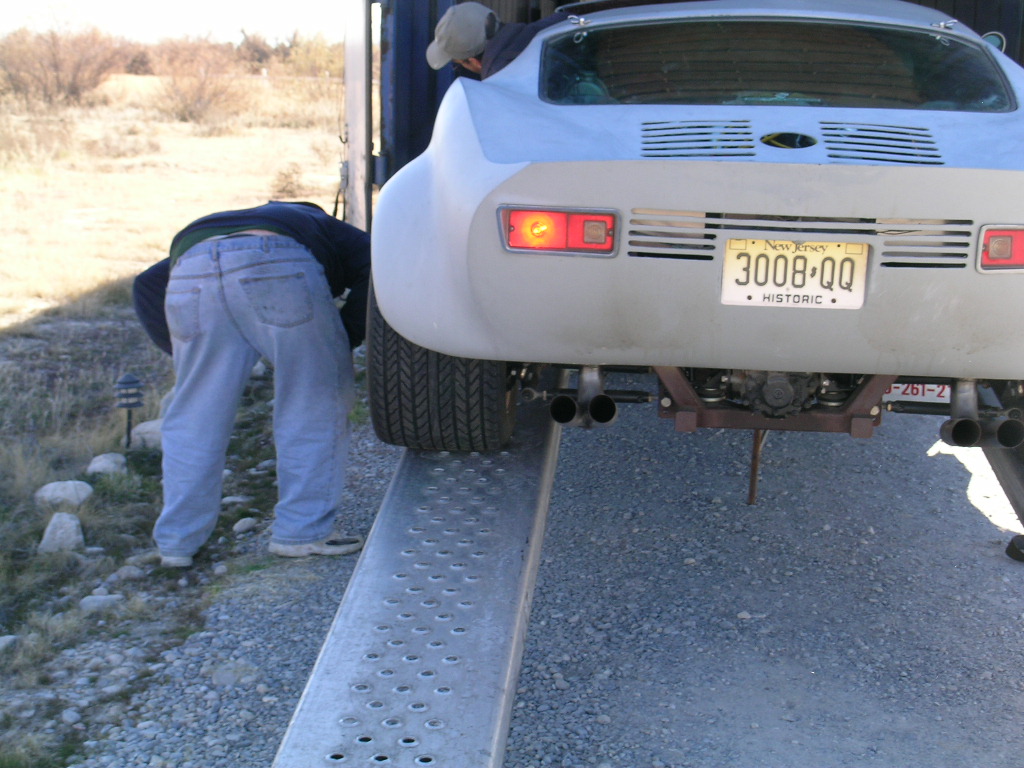
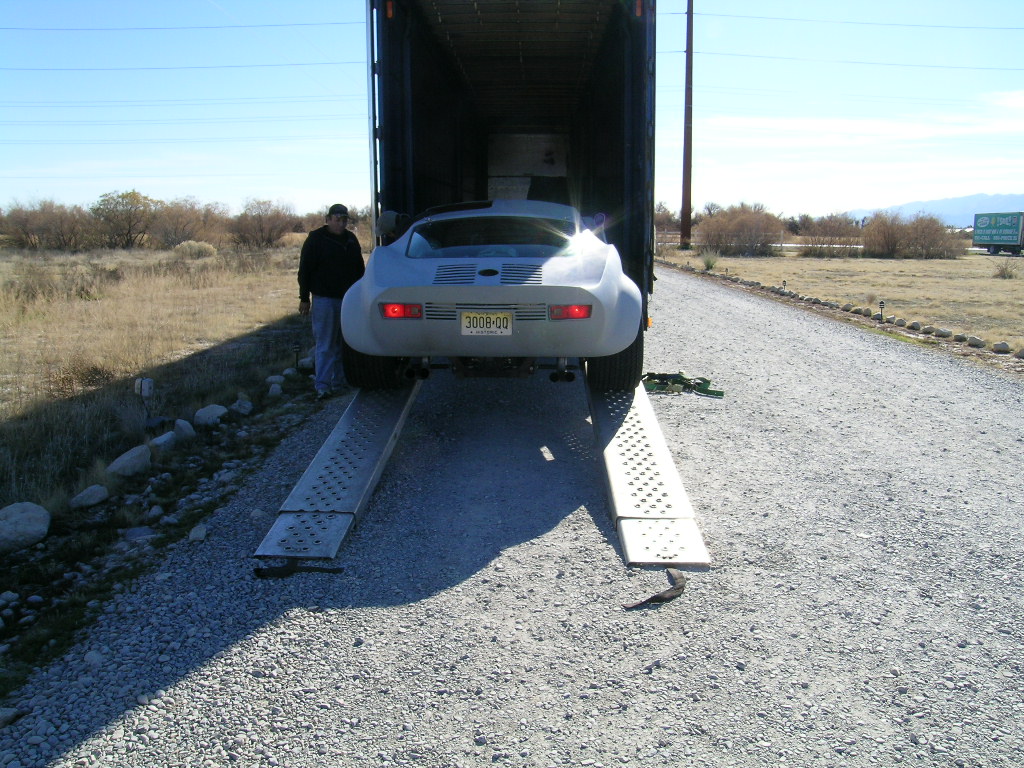
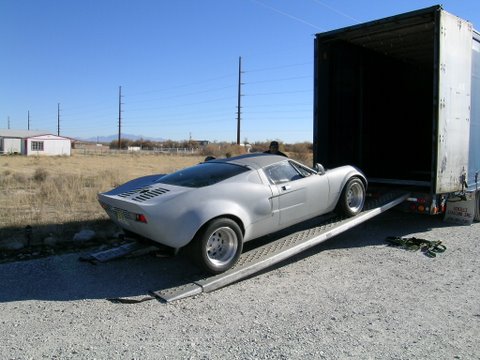
When our New Jersey house was finally sold, we were already in Nevada, and I arranged to have a friend back in New Jersey meet the transport truck and get the Valkyrie on its way to Nevada. When the transport truck arrived to make the delivery, we had to put the Valkyrie in a storage locker for a few weeks while the finishing touches were being made on the house.


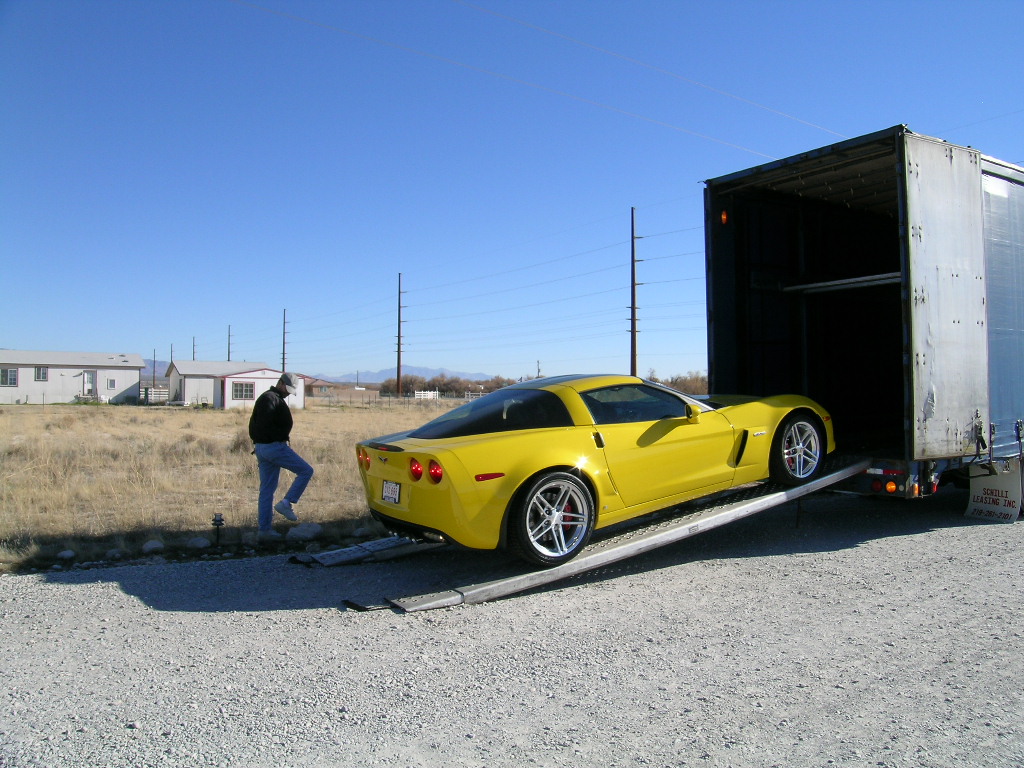
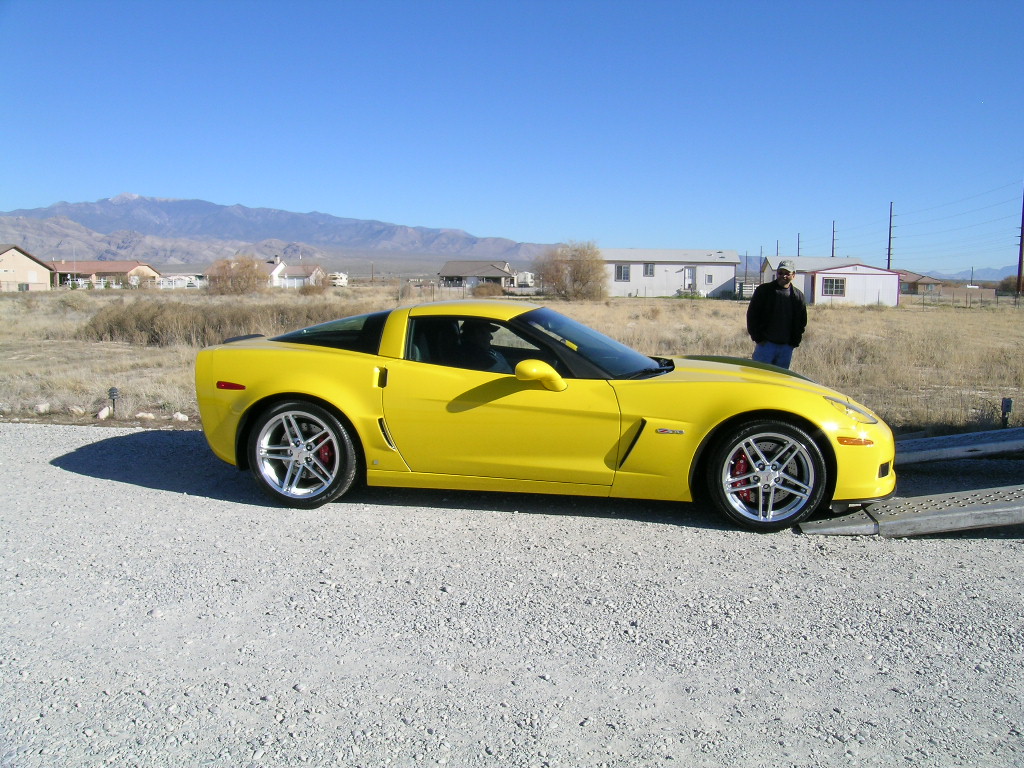

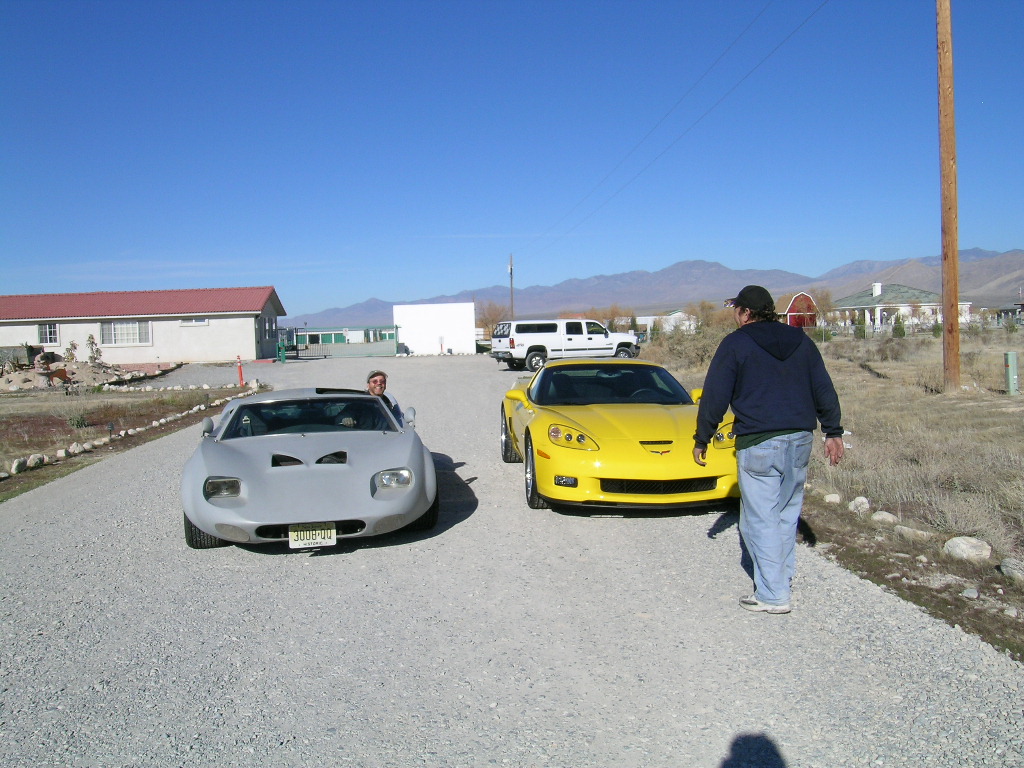

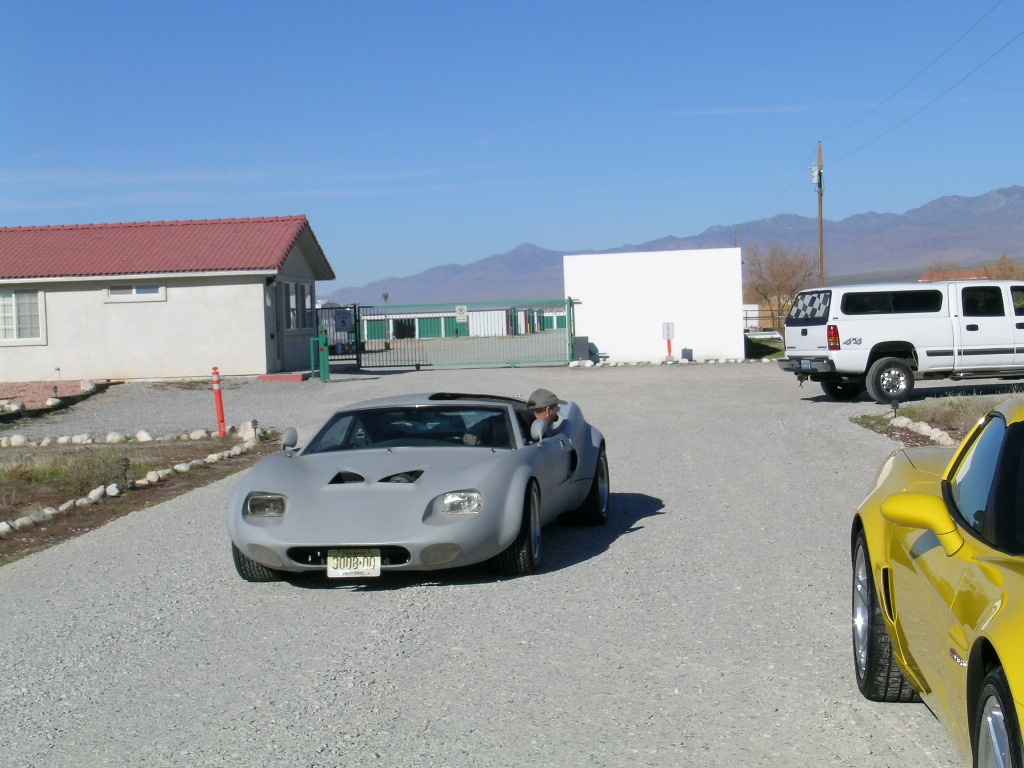

I never realized how low and small the Valkyrie was until I saw it parked next to a new (2006) ZO6 Corvette.
A major chassis “clean-up” and restoration
Moving the fuel tank back to the front
Radiator to the rear?
CAD + 3D printing helps solve many challenges
Making a fiberglass engine cover with a scoop!
Converting the old Stewart-Warner speedometer to GPS-stepper motor
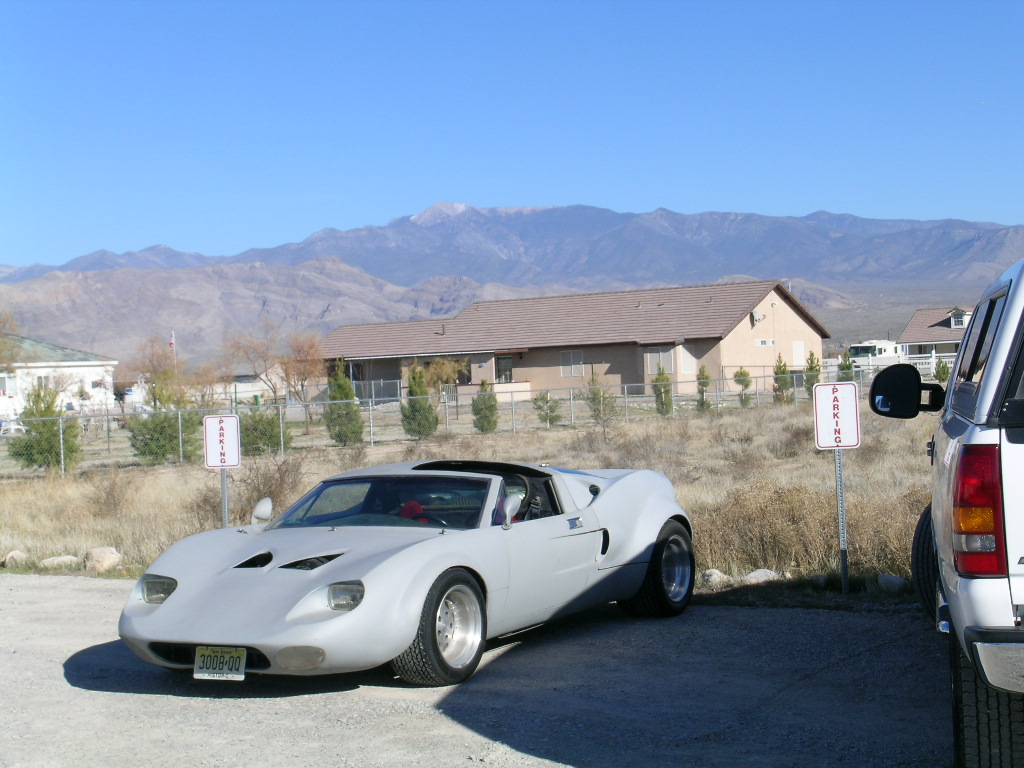
A fresh coat of my favorite color: Gray Primer
A Nevada Title & VIN !
First Time On Display
Door side mirrors – two attempts!
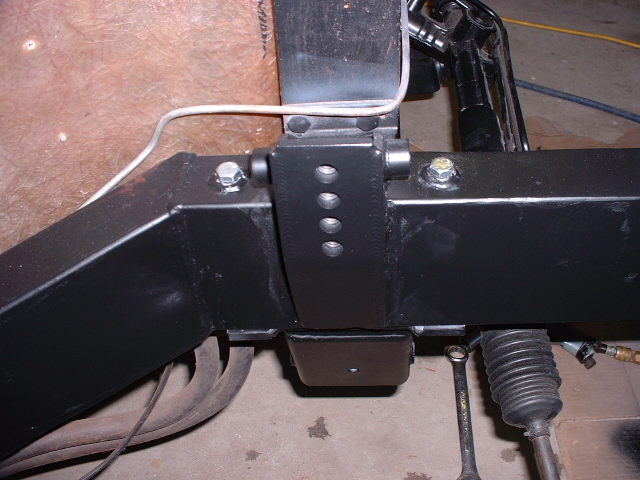
New motor mounts
Kick-panels
What’s about Paint?
As I mentioned, my favorite color is gray primer!
The car currently wears a (Nevada) state-issued VIN plate. It is registered as an Assembled Vehicle (ASVE), with the model listed as Valkyrie.
There’s no doubt in my mind that others with more skills and more funds could have had this car completed, and probably built a dozen more in the time I have owned it. For me, there always seemed to be something else that was demanding my attention and my resources, but I always had a goal of getting it to the “next level”, and there’s always something that can be improved.
My background
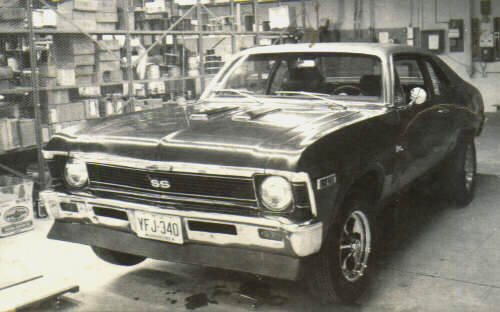
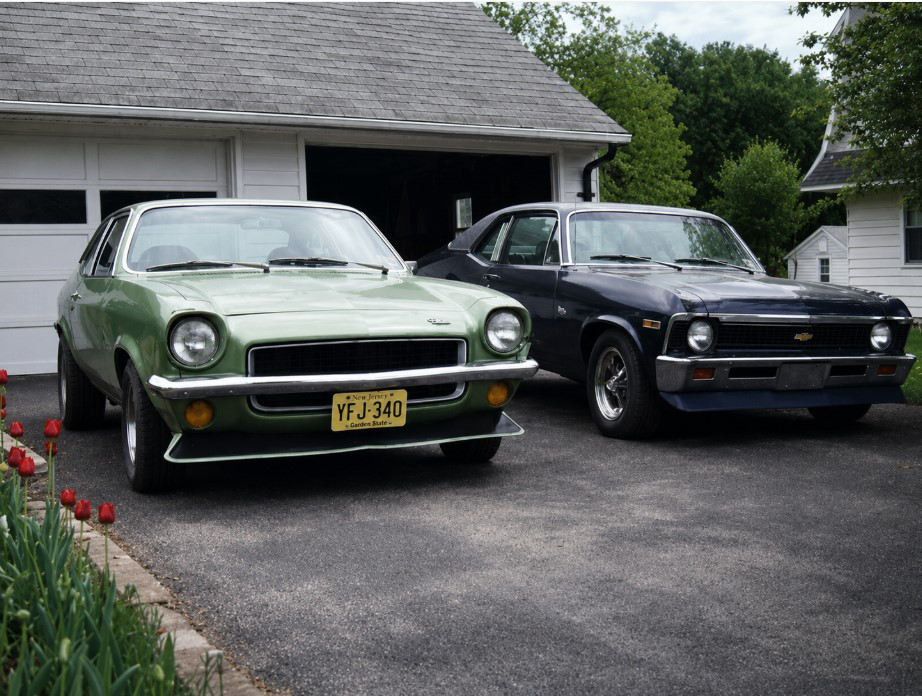
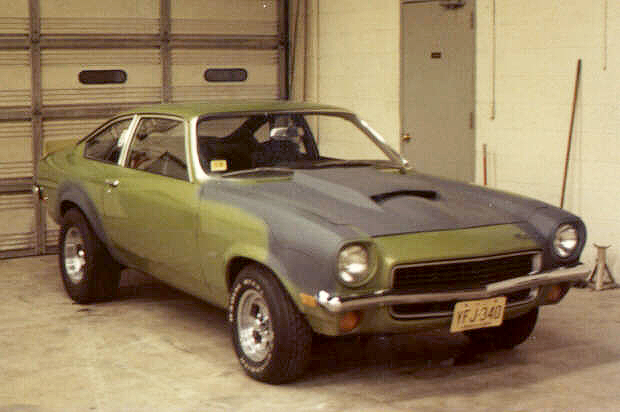
Prior to tackling the Valkyrie project, I had about 10 years experience working on cars (as a hobby) and I learned a lot from the older neighborhood drag racers and hot rodders at the time. When I was 15, my best friend and I had built a 1956 Chevy with a 327 SBC, Muncie 4-speed, and Pontiac rear end with 5:13 gears. When I finally got my drivers license at 17 years old in my senior year In high school, I had a 1961 Corvette that was also initially a basket case with a seized engine. When I was 19 (and already married), I acquired a 1969 Nova SS from a fellow National Guard buddy. It had a 427 with a bad rod bearing, and he was tired of pouring money into it and breaking parts. Rebuilding that big block was very similar to working on a small block, except everything was bigger! I also had a lot of fun daily driving a 400 cu in SBC Chevy Vega that I put together in 1973.


Although my Dad was not a car enthusiast and he frequently told me I was wasting my money, he did own a business that designed and manufactured industrial process control systems, which gave me access to equipment and tools that the average car enthusiast working in their home garage might not, such as a forklift, I-beam mounted electric and chain hoists, a band saw, welders, oxy-acetylene torch, a decent selection of nuts and bolts, various gauge rolls of wire, and about 900 square feet of climate-controlled space in a corner of the shop floor.
Over the many years I have owned it, my Valkyrie repeatedly reached a drivable state, but was shortly after dismantled again so that various aspects of the car could be improved. Although I thoroughly enjoyed (and still do) performing nearly all of the work myself, I did not have the skills or funds to create a “show” quality custom car. The goal has always been to assemble a unique, good-handling, mid-engined, built-on-a-budget, sports car.


